How to Use the Docker Build Command to Create an Image from a Dockerfile

Using containers to run apps without having to build, deploy, and run them is the idea behind docker’s build command. If you are looking for a hosting option for your Docker container, ServerMania’s dedicated server hosting gives you complete control and great speed. It is also scalable, adaptable, and budget-friendly. We have been in the business of building budget-friendly cloud hosting for more than two decades, and we have thrived at it by creating a sustainable system to keep your servers running.
Docker is a tool for packaging, deploying, and running applications in lightweight containers. If you want to learn about the basics of Docker and how to use Docker, refer to Docker Tutorials for Beginners: Learn How to Use Docker.
If you already now Docker and want to better understand containerization and how to use the dockerfile, you should read our blog on What is a Docker Container? Uses and Benefits. And if you are a curious person and want to understand the other versions of Docker and how their iterative changes over the years have made it easy to use, you should read through our blog on what is Docker CE, and how is it different from other versions?
Now, let’s look at how to use the docker build command to create an image from a Dockerfile. Fundamentally, Docker acts as a container element for your web application and virtual environment during the development stage of your application. Here is some key information you should understand:
Prerequisites
- Docker is installed by downloading the platform from Docker’s official Website
- Use your Docker Hub account to push and store your images
- Gain some basic knowledge of Docker by reading through our Knowledge Knowledge Base
- Understand the basics of Ubuntu Server
- Get familiar with text editors like VS Code, Sublime Text, or IntelliJ IDEA.

Syntax in Docker Build Command
The Docker build command requires an understanding of its syntax before it can be used. Customizing the build process to your needs will be made easier if you know the syntax and available options. Run the docker build command using the following syntax:
docker build [OPTIONS] PATH | URL- OPTIONS: refers to the flags and options that modify the build behavior.
- PATH | URL: This indicates the build context or where you want to install your Docker container, which might be a local directory or a remote Git repository.

Docker Build: A Beginner’s Guide to Building Docker Images
Before you can start creating Docker images, you need to create a Dockerfile. If you understand this process, you’re off to a good start. However, if you don’t know how to create a Docker file, you should follow along through this entire tutorial to get started.
The Docker Container image is a lightweight standalone executable package of software that includes everything needed to run an application, including code, runtime, system tools, libraries, and settings. Think of it as a software, with batteries included. Once you bundle all of these elements together, it is called an image, and these images become containers. Once compiled, an image can be copied and moved to Windows, MAC, Linux, or any other OS that you would like your application to run on.
It will run the same way regardless of infrastructure, and that’s what makes these images so powerful, not only during development, but also during runtime. Now, we’ll explain how to build Docker images from a Dockerfile.
First, we are going to create an image that is a bit more useful than the usual ‘Hello World’ phrase you see on the internet. This will be a small web server to serve out of a web page through Nginx. We will also make sure that we can build, test, and run it on our machines.
Creating a Dockerfile
At first glance, there is nothing really special about the Dockerfile. Dockerfile is similar to many other files you create in your development process. However, this file only works for Docker element codes. That is all it takes to start your first Docker image.
In your first line, you want to type FROM. This word specifies the base image you will be using to build your own image. Almost every single image in Docker is based on another image, and most of them are Linux. You can specify your image, like Ubuntu or Linux, and this will build your image according to those parameters. But if we are building a web server, we can’t base it on Ubuntu or Linux; we have to base it on Nginx, as we mentioned above.
If we set Nginx, like in the example below, you have set your baseImage directly from Nginx. This is coming directly from Docker hub, and in Docker hub, you can see different tags for the Docker image.
FROM nginxYou can have different version tags and unversion tags. There are some that include some additional dependencies, like Perl, and some that are based on an entirely different base image altogether, like Alpine. We can pin Alpine to our already prepared Dockerfile like this:
FROM nginx:latest-alpineThis will give us the latest version of Nginx, but this image, although small, is a bit bigger than the Alpine one, which is around 50MB – 100MB.
Can I Use Environment Variables (ENV) in Dockerfile?
In the next line, you want to use the keyword ENV with its key pair as Value. Docker run command for environment variables is entered like this:
ENV FOO=barWe can always pass in our environment variable during the development process, but this is how it is used in Dockerfile for Docker images.
Copy Command
You will often see the copy command taking in two parameters, which is the source and destination. The copy command can copy files from the host machine into your actual docker image. What it means for us is that we can copy it to our website or static page to serve it up. The default site always come through the SRC and destination in the copy command.
Source Files
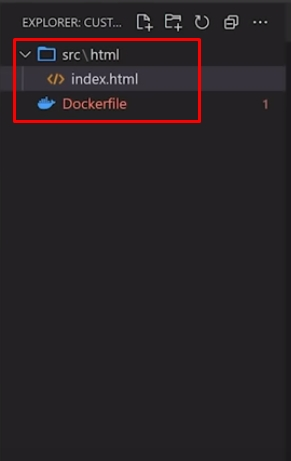
This part is like your usual development process, except that in apps that have a JavaScript framework, the source (SRC) file is already created for you. In the Docker engine, we have to create our SRC folder manually. We open a new folder inside the SRC folder that carries the development file, like HTML or JS. Use the image below as a reference.
Expose
We can Expose a port by specifying the port number in our code. We can specify whether it is `TCP` or `UDP`, but if there are no specifications, then the code editor interprets it as a default, which is `TCP`.
#documentation
EXPOSE 80
CMD Entry Point
CMD is the command at the entry point, which should allow you to specify an executable. The executable, in this case, is Nginx. You need to also pass an argument to it. You can pass a `-g` and turn daemon off. You pass these arguments as an array of parameters. You can also run it in debug mode by adding `-debug` with the same parameters.
CMD [“nginx”, “-g”, “daemon off;”]
How to Build a Docker Image
Using the `docker build` command is essential to creating Docker images from Dockerfiles. Here’s a step-by-step guide on how to do it:
1. Write a Dockerfile: First, you need to create a Dockerfile. This file contains instructions on how to build your Docker image. Here’s a simple example:
# Use an existing base image
FROM nginx:latest
# Run commands to set up your environment
RUN apt-get update && apt-get install -y \
software-properties-common \
&& rm -rf /var/lib/apt/lists/*# Set the working directory
WORKDIR /app# Copy your application code into the container
COPY . .# Specify the command to run your application
CMD ["python", "app.py"]Save this file in your project directory.
2. Navigate to the directory containing the Dockerfile: Open a terminal or command prompt and navigate to the directory where your Dockerfile is located.
3. Build the Docker Image: Use the `docker build` command, followed by the path to the directory containing your Dockerfile. You can optionally use the `-t` flag to tag your image with a name and a version.
docker build -t myimage:latestIn this example, `myimage` is the name of the image, and `latest` is the version tag.
4. Wait for the build to complete: Docker will now execute the instructions in your Dockerfile to create the image. Depending on the complexity of your Dockerfile and the speed of your internet connection, this process may take some time.
5. Verify the Image: Once the build is complete, you can verify that your image was created successfully by listing all images using the `docker images` command:
docker imagesThis command will display a list of all images on your system, including the one you just created.
That’s it! You’ve successfully used the `docker build` command to create a Docker image from a Dockerfile. You can now use this image to run containers.
How do I use base images from container registries other than the Docker hub?
To use base images from container registries other than Docker Hub, you need to specify the full path to the image in your Dockerfile’s FROM directive. Here’s how you can do it:
- Find the Image: First, you need to find the image you want to use on a container registry other than Docker Hub. Popular alternatives include:
- Amazon Elastic Container Registry (ECR)
- Google Container Registry (GCR)
- Microsoft Azure Container Registry (ACR)
- Nginx
- Quay.io
- Harbor
- Authentication (if required): Some registries may require authentication to pull images. You may need to authenticate using tools like docker login or by configuring your Docker daemon with appropriate credentials.
- Specify the Image in Dockerfile: Once you have the registry URL and any required authentication set up, you can specify the image in your Dockerfile’s FROM directive. For example:
FROM xyz.com/myimage:latestReplace xyz.com/myimage:latest with the actual path to the image on your desired registry. - Build the Image: With the updated Dockerfile, you can now build your image using the docker build command as usual.
docker build -t myimage:latestThis docker build command will be used to specify the base image from the non-Docker Hub registry to build your Docker image.
Pushing a Docker Image To Docker Hub
To push a Docker image to Docker Hub, you need to follow these steps:
1. Tag Your Image: Before pushing the image, you need to tag it with your Docker Hub username and the desired repository name. If you’ve already tagged your image during the build process, you can skip this step.
docker tag local_image_name your_docker_hub_username/repository_name:tagReplace `local_image_name` with the name of the image you want to push, `your_docker_hub_username` with your Docker Hub username, `repository_name` with the name of the repository on Docker Hub where you want to push the image, and `tag` with the version or tag you want to assign to the image.
2. Log in to Docker Hub: Before pushing the image, you need to log in to Docker Hub using the `docker login` command:
docker loginYou’ll be prompted to enter your Docker Hub username and password. After successful login, Docker will store your credentials securely for future use.
3. Push the Image: Once logged in, you can push the tagged image to Docker Hub using the `docker push` command:
docker push your_docker_hub_username/repository_name:tagReplace `your_docker_hub_username/repository_name:tag` with the tag you used while tagging the image.
4. Wait for the Push to Complete: Docker will now push your image to Docker Hub. Depending on the size of the image and your internet connection speed, this process may take some time.
5. Verify on Docker Hub: Once the push is complete, you can verify that your image is available on Docker Hub by visiting the Docker Hub website and navigating to your repository.
Now, your Docker image has been successfully pushed to Docker Hub and is available for use by others or for deployment on other systems.
How do you build a Docker Image from a Git repository?
To build a Docker image directly from a Git repository, you can use Docker’s support for building images from a remote Git repository URL. Docker’s build context can accept a Git repository URL as an argument. Here’s how you can do it:
1. Ensure Docker Installation: Make sure Docker is installed on your system and that you have the necessary permissions to run Docker commands.
2. Clone the Repository (Optional): If you haven’t already cloned the Git repository locally, you can do so using the `git clone` command:
git clone <repository_url>3. Build the Docker Image: Use the `docker build` command with the Git repository URL as the build context. You can specify the repository URL directly in the `docker build` command:
docker build -t myimage:latest <repository_url>Replace `<repository_url>` with the URL of the Git repository you want to build the image from.
4. Wait for the Build to Complete: Docker will now clone the repository and build the image using the Dockerfile present in the repository. Depending on the repository’s size and the Dockerfile’s complexity, this process may take some time.
5. Verify the Image: Once the build is complete, you can verify that your image was created successfully by listing all images using the `docker images` command:
docker imagesThis command will display a list of all images on your system, including the one you just created.
If you want to build an image with specific changes using Git, ensure that the Dockerfile is present in the root path of the Git repository and that it contains instructions for building the desired image.

What is the Importance of Using Dockerfile in Building Docker Images?
1. Reproducibility and Efficiency: Dockerfile offers a precise and reproducible method for defining the environment and dependencies required by your application. It provides precise commands and steps for building your image, thus guaranteeing consistency across various environments and deployments. Using a Dockerfile enables you to optimize resource utilization by precisely defining your application’s essential components and dependencies. These outcomes lead to reduced image sizes, faster build times, and less storage and network overhead.
2. Version Control: Dockerfile can be version controlled along with your application code, allowing you to track changes to your environment configuration over time. This makes it easier to collaborate with team members and revert to previous versions if needed.
3. Automation: Dockerfile allows for automation of the image-building process. Once you define the steps in your Dockerfile, you can automate the build process using Continuous Integration (CI) tools like Jenkins, Travis CI, or GitHub Actions. This reduces manual errors and speeds up the deployment pipeline.
4. Customization: Dockerfile enables you to customize your Docker images to suit the specific requirements of your application. You can install additional packages, configure environment variables, and perform other tasks to tailor the image to your needs.
Wrap Up
Your application delivery process is streamlined among development teams when they can collaborate, automate, and manage versions using Dockerfiles.
If you are looking to deploy Docker containers in the cloud, ServerMania offers robust cloud hosting solutions and one-click deployment of Dockerfiles. With ServerMania, you can quickly provision virtual servers, manage resources, and scale your infrastructure to meet current demands. Installing Docker on Ubuntu Server is quick and easy on the ServerMania cloud environment, enabling fast deployment and proper management of containerized applications.
By taking steps to combine powerful technologies, such as Docker, Ubuntu Server, and the ServerMania Cloud, your organization can achieve flexibility, scalability, and reliability in its IT operations.
Was this page helpful?
About the author

