How to Host a Solana Validator Node: Hardware Requirements and Setup Guide

Hosting a Solana validator node is not as simple as joining a network, it’s more about becoming an active participant in the Solana development ecosystem. So, if you are a blockchain developer, a member of a DeFi team, or large-scale enterprise, understanding the requirements is critical for your long-term goals.
When it comes to reliable hosting, ServerMania stands out as a top-tier provider that caters specifically to demanding blockchain workloads. With our powerful dedicated servers, tailored for network security and high availability, we makes running a Solana validator node seamless.
In this guide, we’ll walk you through everything including the Solana validator hardware requirements, how to host Solana validator, Solana validator setup guide and more…
Why You Need a Professional Infrastructure?
Hosting a Solana validator node is far from a casual project.
It demands a significant commitment to high-performance hardware and expert-level infrastructure to keep up with the Solana blockchain’s phase. Running a Solana validator node requires not only powerful hardware but also a significant amount of SOL staked to your node, which helps you earn your rewards.
If you want your validator to be competitive, stay online consistently, and contribute meaningfully to the network, understanding these challenges is essential.
Hardware Solana Validator Requirements:
Solana’s architecture pushes the limits of what validator hardware can handle, by utilizing a performant executable that efficiently processes transactions.
Unlike many blockchains, Solana requires:
- 24+ CPU cores: These are required to process thousands of transactions per second and keep up with the network’s rapid block times.
- 384GB or more of RAM: That much RAM is needed to handle the blockchain state and support real-time transaction validation.
- Enterprise-grade SSDs: You will need an ultra-fast and reliable storage, which is critical to maintain data integrity and reduce latency.
The total upfront cost can easily fall between $15,000 and $50,000 or more, depending on the quality and scale of the setup. On top of that, annual operational expenses which include electricity, cooling, maintenance, and bandwidth can often exceed $60,000.
For most aspiring validators and crypto enterprises, this makes managing your own infrastructure costly and complex. So, that’s where professional hosting becomes a practical and cost-effective alternative.
Why Professional Hosting is Critical?
Professional hosting providers like ServerMania offer dedicated infrastructure designed to meet the demanding needs of blockchain validators.
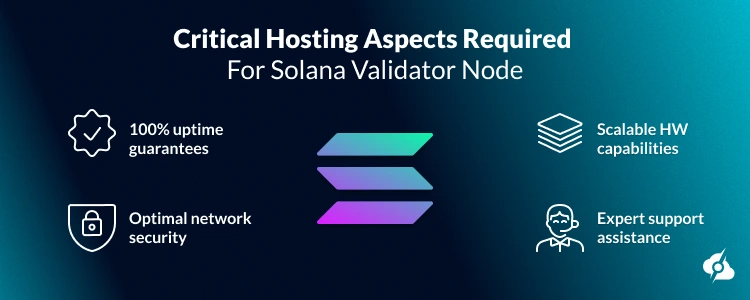
Here’s what professional hosting guarantees:
- 100% uptime guarantees
- Optimal network security
- Scalable HW capabilities
- Expert support assistance

Solana Validator Hardware: Minimum vs. Recommended
Running your Solana validator node demands specialized hardware tuned for high throughput and low latency. The critical hardware components involved are CPU, memory, storage and network security.
CPU Requirements: Multi-Core Performance and SHA Extensions
The CPU is the heart of your validator node. Solana’s fast block times require CPUs with many cores and specific instruction sets to handle cryptographic operations efficiently.
| Specification | Minimum | Recommended | Notes |
|---|---|---|---|
| Physical Cores | 24 | 32+ | High core count ensures parallel processing |
| Threads | 48 | 64+ | Supports concurrent workloads |
| Base Clock Speed | 3.9 GHz | 4.0+ GHz | High single-thread performance improves transaction processing |
| CPU Model Examples | AMD EPYC 7642 / Intel Xeon Silver 4210 | AMD EPYC 9434/ Intel Xeon Gold 5412U | Enterprise-grade CPUs with SHA and AVX2 support |
| Key Features | SHA extensions, AVX2, AES-NI | SHA extensions, AVX2, AES-NI | Critical for cryptographic hash functions |
Memory Specifications: DDR5 ECC and Capacity Planning
Memory size and speed influence your node’s ability to handle blockchain state and rapid transaction validation.
| Specification | Minimum | Recommended | Notes |
|---|---|---|---|
| Capacity | 384 GB DDR5 ECC Registered | 512 GB – 1 TB DDR5 ECC | ECC is critical to prevent data corruption |
| Memory Speed | DDR5-4800+ MHz | DDR5-5600+ MHz | Higher bandwidth reduces latency |
| Type | Registered ECC (Error Correcting Code) | Registered ECC | Ensures system stability under heavy load |
| Scalability | Upgrade as accounts grow | Plan ahead for scaling | Validator memory needs increase over time |
Storage Architecture: NVMe SSDs and Data Separation Strategy
Storage speed and reliability are essential for account data access; using the same disk for certain data types can simplify management but may impact performance.
| Specification | Minimum | Recommended | Notes |
|---|---|---|---|
| Ledger Storage | 2 TB NVMe SSD | 4 TB NVMe SSD | High-speed NVMe ensures fast block replay |
| Accounts Storage | 1 TB NVMe SSD | 2 TB NVMe SSD | High TBW (Terabytes Written) for longevity |
| Operating System Drive | 500 GB Enterprise SSD | 1 TB Enterprise SSD | Reliable OS storage for stability |
| Performance | 7,000+ MB/s read/write | 9,000+ MB/s read/write | Low latency and throughput critical |
Network Infrastructure: Bandwidth and Latency Requirements
Networking is the foundation of your Solana validator’s communication with the Solana cluster and peers, hence it’s vital to consider the right options:
| Specification | Minimum | Recommended | Notes |
|---|---|---|---|
| Bandwidth | 3 Gbps symmetric | 10, 25 or 100 Gbps symmetric | Unmetered bandwidth preferred |
| Latency | <50 MS to major validator clusters | <30 MS | Low latency improves consensus participation |
| Redundancy | Single uplink | Multiple uplinks with failover | Ensures uptime during outages |
| Geographic Considerations | Proximity to Solana cluster nodes | Same region or data center | Reduces network delays |
Now that we understand the Solana validator infrastructure, let’s explore how to deploy a Solana validator node.

Solana Validator Deployment: Complete Setup Walkthrough
There are several critical steps that you would need to go through in order to set up your own Solana validator node. They range from setting up your server operating system, turning the environment, launching your own node and more…
We’ve prepared a complete step-by-step guide to walk you though the process:
1. Server Preparation & OS
The recommend operating system for running a validator node is Ubuntu 20.04 LTS or later because this system has the best support and stability.
Here’s what you need to start with:
- System Installation: Use Ubuntu packages 20.04+ LTS, applying all the latest updates.
- User Management: Create a dedicated SOL user to isolate Solana processes and files.
Here’s an example command for user creation and directory management:
sudo adduser sol
sudo mkdir -p /var/solana/{data/{ledger,config},accounts/snapshots}
sudo chown -R sol:sol /var/solana/Tip: When ready you would need to adjust kernel parameters and limits, including session file limits, to ensure stable validator operation.
2. Solana CLI Installation
The Solana command line tool and your Solana config set are the most important piece for your validator node management, including key generation, account creation, and node operation.
To install the Solana CLI as the SOL user run the following commands:
sh -c "$(curl -sSfL https://release.solana.com/stable/install)"
export PATH="/home/sol/.local/share/solana/install/active_release/bin:$PATH"
Once Solana CLI is installed, remember to set your cluster endpoint with the command Solana config set URL <RPC_URL> to ensure your CLI connects to the correct Solana network.
When you install the SOL user, don’t forget to add the export line to your .bashrc or .profile, then open a new terminal window to verify with the following command:
solana --versionAs concisely as possible, when you install the Solana CLI, it enables you to interact with the Solana network, claim Solana airdrops, set up your node effectively, and manage your keys.
Tip: To ensure your storage setup is properly configured, use the list block devices command and to check disk space mounted, use the df command to verify all drives before deploying your node.
3. Validator Identity & Creation
Now you need to set up your validator identity and create your validator vote account. The first step here is to generate your validator identity keypair JSON file by using the appropriate command:
solana-keygen new --outfile ~/validator-keypair.jsonWhen you have create keys, next, you must generate a vote keypair account:
solana-keygen new --outfile ~/vote-keypair.json
solana create-vote-account ~/vote-keypair.json ~/validator-keypair.json
And lastly, generate an authorized withdrawer keypair for secure fund management:
solana-keygen new --outfile ~/authorized-withdrawer-keypair.jsonPro Tip: Store the keypairs on a hardware wallet.
4. Validator Startup Configuration
To make your validator node running, you need to properly set up your Solana config along with script configuration options, service management, and network. One essential step here is configuring your RPC URL using Solana config set URL <RPC_URL> so your validator communicates with the right cluster.
This way, you would ensure that the validator software launches correctly, performs well and remains online in the Solana network.
Startup Script Creation: Essential Flags and Parameters
The validator startup script and the Solana config set are where you define how your node operates:
- –identity: Path to your validator keypair file, which authenticates your node.
- –vote-account: Location of your vote account keypair file, used for consensus voting.
- –ledger: Directory where the ledger data is stored.
- –accounts: Directory for account snapshots.
- –log: File location for logs, with rotation to prevent disk overflow.
- –rpc-port: Port number for RPC connections (default is 8899).
- –entrypoint: Address(es) of entry points in the Solana gossip network.
- –expected-genesis-hash: Validates you’re connecting to the correct cluster.
Security is vital, so in your terminal program open only necessary ports to protect your validator server:
sudo ufw allow 22/tcp      # SSH access
sudo ufw allow 8000:10000/udp
sudo ufw allow 8000:10000/tcp
sudo ufw allow 8899/tcp    # RPC port, if enabled
sudo ufw enableTip: You can manage validator operations through an existing shell environment using command-line tools designed for ease of use.
Solana Node Operations: Monitoring, Alerts, and Tuning
Unfortunately, running your own Solana validator is not just the initial configuration and then forgetting about it, it’s more like a continuous monitoring, maintenance and clever tuning.
So, we’re going to review some of the core operational practices!
Essential Monitoring Metrics and Dashboards
Monitoring your mainnet validator’s performance with tools such as Solana Watchtower is crucial to ensure it stays in sync with the network and avoids penalties.
So here are the critical indicators you must keep an eye out for:
- Consensus participation: This is the measurement of your vote success rate and slot leadership frequency, indicating how actively and accurately your validator participates.
- Network synchronization:This is the tracking catchup status and slot processing speed, which ensures that your node stays up-to-date with the Solana blockchain without lag.
- The resource utilization: As self-explanatory as it is, this is the monitoring of your CPU usage, memory consumption, disk I/O rates, and network bandwidth.
- Financial performance: Lastly, we have the monitoring over rewards accumulated from staking and the transaction fees your node generates, balanced against operational costs.
Tip: You can use dashboards such as Grafana and Prometheus to view real-time data with a fully customizable view.
Automated Alerting and Incident Response
We completely understand that there is no such thing such as an operator that can watch their validator 24/7. That’s where automated alerts come in. Setting up thresholds for critical metrics, such as the high CPU load, any vote failures, or network sync issues, will keep you informed for any potential anomalies.
A typical alert system tuning incudes:
- Integration with messaging platforms like Slack or email.
- A fully automated incident logging and ticketing system.
- Predefined response playbooks to troubleshoot problems.
Performance Tuning for Maximum Efficiency
In order to handle Solana’s blockchain environment, your validator node must be configured for peak performance, so you might want to consider these techniques:
- System Kernel tuning: We recommend adjusting your Linux kernel parameters to improve network buffer sizes and scheduler behavior, minimizing packet loss and CPU stalls.
- Storage optimization: Use RAID arrays and choose filesystems optimized for high IOPS and low latency, such as XFS or EXT4 with proper mount options.
- Network optimization: Also, enable TCP window scaling and apply advanced congestion control algorithms to maintain stable, high-throughput connections.
- Memory management: You may also leverage huge pages and carefully configure NUMA (Non-Uniform Memory Access) topology to reduce memory latency and improve throughput.
Important: It’s crucial to remember that before mounting a new disk, you must format it using commands like “sudo mkfs” to create a filesystem.
Solana Node Troubleshooting: Common Problems and Quick Fixes
When have a Solana validator, you will surely encounter a few common methods along the way, so having some expert solutions at your disposal is recommended.
Let’s go through some of the common issues:
1. Synchronization and Catchup Issues
One frequent problem is slow Solana catchup, which can put the node to a halt because of a limited network bandwidth or other potential bottlenecks.
Validators often struggle with catchup and typically lag behind the cluster, risking missed votes and rewards. Running the Solana catchup command helps identify synchronization status, but ensuring your remote machine has sufficient resources and a reliable connection is key to resolving these delays.
solana catchup <validator_vote_account_pubkey> <RPC_url>The example command mentioned shows how far your validator’s public key is behind the cluster’s slot and helps you find where the exact delay is coming from by checking the public key status.
2. Hardware Performance Bottlenecks
Validator performance depends heavily on adequate hardware specs. Insufficient RAM or CPU capacity leads to memory exhaustion or processing delays.
For example, if you can’t meet the minimum 384GB DDR5 ECC memory requirement or you are lacking SHA extensions on the CPU can cause transaction processing slowdowns. Monitoring system metrics using tools integrated with your Solana CLI tool suite will enable an early detection of such bottlenecks.
3. Vote Account & Consensus Problems
Maintaining a healthy vote account and a correct Solana config is critical for your validator rewards.! Issues like vote failures often relate to network latency, misconfigured vote account, or insufficient staked SOL balance.
By regularly checking your vote account status with Solana CLI commands will be able to maintain proper validator keypair security ensures your node participates effectively in consensus.
Solution Frameworks:
- Diagnostics: Analyzing logs using the Solana CLI locally or diagnosing your validator remotely.
- Escalation:Engage with the the Solana community or your server provider for expert assistance.
- Recovery: Use snapshot restoration or regenerate keys with Solana keygen in case of corruption.
- Prevention: Implement proactive monitoring and optimize your network and hardware resources.
Solana Validator Hosting: What Options To Consider
When it comes down to Solana validator hosting, there are going to be a few options that you’ll need to consider based on your long-term vision.
Self-Managed: Control Above All
Running a Solana validator on your own hardware requires managing your Solana config carefully, which makes it essential for you to maintain a secure and reliable validator server for an optimal performance.
You decide every single detail.
A proper Solana setup requires at least 24+ cores, 384GB+ ECC RAM, and multiple NVMe SSDs, often totaling $20,000–$50,000 upfront, plus ongoing power, cooling, and maintenance.
You’re also responsible for 24/7 monitoring, troubleshooting validator software, and staying synced with the Solana network. Missed votes or outages quickly eat into rewards.
Colocation: Balance of Ownership
Colocation is the middle ground option!
You own the hardware but place it in a professional data center. This eliminates the worry about the power supply, cooling, environment and network connection but you’ll be using only a remote server.
Your team, however, will still manage the node’s software, identity keys, and updates, but the critical infrastructure is handled by the facility. For those with strong technical teams, it keeps control of the Solana validator while reducing on-site risks.
Managed Hosting: Easy Validator Management
Providers that offer fully managed services handle everything!
You get dedicated hardware built for Solana, backed by SLAs, multi-region redundancy, and an expert team who keep your node optimized. They manage upgrades, validator keypair safety, monitoring, and rapid response to issues, which ensures top rewards while freeing your team to focus on opportunities.

Cloud Platforms vs. Bare Metal: Which One?
Finally, traditional cloud servers often can’t match bare metal for validator performance. Validators rely on consistent CPU throughput and low disk latency, areas where Solana validator dedicated servers shine. Hence, for serious participation in the Solana blockchain, dedicated bare metal remains the best choice.
Your Solana Node Journey: Next Steps!
Before diving into hosting a Solana validator, it’s very important to determine your technical readiness, budget, and objectives. Running a validator requires significant hardware investment, so consider this:
- Do you have access to enterprise-grade hardware or a reliable remote machine?
- Are you prepared for the annual Solana validator hosting costs and maintenance?
- Does hosting a validator align with your crypto goals or future development plans?
Starting small with an RPC node can be a smart pilot program. It lets you familiarize yourself with the Solana CLI tool suite and network operations without the full validator complexity.
This approach helps build expertise and confidence before scaling up!
See Also: Top10 MarTech and AdTech Infrastructure Challenges in 2025
Why Choose ServerMania for Your Solana Node?
Hosting a validator demands more than just powerful hardware, in fact it requires a partner who understands the nuances of blockchain operations.
ServerMania delivers purpose-built, optimized hardware designed to meet the strict demands of validator nodes, including high-core CPUs, large DDR5 ECC memory, and ultra-fast NVMe SSD storage.
With our global network of data centers strategically located near major Solana clusters, ServerMania ensures low-latency connections and reliable network participation.
Our 24/7 expert support team specializes in blockchain infrastructure and is ready to assist with any validator setup or operational challenges. Whether you’re deploying a single node or scaling to multi-validator environments, ServerMania offers fully flexible deployment options tailored to your needs.
Get in touch with a ServerMania experts to get started with the Solana ecosystem today!
Was this page helpful?

