Installing a Minecraft Server: Ultimate Guide Tips and Tricks

Minecraft is a game which allows players to build with a variety of different blocks in a 3D procedurally generated world. Minecraft is so popular, that it is the best-selling PC game of all time with over 238 million copies sold.
For those looking to play Minecraft with their friends, a Minecraft Server is required. It allows users to connect to one central computer which will host the game software for all the other players to use.
Minecraft Server Requirements
You’ll need the following system requirements in order to run a Minecraft Server:
- A Windows 10 desktop or server
- At least 4GB of RAM is recommended
- A reliable wired network connection
- A generous Internet bandwidth plan: Minecraft can use up to 100MB per player per hour, so an unlimited bandwidth plan is ideal
For those wondering how to increase server performance, you may need a server wish more RAM or a more powerful CPU to keep up with multiplayer server demands. Check out our Dedicated Gaming Server solutions for more info on larger gaming servers.
See Also: Affordable Cloud Hosting
Installation Instructions
Step 1: Open Windows 10 and download Java
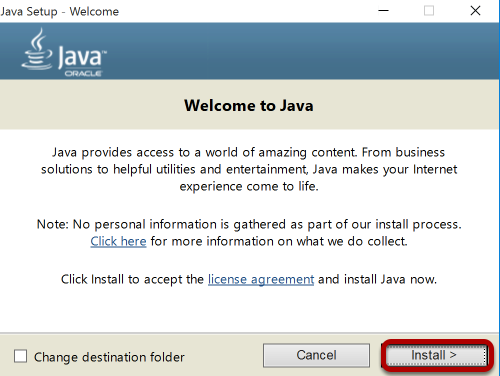
Visit the Java download site
Download the latest version of Java for Windows 10. Open the .EXE file and click Install. Restart your computer once installation has completed. We’d always recommend using the latest version of java for the best performance and you should keep java you are running up to date.
Step 2: Download Minecraft Server
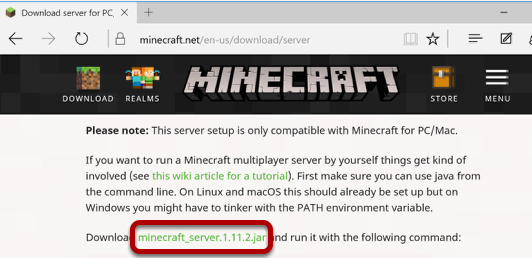
Visit the Minecraft Server website and download the Minecraft server version of the Minecraft Vanilla JAR file to your computer. When you download the Minecraft Server jar, it will be saved by default to your Downloads folder. You can also download Minecraft Server from another project like Forge or Bukkit, but the next steps of running those jars and the install may vary.
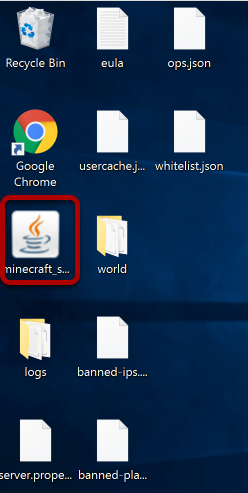
Step 3: Open the Downloads folder and move Minecraft Server
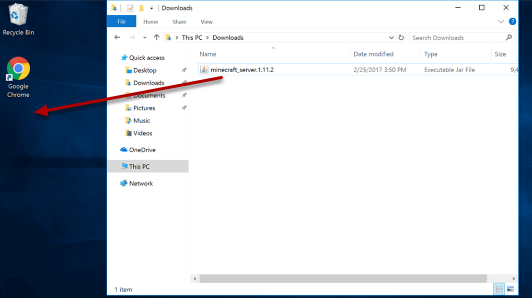
Navigate to your Downloads folder and move the Minecraft folder to your desired location. We’re going to drag it to the desktop, but we would recommend a dedicated folder for Minecraft.
Step 4: Double click on the Minecraft JAR file

Double click on the Minecraft JAR file. This will extract some files we need before we can start the server.
Step 5: Agree to the Minecraft EULA and Set Server Properties
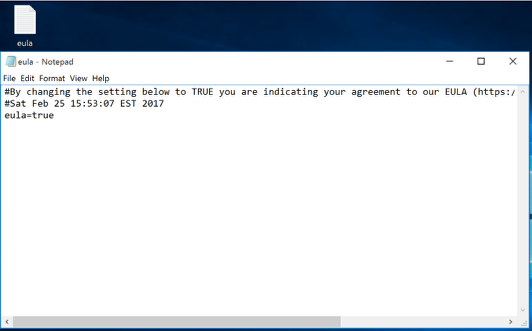
We’ll start by adjusting the configuration files before starting the server. The first file to open is the Minecraft EULA. The EULA is the document you are agreeing to when running the Minecraft Server.
To accept the end user license agreement, open the EULA txt file and update eula=false to eula=true. Save the file.
To adjust server settings, open the server properties file and save the file once the necessary changes have been made. If you’re wondering how to adjust server settings, the server properties file determines key server settings like server port, memory, and in game settings. Port 25565 is the default server port.
Step 6: Double click on the Minecraft JAR file
Open the Minecraft server file again to get the server java file running.
Step 7: Allow the Minecraft Server in the firewall
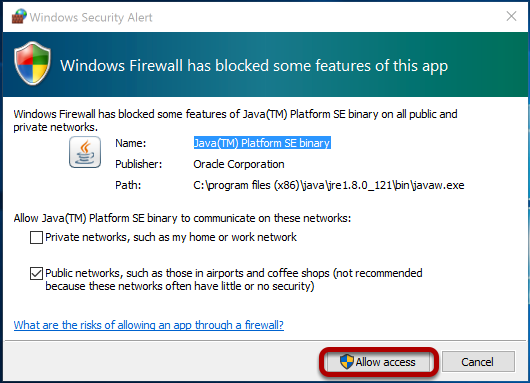
Click Allow Access
Step 8: Review Minecraft Server stats
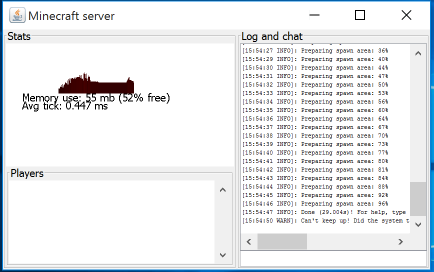
The Minecraft Server is now installed and running and a stats window will appear. As we can see in the window, this particular local PC can’t keep up with the resources required to run a multiplayer server, so we’ll be setting this up on a cloud server with ServerMania for a better experience.
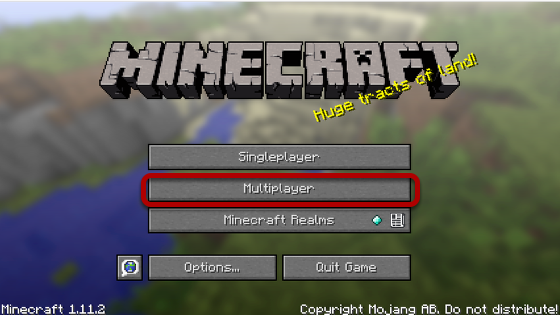
Step 9: Connecting to your Minecraft Server
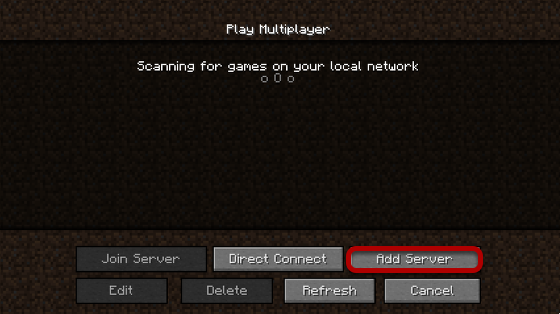
Now that your server is installed, you can connect to it from Minecraft. Launch Minecraft and select Multiplayer.
Click Add Server
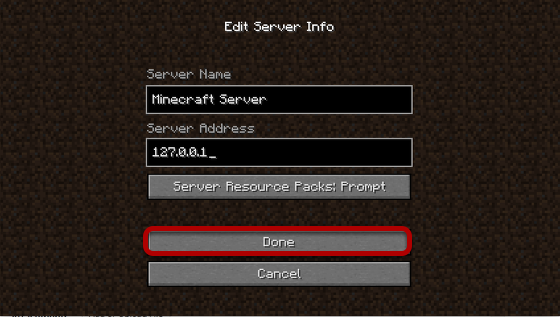
Enter server details and click Done. You can obtain the Minecraft server IP address by going to Google and searching “what’s my IP”. You may need to open up access to port 25565 on your router if your friends are unable to connect. Keep in mind that your home IP address may change frequently, so you will need to provide them with the updated connections details when this happens. One of the main advantages of using a cloud server is you always keep the same IP.
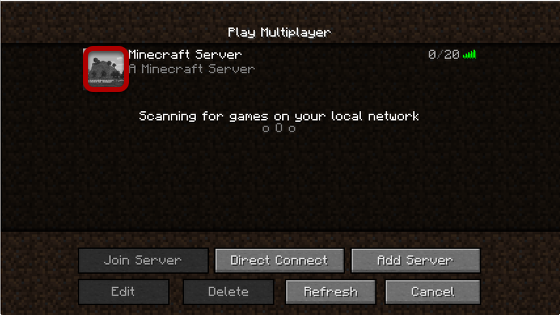
Click the play button next to your server to start playing!
How do I setup Port Forwarding?
When you completing the install of a Minecraft multiplayer server on your local PC instead of hosting it wth a cloud server provider, you need to open up access to your local PC to the internet through port forwarding. If you don’t setup port forwarding, your friends won’t be able to connect.
The instructions for setting up Minecraft Server port forwarding will vary based on the type of router you use. So we’d recommend performing a google search on how to setup port forwarding based on the internet router or ISP you are using. This will complete your server install process.
In Summary
You’re ready to go! You’ve now learned how to create your own server. If you completed the server install process correctly, your friends should now be able to connect to your Minecraft Server. You can follow these instructions and swap out the default Vanilla Minecraft jar with a Forge, Spigot, or Feed The Beast jar if you want to customize your Minecraft Server experience with mods and plugins!
See Also: (Live Webinar) Meet ServerMania: Transform Your Server Hosting Experience
ServerMania not only supports businesses with technical tutorials, but also through enterprise focused solutions such as colocation and server cluster configurations. For these advanced partnership opportunities, please book a free consultation with our account executives today.
Was this page helpful?
About the author

