How to Setup and Scale a Redis Cluster

If you have a huge application, you might need to scale it for extra performance and availability. The usual scaling method of a Redis server is vertical, which means you add more resources to a single server.
But since Redis is single-threaded and can only handle a single request at a time, it gets mandatory to run Redis across several servers.
So, the solution to this kind of problem is the Redis cluster, which we will explain in this tutorial.
What is a Redis Cluster?
Redis cluster is a technique of distributing Redis across several nodes (server). Redis cluster simply enables you to horizontally scale out your Redis server.
Redis cluster combines several servers in order to handle the load and the traffic of Redis. It protects your system from failure and increases availability.
Redis cluster works in terms of master and replica format. The minimum numbers of masters are 3 and each one of these master should have at least a single replica.
These replicas are a backup option for a master. If a master node fails, these replica nodes would be promoted to master to avoid any failures and increase availability.
Why Setup a Redis Cluster?
Redis cluster has a lot of sweet features, but under normal circumstances, setting up a Redis cluster might not be a good idea.
Redis cluster is mostly used by applications with high loads or by applications that need their data to be stored across several servers. Or by applications with a lot of traffic.
For example: Suppose that you have a single server for Redis. The server gets overloaded with tons of requests at a given time. Since Redis is single-threaded it could only answer a single request at a time. If you need your Redis server to handle more than one request at a time, then you need to set up a Redis cluster.
Benefits of Redis Cluster
- The ability to scale your Redis server
- The ability to run Redis across several nodes
- The ability to minimize failover and maximize availability
- The ability to handle more load
Disadvantages of Redis Cluster
- More expensive than a single Redis server
- Lost of data, if a failure happens during the processing of your data
- Needs more maintenance than a single Redis server
Before We Begin…
In this tutorial, we will have a deeper look at how to set up a Redis cluster. Also, we will show you the two different ways of setting up a Redis cluster.
- On a production environment with several nodes (server)
- On a local machine as a test
See also: Redis requirements for email servers
Setup a Redis Cluster with Multiple Nodes
The first method of setting up a Redis cluster is to cluster several nodes (servers) together as a Redis cluster. This Redis cluster setup is of a production environment.
Before starting to set up this method you need at least 6 servers. But don’t worry if you haven’t got that many servers, you could check out our cloud hosting for renting cloud servers.
Still, if you find it difficult to rent 6 servers, then hover down and look for the local installation of the Redis cluster on a local machine, which doesn’t need any remote server.
See also: Redis hardware requirements
Note
Every step that we do in this tutorial with a single Redis cluster node, shall be done on all of the nodes. So, be sure to repeat these methods on all of your servers.
SSH into your Remote Server
The first step is to SSH into your remote server by typing the command below:
ssh [USERNAME]@[IP_ADDRESS]
Update your Linux packages
After getting into your Linux server make sure you update its packages. To update your Linux packages, type the command below:
sudo apt update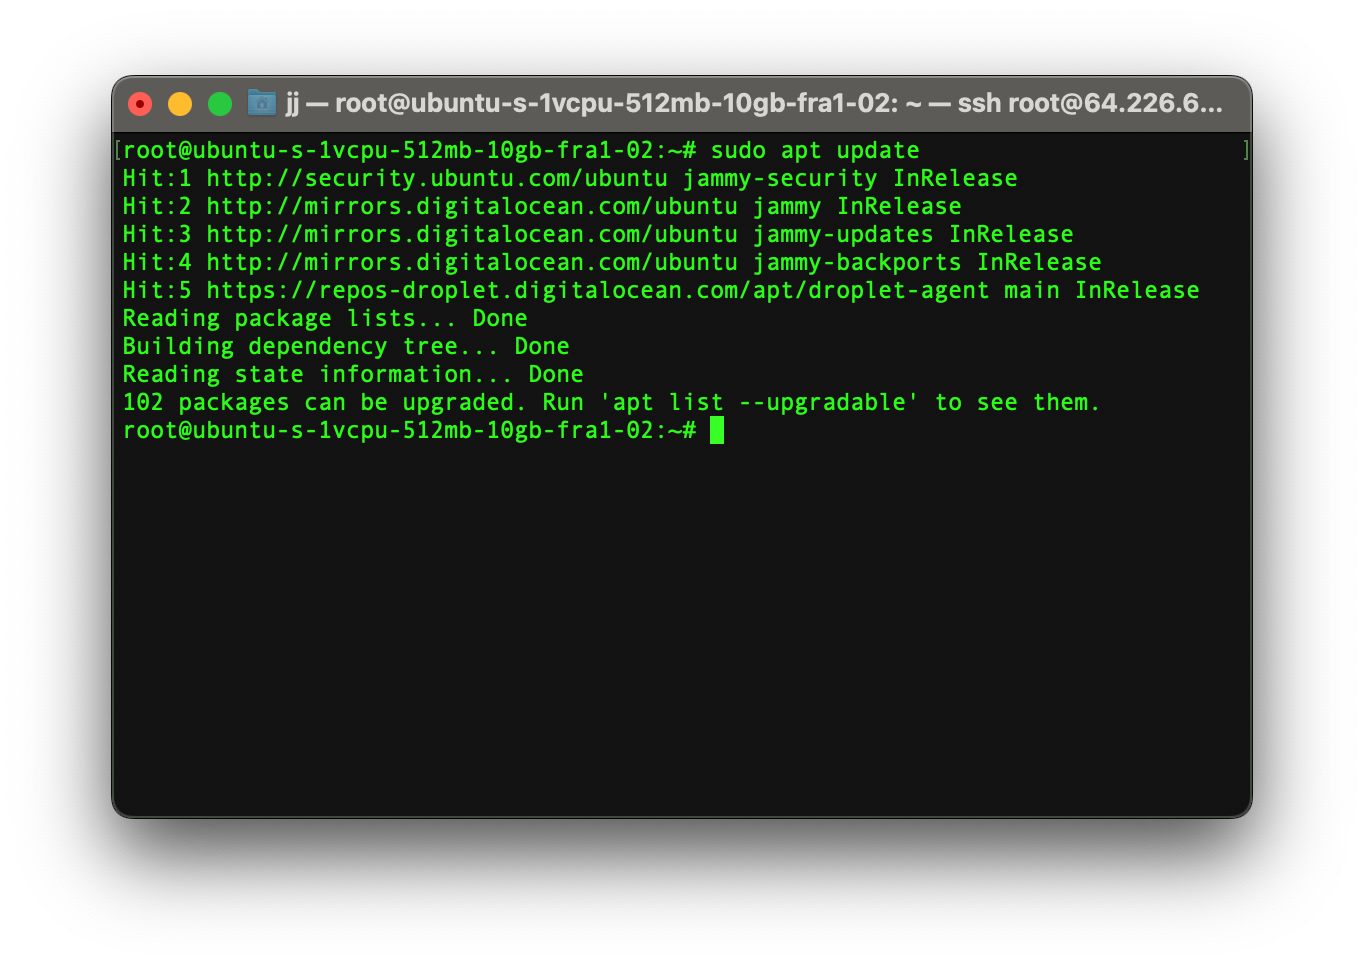
Install Redis
A Redis cluster node requires to have Redis installed. To install Redis on your server type the command below:
sudo apt install redis-server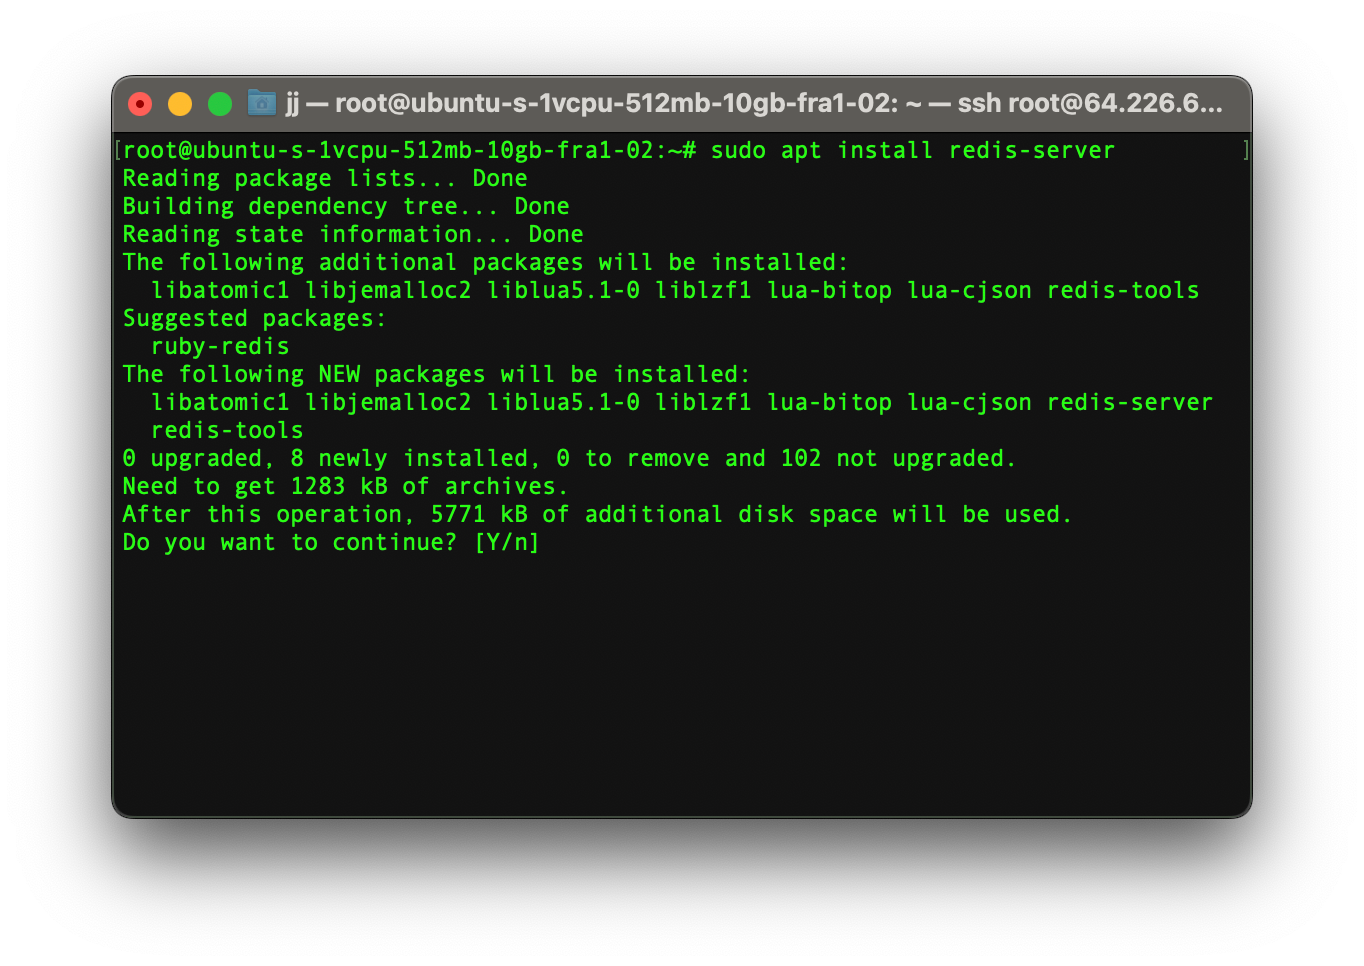
Enable Redis
After successfully installing Redis on a node, start and then enable it at every boot. So that your Redis server would start after you restart your server.
To start and enable the Redis server type the command below:
systemctl start redis
systemctl enable redis-server
Additionally, you could also check the status of the Redis server by typing the command below:
systemctl status redis
Configure redis.conf File
Type the command below to edit the configuration file of the Redis cluster:
sudo nano /etc/redis/redis.conf
After opening up the configuration file, you need to change a few parameters. The file contains a lot of text, so you need to find the parameter you need by hovering. Also, be sure to change this file on each server individually.
The first parameter to be changed is bind. This parameter defines which interfaces should Redis listen to. By default, it listens for all connections. But we could alter it to listen to one or more interfaces.
Find the word bind and add your server’s private IP address after 127.0.0.1 as shown in the picture below.
bind 127.0.0.1 [SERVER_IP_ADDRESS]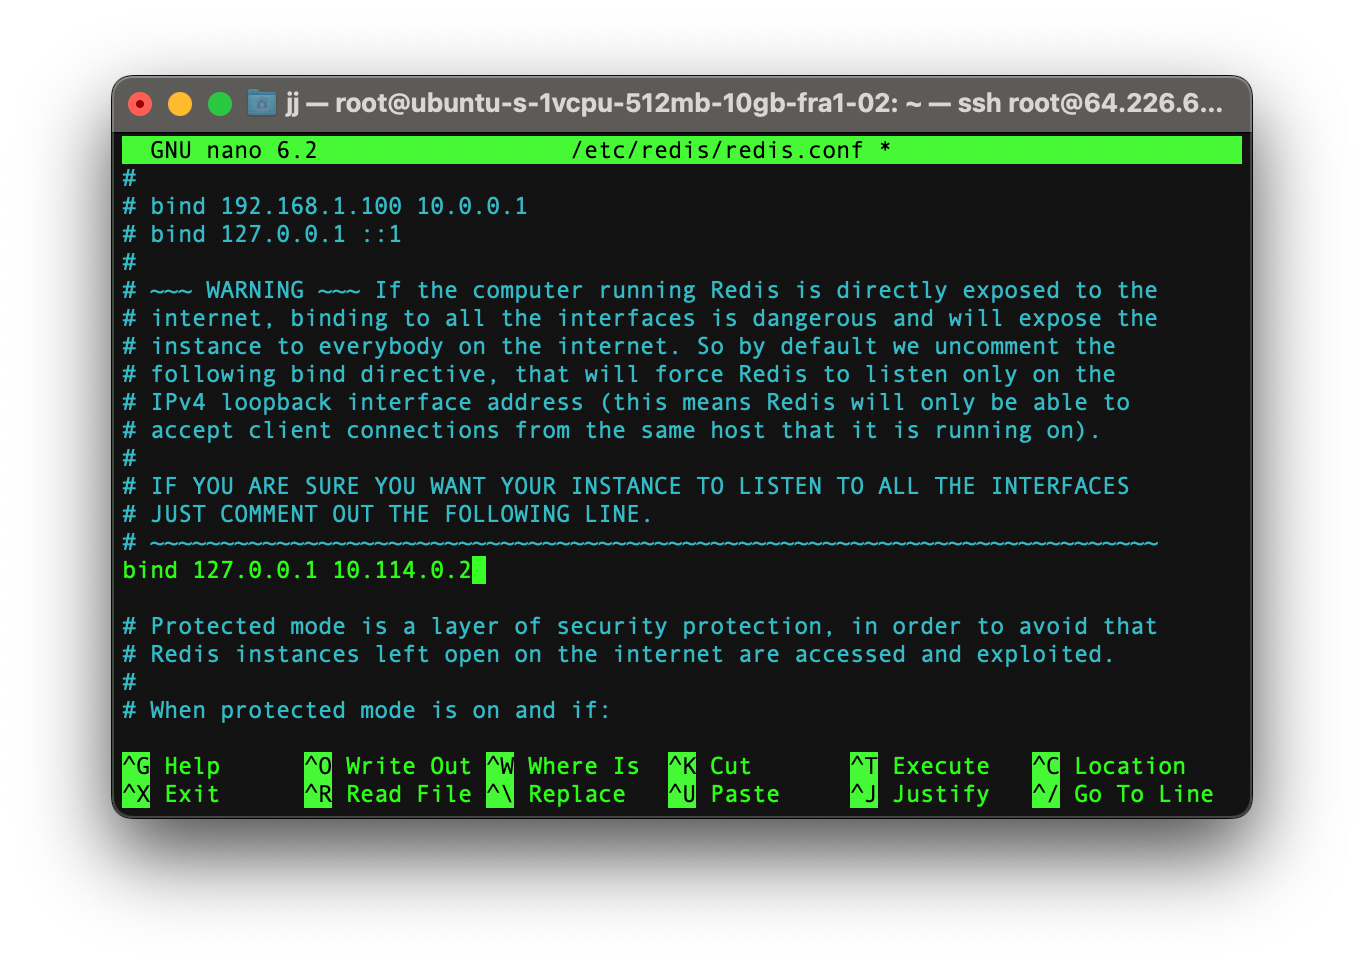
The second parameter is protected-mode. This parameter simply protects your Redis server from outside connections and hosts. By default, it is on. But for making a Redis cluster we need to disable it by changing its values to no.
protected-mode no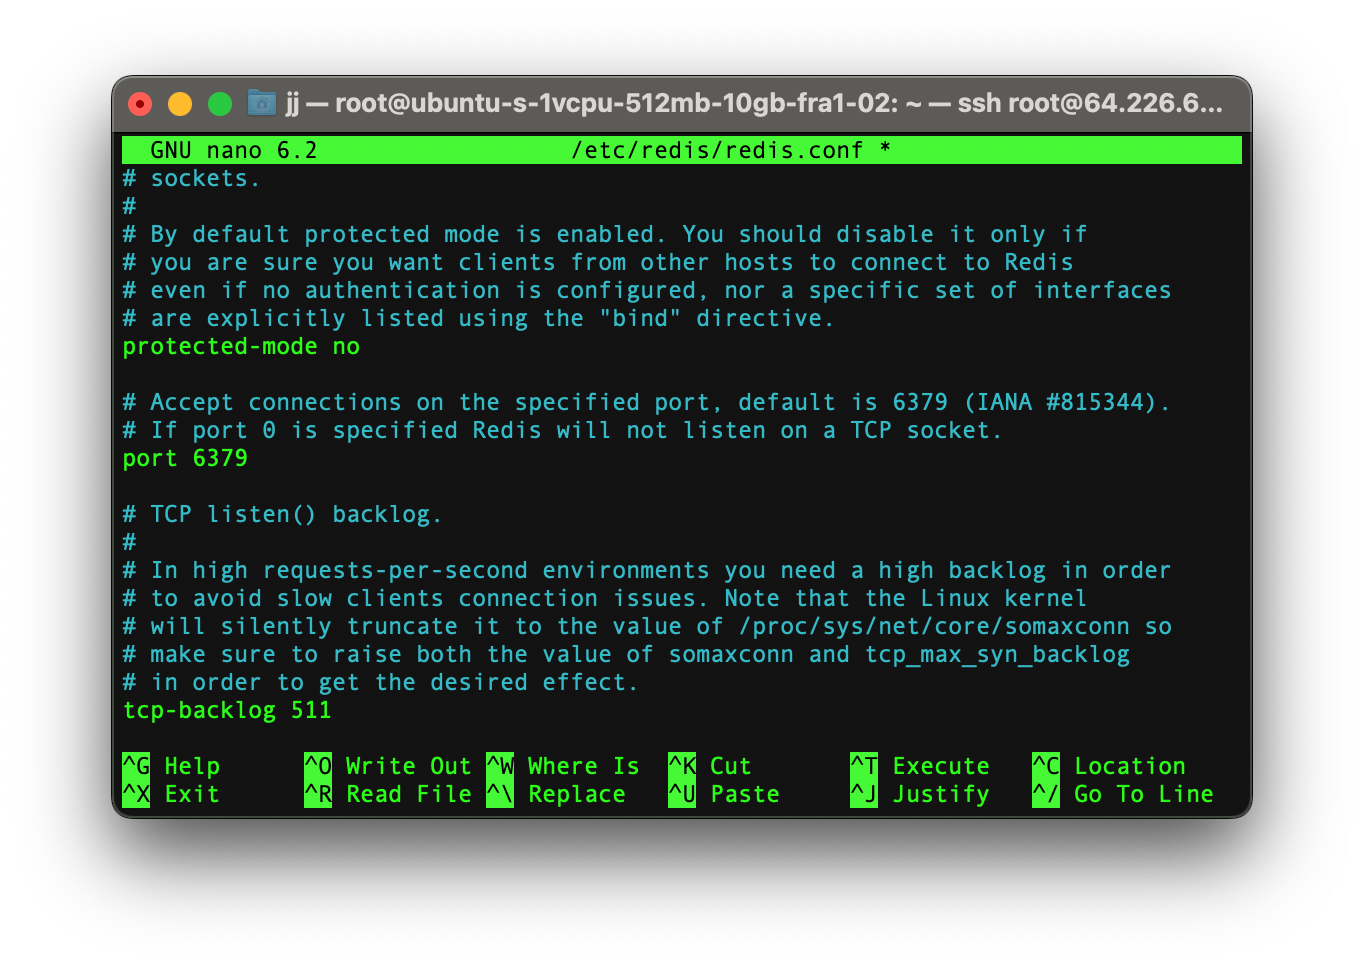
The next parameter is appendonly. This parameter is an alternative persistence mode that provides much better durability. It ensures data protection even if your server running Redis accidentally stops or the power goes off.
By enabling this option you trade off some speed in return for better data protection.
To enable appendonly mode, change its values to yes.
appendonly yes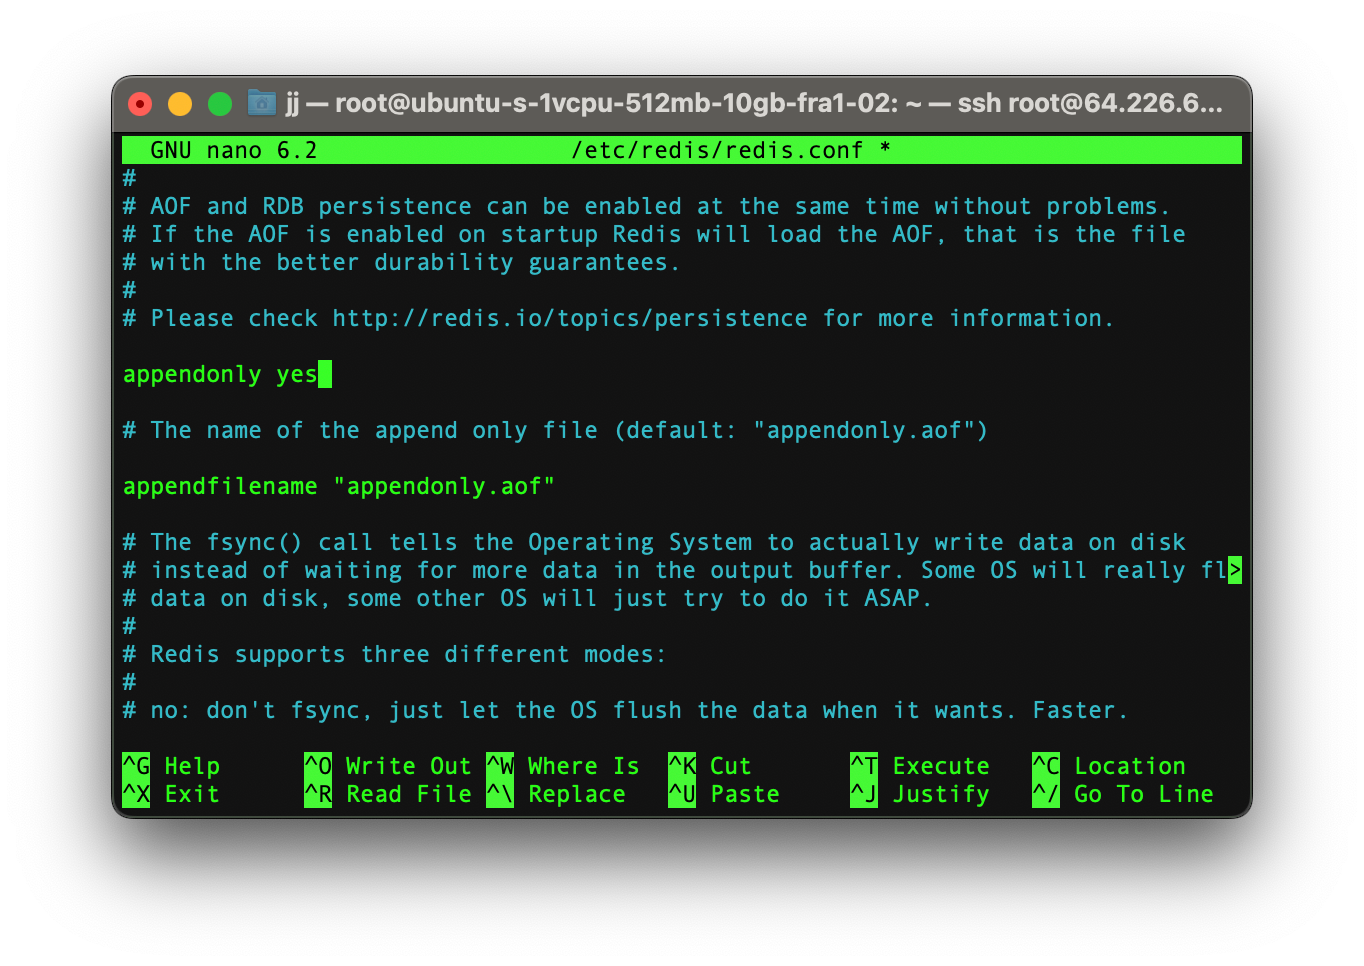
The last parameters are related to clustering configurations, which you need to uncomment in the file.
- cluster-enabled: This parameter enables the cluster mode and disables the default standalone mode.
- cluster-config-file: This parameter specifies the file name where the cluster configurations live.
- cluster-node-timeout: This parameter specifies the amount of time (in milliseconds) in which a node would be considered failed. You could also change its values if you’d like.
cluster-enabled yes
cluster-config-file nodes-6379.conf
cluster-node-timeout 15000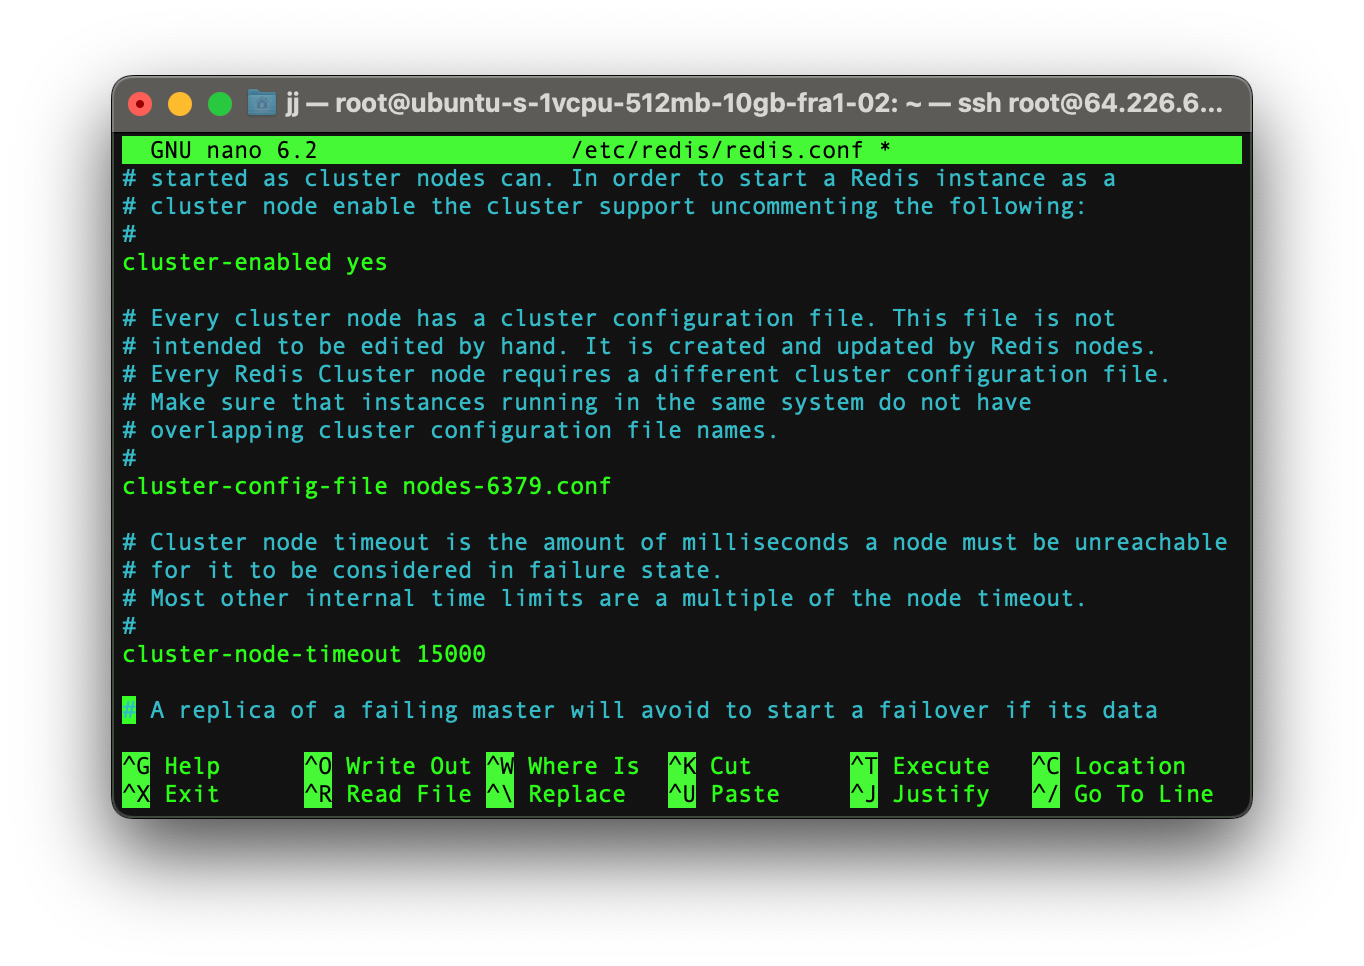
After successfully editing all those lines you could quit the editor and save your changes.
Restart Redis Server
Now that the Redis configuration file is ready we need to restart the Redis server to implement the changes.
systemctl restart redis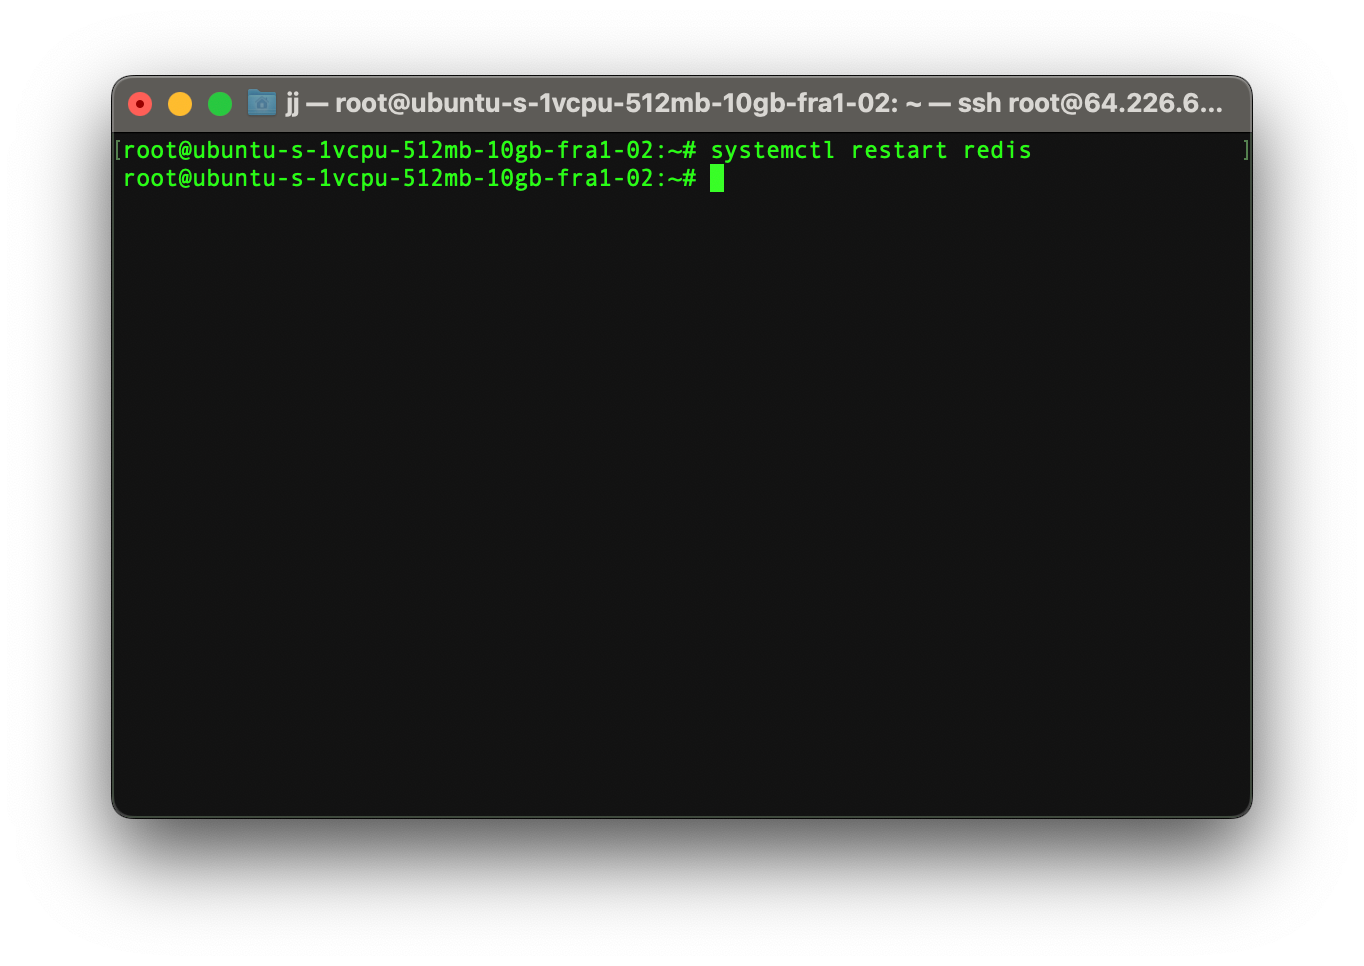
To check the Redis server for any changes you need to see the logs by typing the command below:
sudo cat /var/log/redis/redis.server.log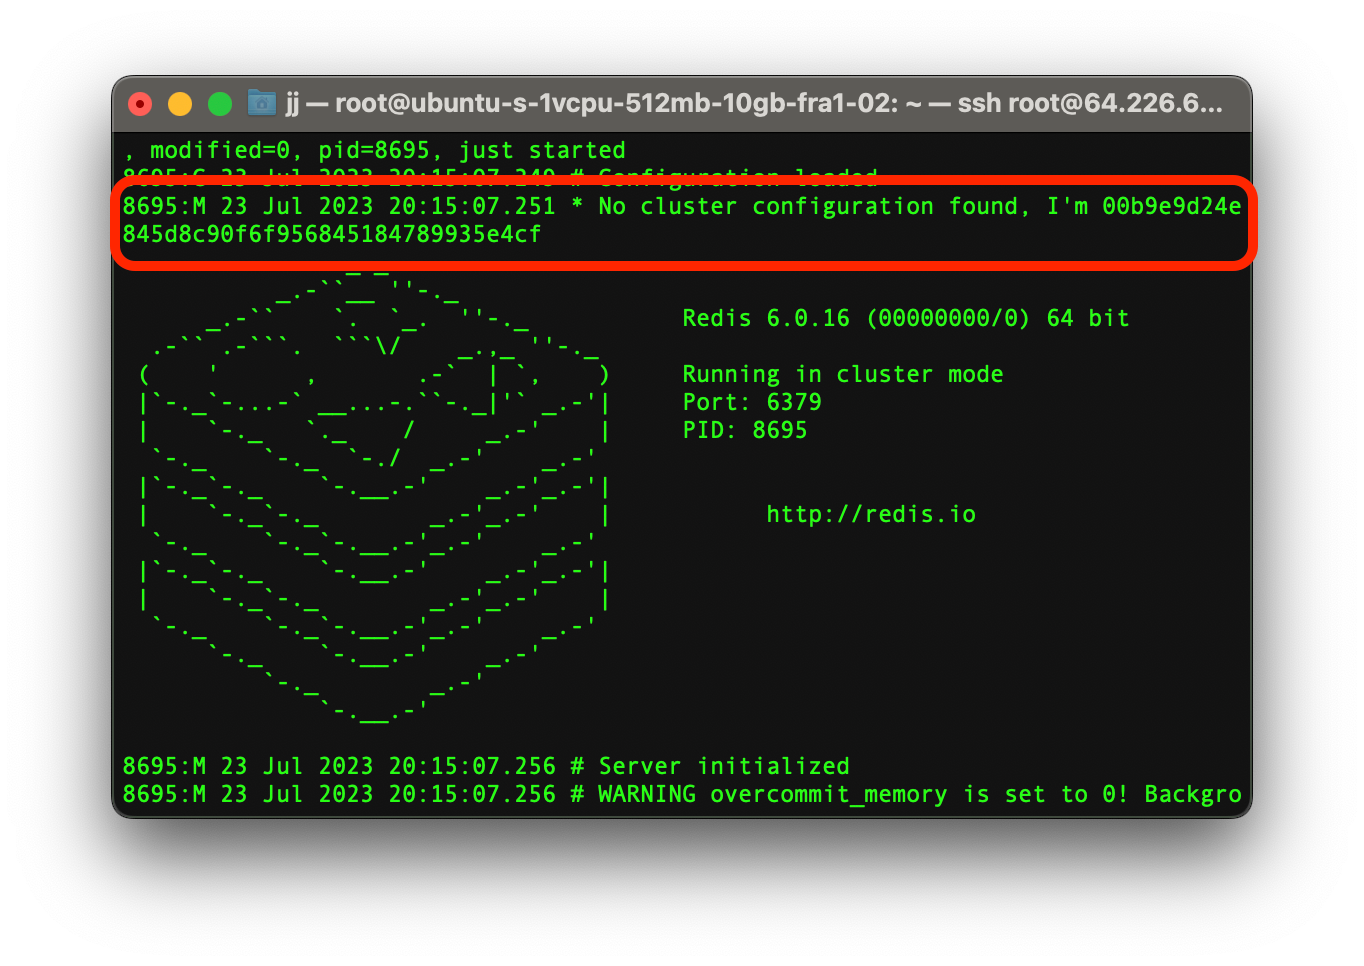
As you could see in the picture above that we have a node ID, which is a unique identifier for each node on a cluster.
Open Ports 6397 and 16379
Since each one of the Redis nodes would be talking via ports 6397 and 16379, it is necessary to open these ports for outside connection by typing the commands below:
sudo ufw allow 6379
sudo ufw allow 16379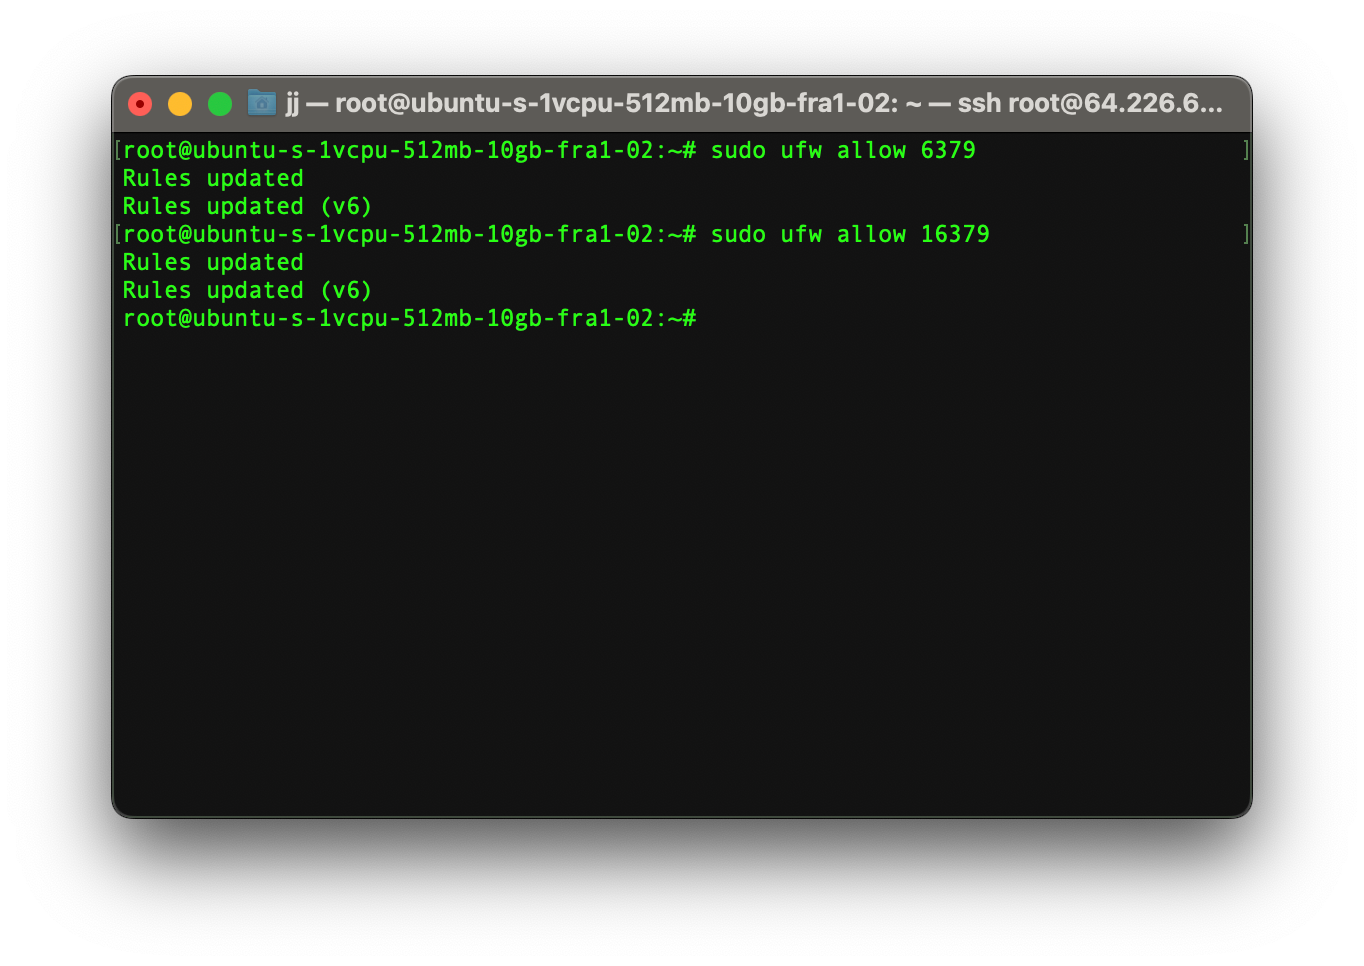
Create the Redis Cluster
The last step toward creating a Redis cluster is to use the redis-cli tool on a Redis node for creating a cluster. This command required all the private IP addresses of your nodes.
This command requires an even amount of IP addresses. The first few would be considered master nodes, and the rest would be considered replica nodes.
For example: If you have defined 6 IP addresses, then after running this command the first 3 would be considered master nodes and the remaining 3 would be replica nodes.
Note! You should only run this command on a single node.
redis-cli --cluster create [IP_ADDRESS_1]:6379 [IP_ADDRESS_2]:6379 [IP_ADDRESS_3]:6379 [IP_ADDRESS_4]:6379 [IP_ADDRESS_5]:6379 [IP_ADDRESS_6]:6379 --cluster-replicas 1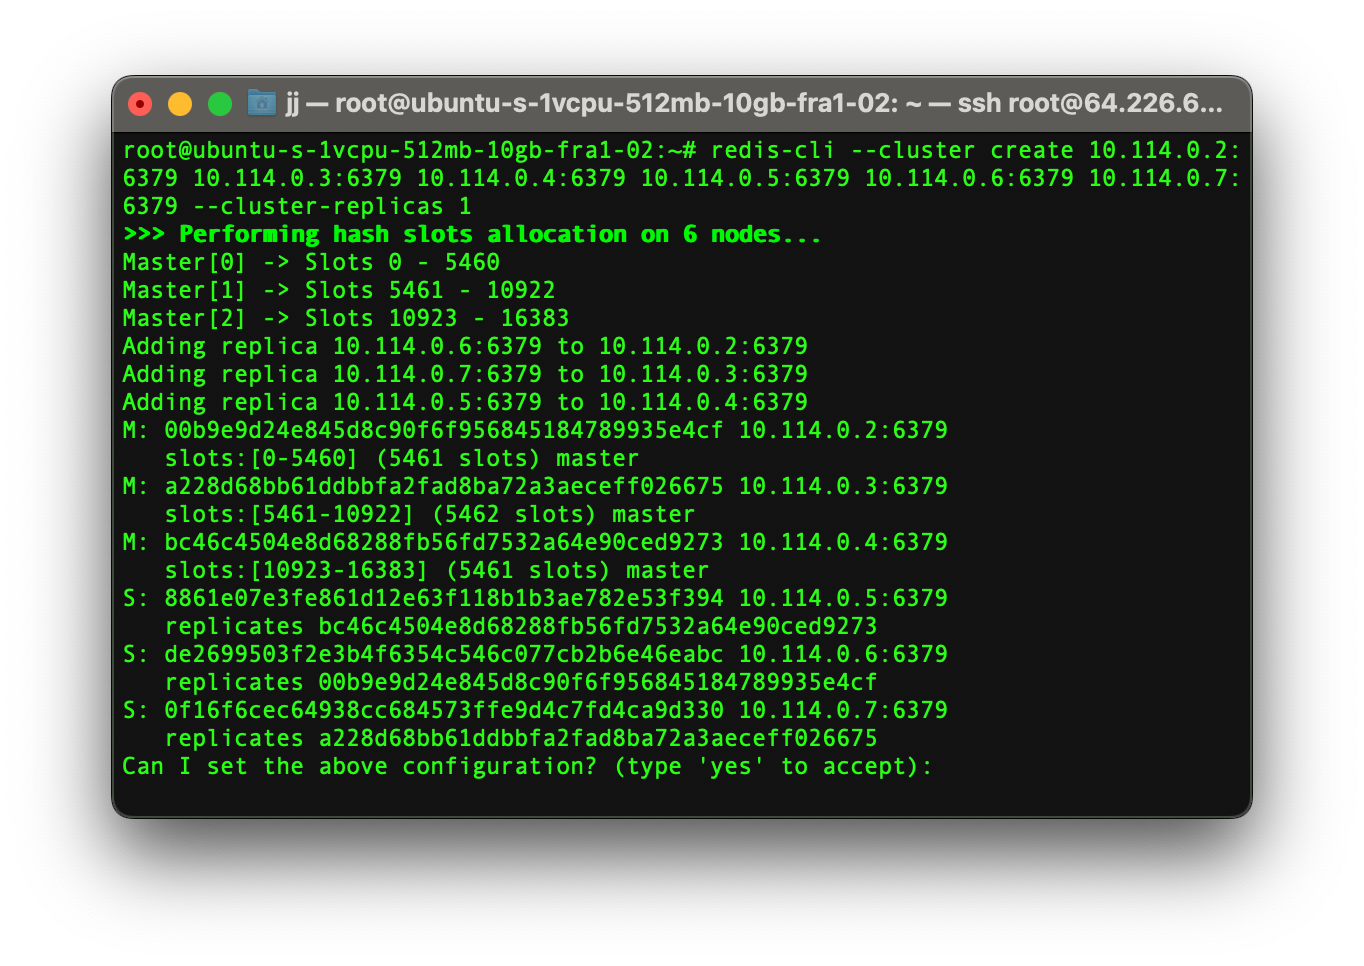
Done
Congratulations, you have now successfully set up a Redis cluster, which can handle unexpected load spikes and perform well under load.
Setting up Redis Cluster on a Local Machine
In this method, you can set up a Redis cluster on your local machine without the hassle of running 6 servers simultaneously.
For setting up this method you don’t need anything extra. All you need is a computer, which can run Redis.
See also: Redis hardware requirements
Install Redis on your Computer
The first step is to install Redis on your machine. Below you could find how to install Redis on different operating systems.
Mac
For installing Redis on Mac computers, write the code below on your terminal:
brew install redisWindows
Redis is not officially supported on Windows. However, you can install Redis by checking out the official documentation on the Redis website.
Linux
For installing Redis on Linux computers, write the code below on your terminal:
sudo apt install redis-serverSee also: ServerMania Dedicated Servers for Windows & Linux
Create Six Different Folders
After successfully installing Redis on your machine, you now need to create 6 different folders with their names being the name of the port they will run on.
Run the command below to create 6 different folders:
mkdir redis-cluster
cd redis-cluster
mkdir 7000 7001 7002 7003 7004 7005
Configure the redis.conf File
After successfully creating 6 different folders, create a file name redis.conf inside each one of the folders and add the code below to it. But be sure to change the port number on each one of the files.
For example: Change the port number to 7001 in folder 7001.
port [WRITE THE PORT NUMBER IN HERE]
cluster-enabled yes
cluster-config-file nodes.conf
cluster-node-timeout 5000
appendonly yes
Start Redis Locally on Each Folder
The next step after adding the redis.conf file on each folder is to start Redis locally using that file on each folder.
To run Redis locally, write the command below inside each folder:
redis-cluster ./redis.confCreate the Redis Cluster
The last step is to create the Redis cluster by running the command below.
redis-cli --cluster create 127.0.0.1:7000 127.0.0.1:7001
127.0.0.1:7002 127.0.0.1:7003 127.0.0.1:7004 127.0.0.1:7005
--cluster-replicas 1
Done
Congratulations, you have now set up a Redis cluster on your local machine.
Monitoring Redis Cluster Nodes
By running the command below you could monitor all the nodes. By running it you could see the node’s role, unique ID, IP address, etc.
redis-cli -h [PRIVATE_IP_ADDRESS_OF_THE_SERVER] -p 6379 cluster nodes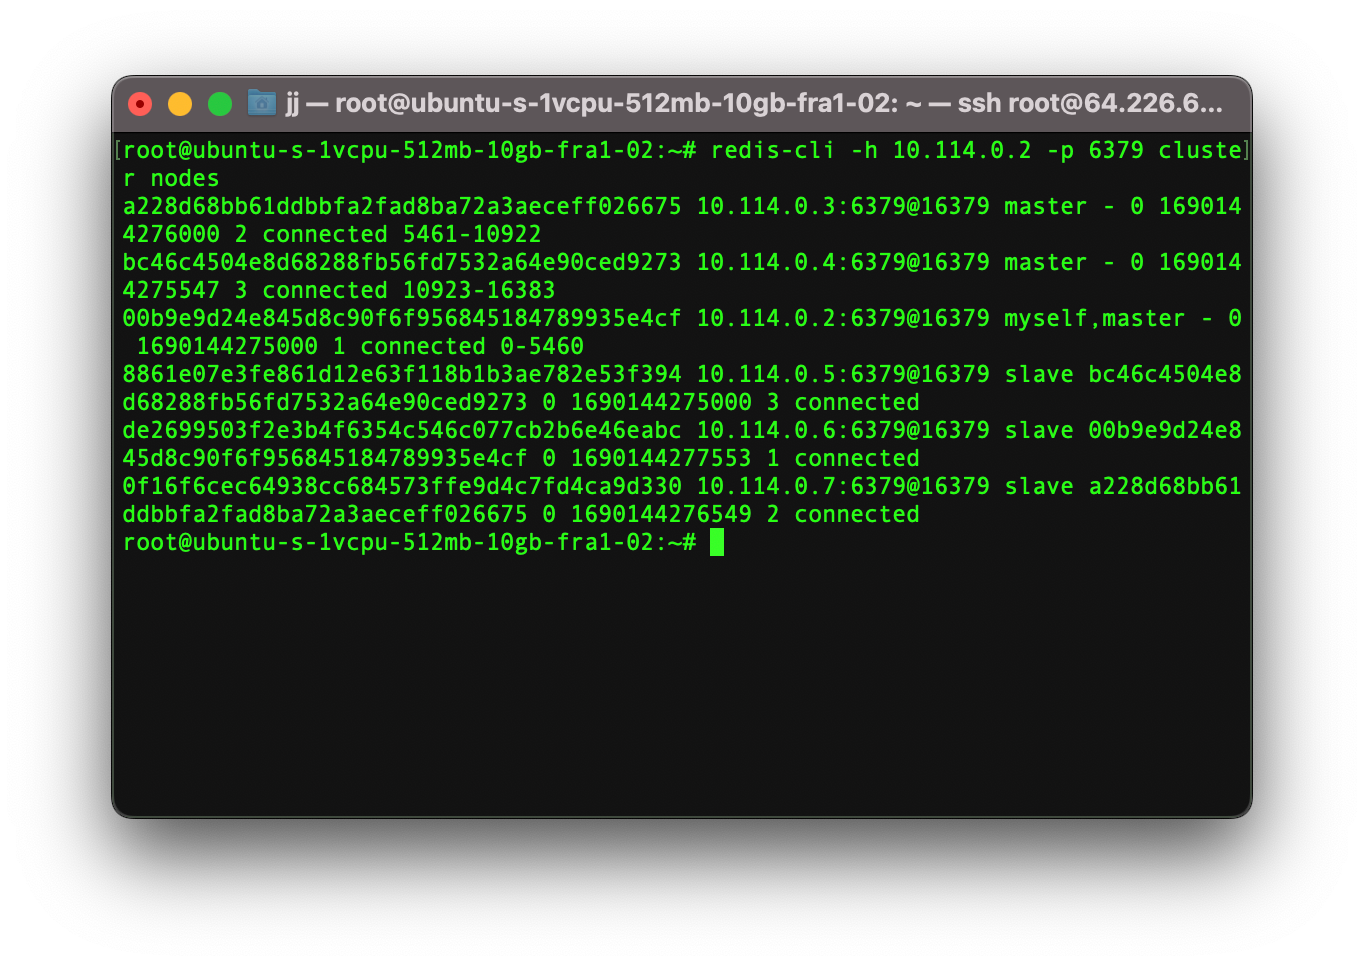
Interacting with Redis Cluster
You could also interact with the Redis cluster instances using the Redis CLI tool. By using it you could read, add, delete, or edit values on the Redis server.
To interact with the Redis cluster type the command below on any of the nodes:
redis-cli -c -p 6379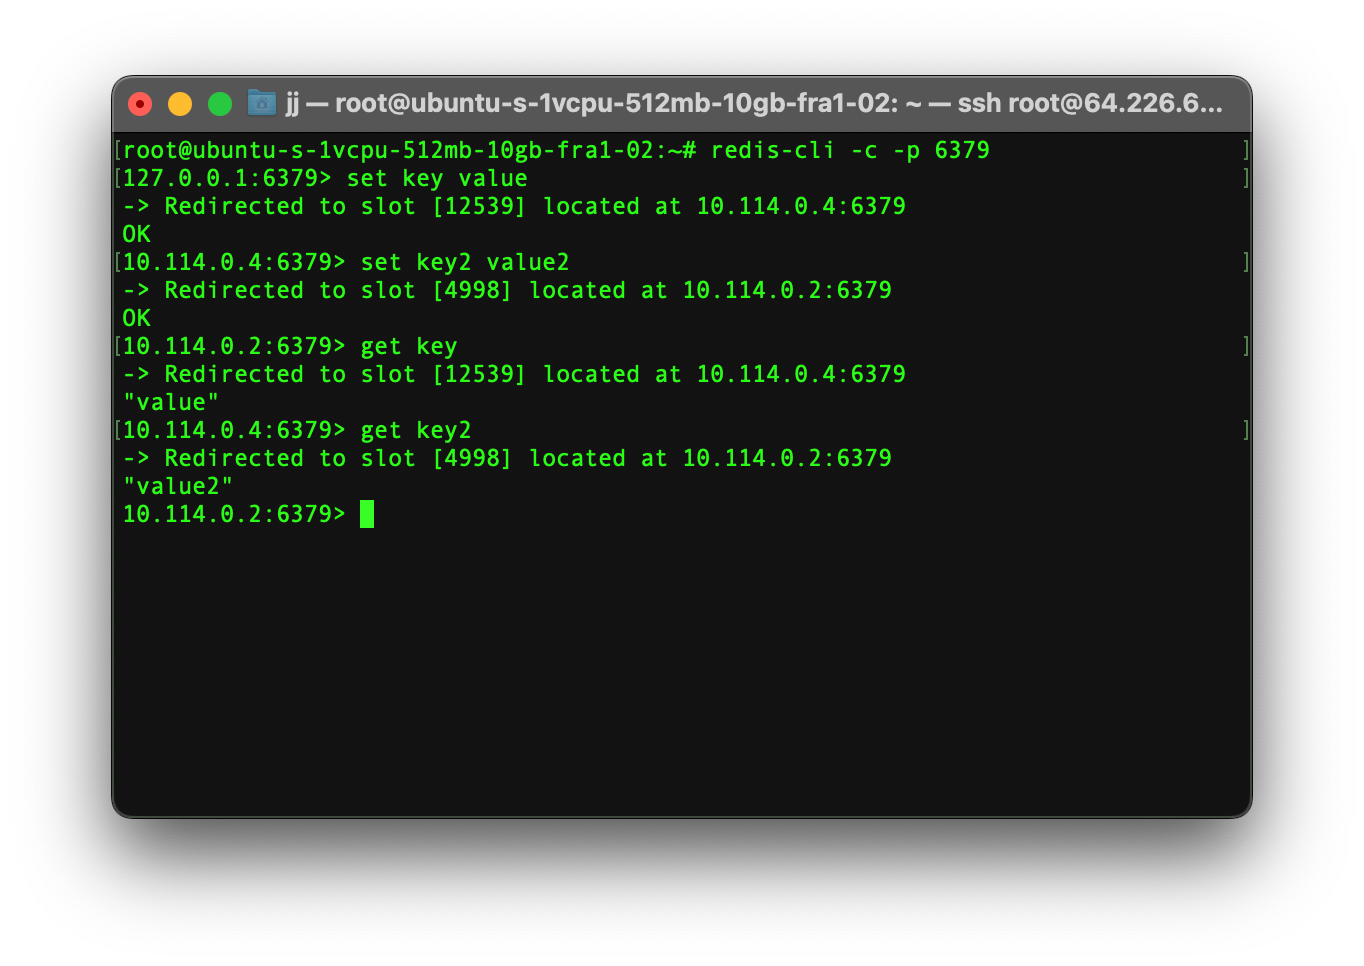
Redis Cluster Auto Failover
Redis Cluster automatically replaces the master node with a replica node if a failover happens.
To test this feature out you could stop one on your master server and then type the below command to check the new cluster configuration.
redis-cli -h [PRIVATE_IP_ADDRESS_OF_THE_SERVER] -p 6379 cluster nodes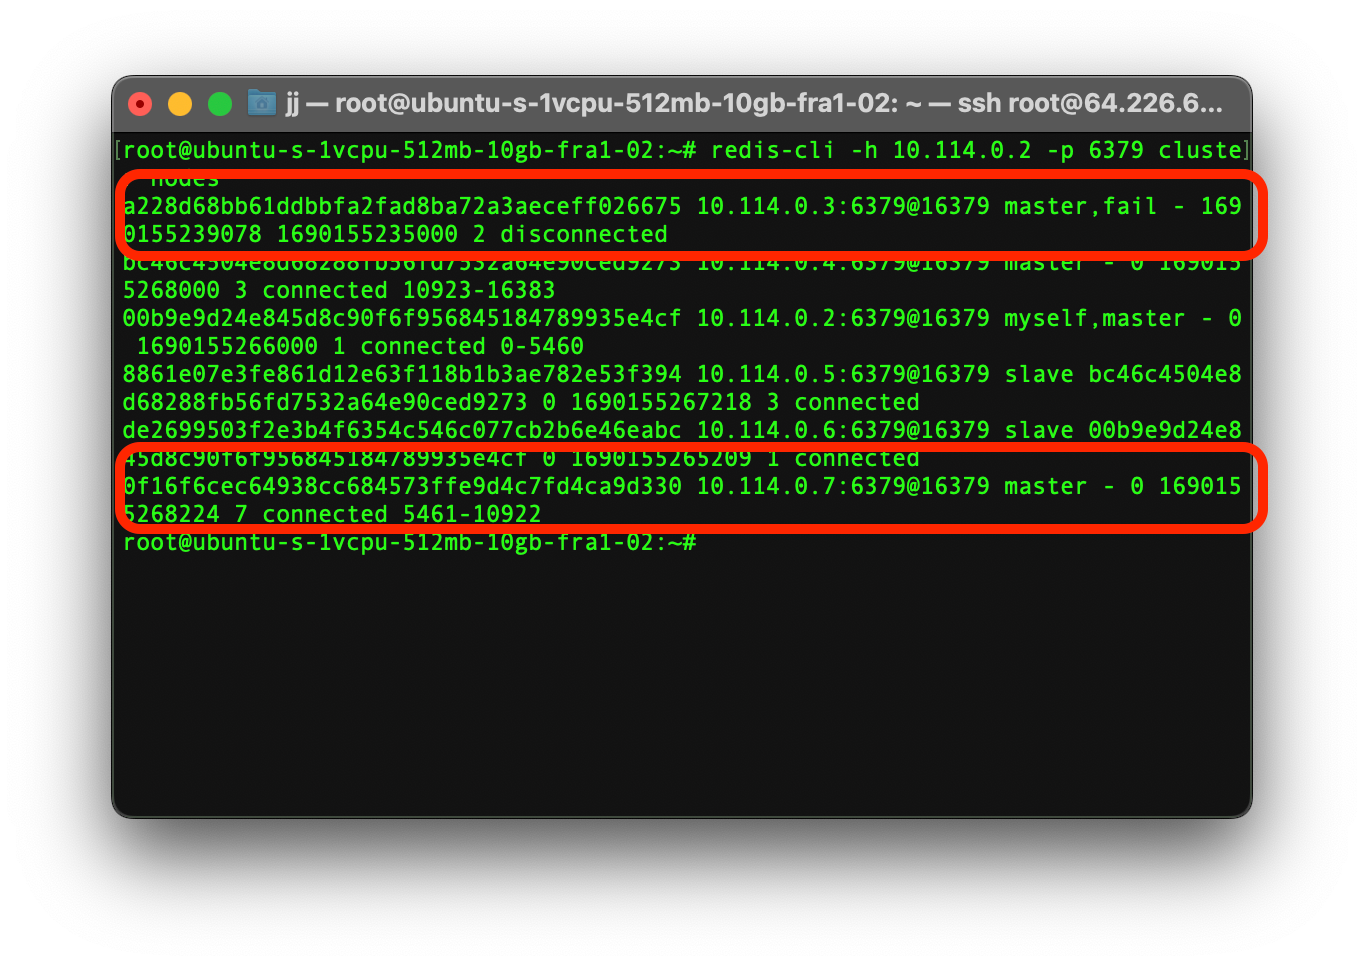
Conclusion
Redis Cluster is a necessary technology for large applications. If your stack is based on Redis and you need more performance and power, then the Redis cluster is the right choice for you.
By implementing the Redis cluster you lose some speed and data safety, which happens rarely but in return, you get some advantages like extra performance and high load balancing capacity.
Maintaining a Redis cluster can sometimes get overwhelming. If you need an easier solution for maintaining the Redis cluster, then check out our other database hosting solutions.
Next Steps
Now that you have acquired the skills and knowledge on how to set up a Redis Cluster, you can work with it and set it up to meet your needs. Additionally, you could go a step further and see the advanced configurations available for the Redis cluster.
If you are interested in more tutorials like this or need to learn more about hosting and cloud be sure to check out our knowledge base.
Was this page helpful?
About the author