How to Unzip Files in Linux

One of the simplest and most widely used methods for compressing files to minimize their size without compromising quality is zipping. Let us learn how to zip files and unzip zip files in Linux in a few steps.
Installing the Zip and Unzip Packages
You will need the zip and unzip packages to compress and decompress data into ZIP files on Linux. You will need to install these packages with the apt package manager and Linux distributions, such as Fedora, CentOS, or Debian-based ones (like Ubuntu or Kali Linux).
The first step is to launch the terminal application on your desktop, then type the commands below. Installing the zip and unzip packages will vary based on your Linux system.
The sudo command is used at the start of each of the following commands to manage elevated permissions.
Debian
To install zip and unzip packages on Debian, you will use the apt package manager with the commands below.
sudo apt install zip # Installs the zip package
sudo apt install unzip # Installs the unzip package
Fedora and CentOS
To install the zip and unzip packages on Fedora and CentOS, you will use the yum package management tool with the commands below.
sudo yum install zip # Installs the zip package
sudo yum install unzip # Installs the unzip package
Read more on how to connect remote ssh on Linux

How to Compress Files with the Zip Package
A ZIP file is a data container containing one or more compressed files or directories. To compress files with the Zip package, you will need to run the zip command line.
Zipping Files Via Command Line
Zipping files via the command line is a widely used method of compressing files on Linux. The first thing to do is to launch a terminal and create a directory called ~/mydir.
Then, in the /mydir, create two files with the names test1 and test2 and a folder with the name myfolder. Follow the following steps and commands below to continue.
Step 1: Create the mydir directory by running the mkdir command below.
mkdir mydir
Step 2: Use the commands below to create (touch) the test1.txt, test2.txt files and (mkdir) the myfolder directory.
touch ~/mydir/test1.txt
touch ~/mydir/test2.txt
mkdir myfolder
Step 3: Run the following command to list (ls) the working directory’s (/mydir) contents.

Step 4: Compress the /mydir folder by executing the following command after creating the required files and directories. The zip command below searches all files and subdirectories in the mydir directory recursively (-r). After that process, those files will be compressed into a ZIP file called newdir.zip.
zip -r newdir.zip mydir

Step 5: To compress the ~/mydir/test1.txt, ~/mydir/test2.txt, and ~/mydir/myfolder directories, you will need to run the command below. The following zip command creates a ZIP file called newfiles.zip by successively (-r) searching for all test1.txt, test2.txt, and myfolder files and folders in the working directory (mydir).
cd mydir
zip -r newfiles test1.txt test2.txt myfolder
The zip file’s.zip extension can be omitted because it will be automatically added once the compression is finished. In the example mentioned above, the zip command will produce a ZIP file named newfiles.zip rather than just newfiles.

To keep the compressed file, pass the -k option to the command:
gzip -dk file.gz
How to Add New Files to an Existing Zip File
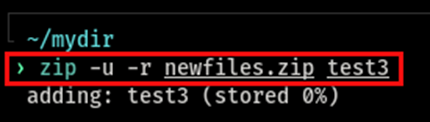
Run the command below to add a new file in the newfiles.zip ZIP archive. The program below recursively (-r) searches through all files in the /mydir directory, adds them to the ZIP package, and updates (-u) the existing ZIP file package (newfiles.zip).
zip -u -r newfiles.zip test3
How to Delete Files from a Zip File
Run the zip command with the option to delete (-d) the test3 file from the (newfiles.zip) ZIP file to remove a file from the ZIP archive.
zip -d newfiles.zip test3


How to Decompress Files with the Unzip Package
There are two methods to decompress files using the unzip package. You can do this via Command-Line and GUI.
Unzipping Files via Command Line
Open your terminal and enter the following command to Linux unzip a ZIP file. The (newdir.zip) ZIP file’s contents can be unzipped using the command below. The (newdir.zip) ZIP file’s default extraction location for its contents is (/mydir).
If you want to extract the contents of a ZIP file into a directory other than the working directory, you must specify the -d option and the destination directory;
for example: unzip newdir.zip -d anotherdir.
unzip newdir.zip

How to Unzip a Zip File to a Different Directory
Use the -d switch to unzip a ZIP file into a different directory than the one it is currently in:
unzip filename.zip -d /path/to/directory
For instance, you would use the following command to unzip the WordPress archive latest.zip to the /var/www/ directory:
sudo unzip latest.zip -d /var/www
We are using sudo in the command above because the account we are signed in as typically does not have write permissions to the /var/www directory. When decompressing ZIP .gz files with sudo, the user root owns the extracted files and folders.
Unzipping a Password Zip File
Password-protected files can be unzipped by using the unzip command with the -P option and the password:
unzip -P PasswOrd filename.zip
Passwords should never be typed in the command line since it is unsafe. Extracting the file without entering the password is a more secure approach. You will be asked to input the password if the ZIP gz file is encrypted.
unzip filename.zip
archive: filename.zip
[filename.zip] file.txt password:
Unzip will use it for all encrypted files if the password is entered correctly.
How to Unzip Multiple Zip Files
Use regular expressions to cross multiple files. For instance, if you have several ZIP files in your current working directory, you can unzip all of the files with only one command:
unzip ‘*.zip’
The *.zip is enclosed in single quotes. The shell would extend the wildcard character if you failed to quote the argument, resulting in an error.
Conclusion
During this tutorial, you have learned how to zip (compress) and unzip (decompress) files and automate the zipping of files in Linux. Contact ServerMania for your Linux server hosting and learn more about Linux server costs.
Was this page helpful?
About the author

