Proxmox Virtual Environment Installation Guide

Proxmox has been an essential tool for most businesses and individuals looking for a robust hypervisor solution. It is an easy way to divide your physical or dedicated server into multiple virtual machines and containers.
If you want to know more about Proxmox virtual environment or need to set up a Proxmox virtual environment, then you are at the right place. In this tutorial, we will guide you on how to install the Proxmox virtual environment.
What is Proxmox Virtual Environment
Proxmox VE (Virtual Environment) stands as a comprehensive, open-source solution designed for proficient server administration in enterprise-level virtualization. It seamlessly combines the power of the KVM hypervisor and Linux Containers (LXC) with cutting-edge software-defined storage and networking capabilities, all unified on a single platform. This robust system also offers an intuitive web-based interface, empowering users to effortlessly oversee virtual machines and containers, ensure high availability in clustered environments, and leverage integrated disaster recovery tools for enhanced operational resilience.
Why use Proxmox Virtual Environment
Proxmox VE is an open-source and easy-to-use hypervisor that can be deployed quickly to any type of server. Its ease of use and availability are the key reasons why most people love it. It is not just used by companies but also by people who want to set up a hypervisor on their home server.
Proxmox is a direct competitor to Hyper-V and VMware, but Proxmox is much easier and much simpler to set up. It also has a beautiful GUI (graphical user interface) that helps you deploy, edit, and monitor VMs and containers.
See also: Hyper-V vs. VMware: Which One Should You Choose?
Before we Start
Before you start installing Proxmox, ensure that you have a dedicated server or hardware on which you want to install Proxmox VE. Make sure the server meets the hardware requirements for virtualization, including CPU support for virtualization (VT-x/AMD-V) and sufficient RAM and storage.
If you don’t yet have a dedicated server, consider renting a fast and reliable dedicated server from ServerMania.
See Also: (Live Webinar) Meet ServerMania: Transform Your Server Hosting Experience
Recommended Hardware
These hardware recommendations will help to ensure a smooth and reliable Proxmox VE installation and operation.
- CPU Requirements: You’ll need an Intel EMT64 or AMD64 processor with support for the Intel VT or AMD-V CPU flag.
- Memory Requirements: A minimum of 2 GB of RAM is needed for the Proxmox VE operating system and its services. Additionally, allocate designated memory for virtual guests. If you plan to use Ceph or ZFS for storage, you’ll need approximately 1 GB of memory for every TB of storage used.
- Storage: Opt for fast and redundant storage, with SSD disks providing the best performance.
Setup up a Proxmox Virtual Environment
Follow the steps below to setup a Proxmox VE:
Download ISO image
In order to download the Proxmox VE ISO image file simply follow the steps below
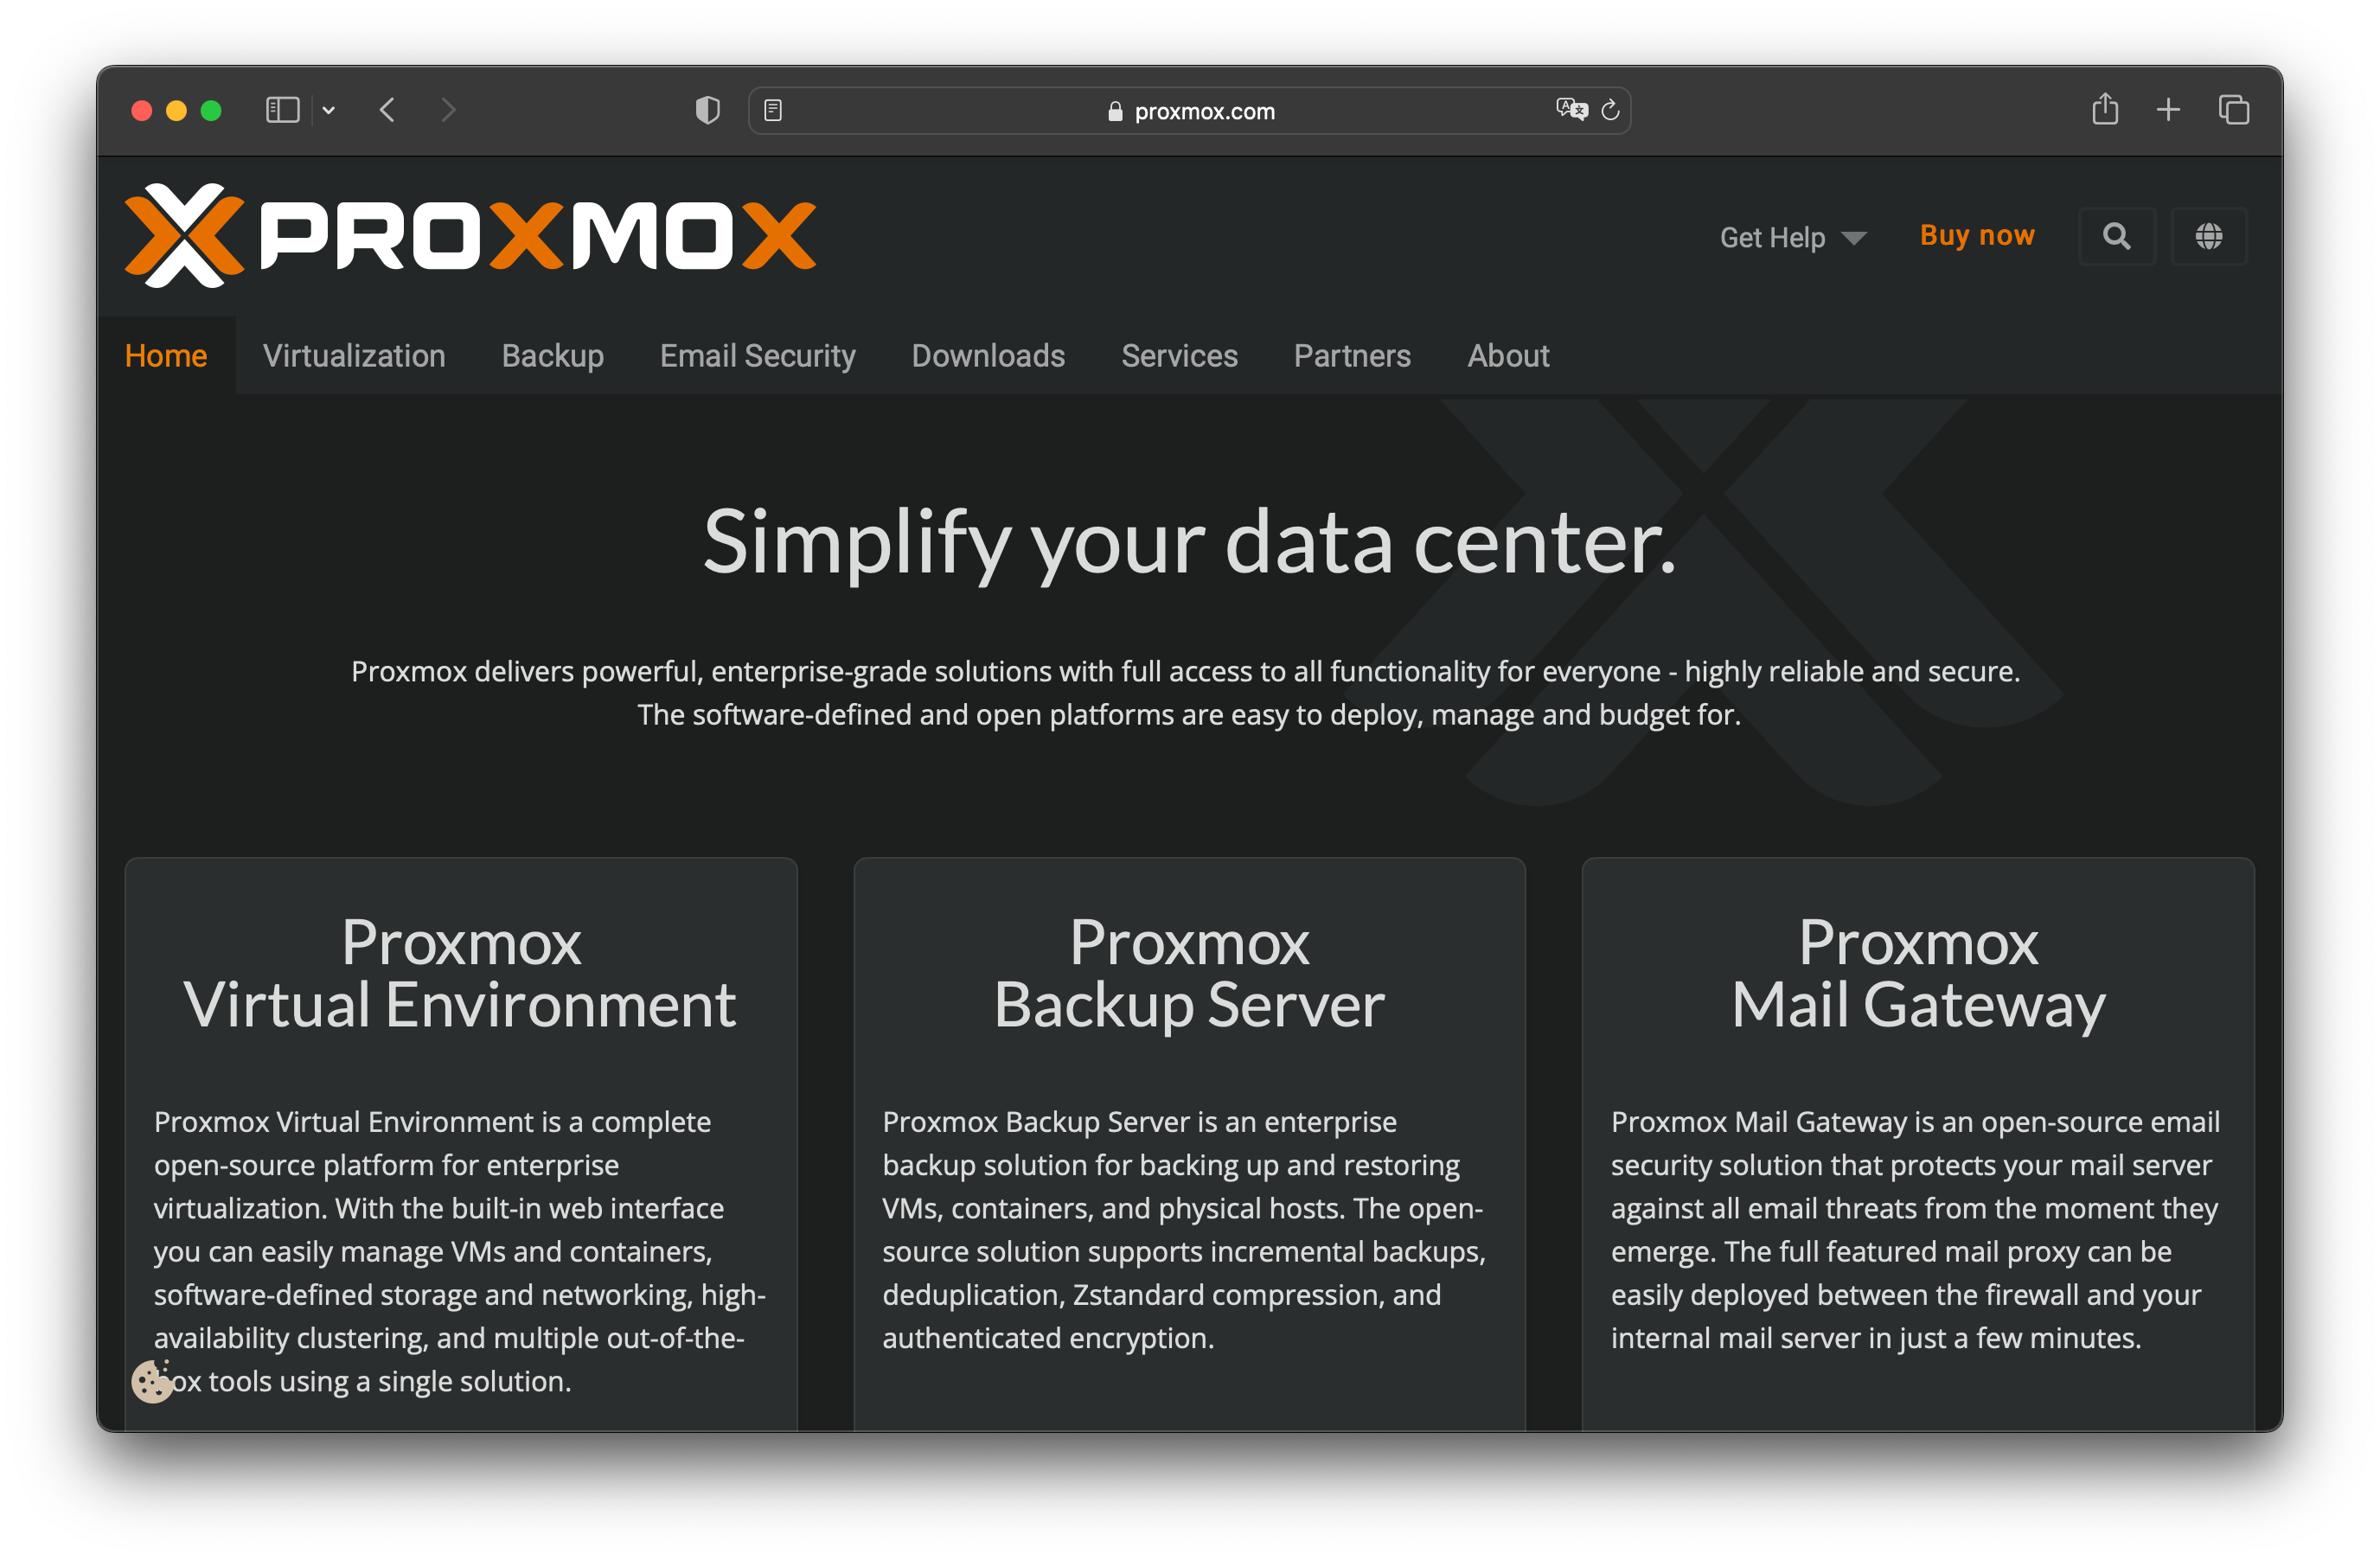
Step 1: Access the Proxmox Website. In the address bar of your web browser, type the URL for the official Proxmox website: https://www.proxmox.com, and press Enter to go to the site.
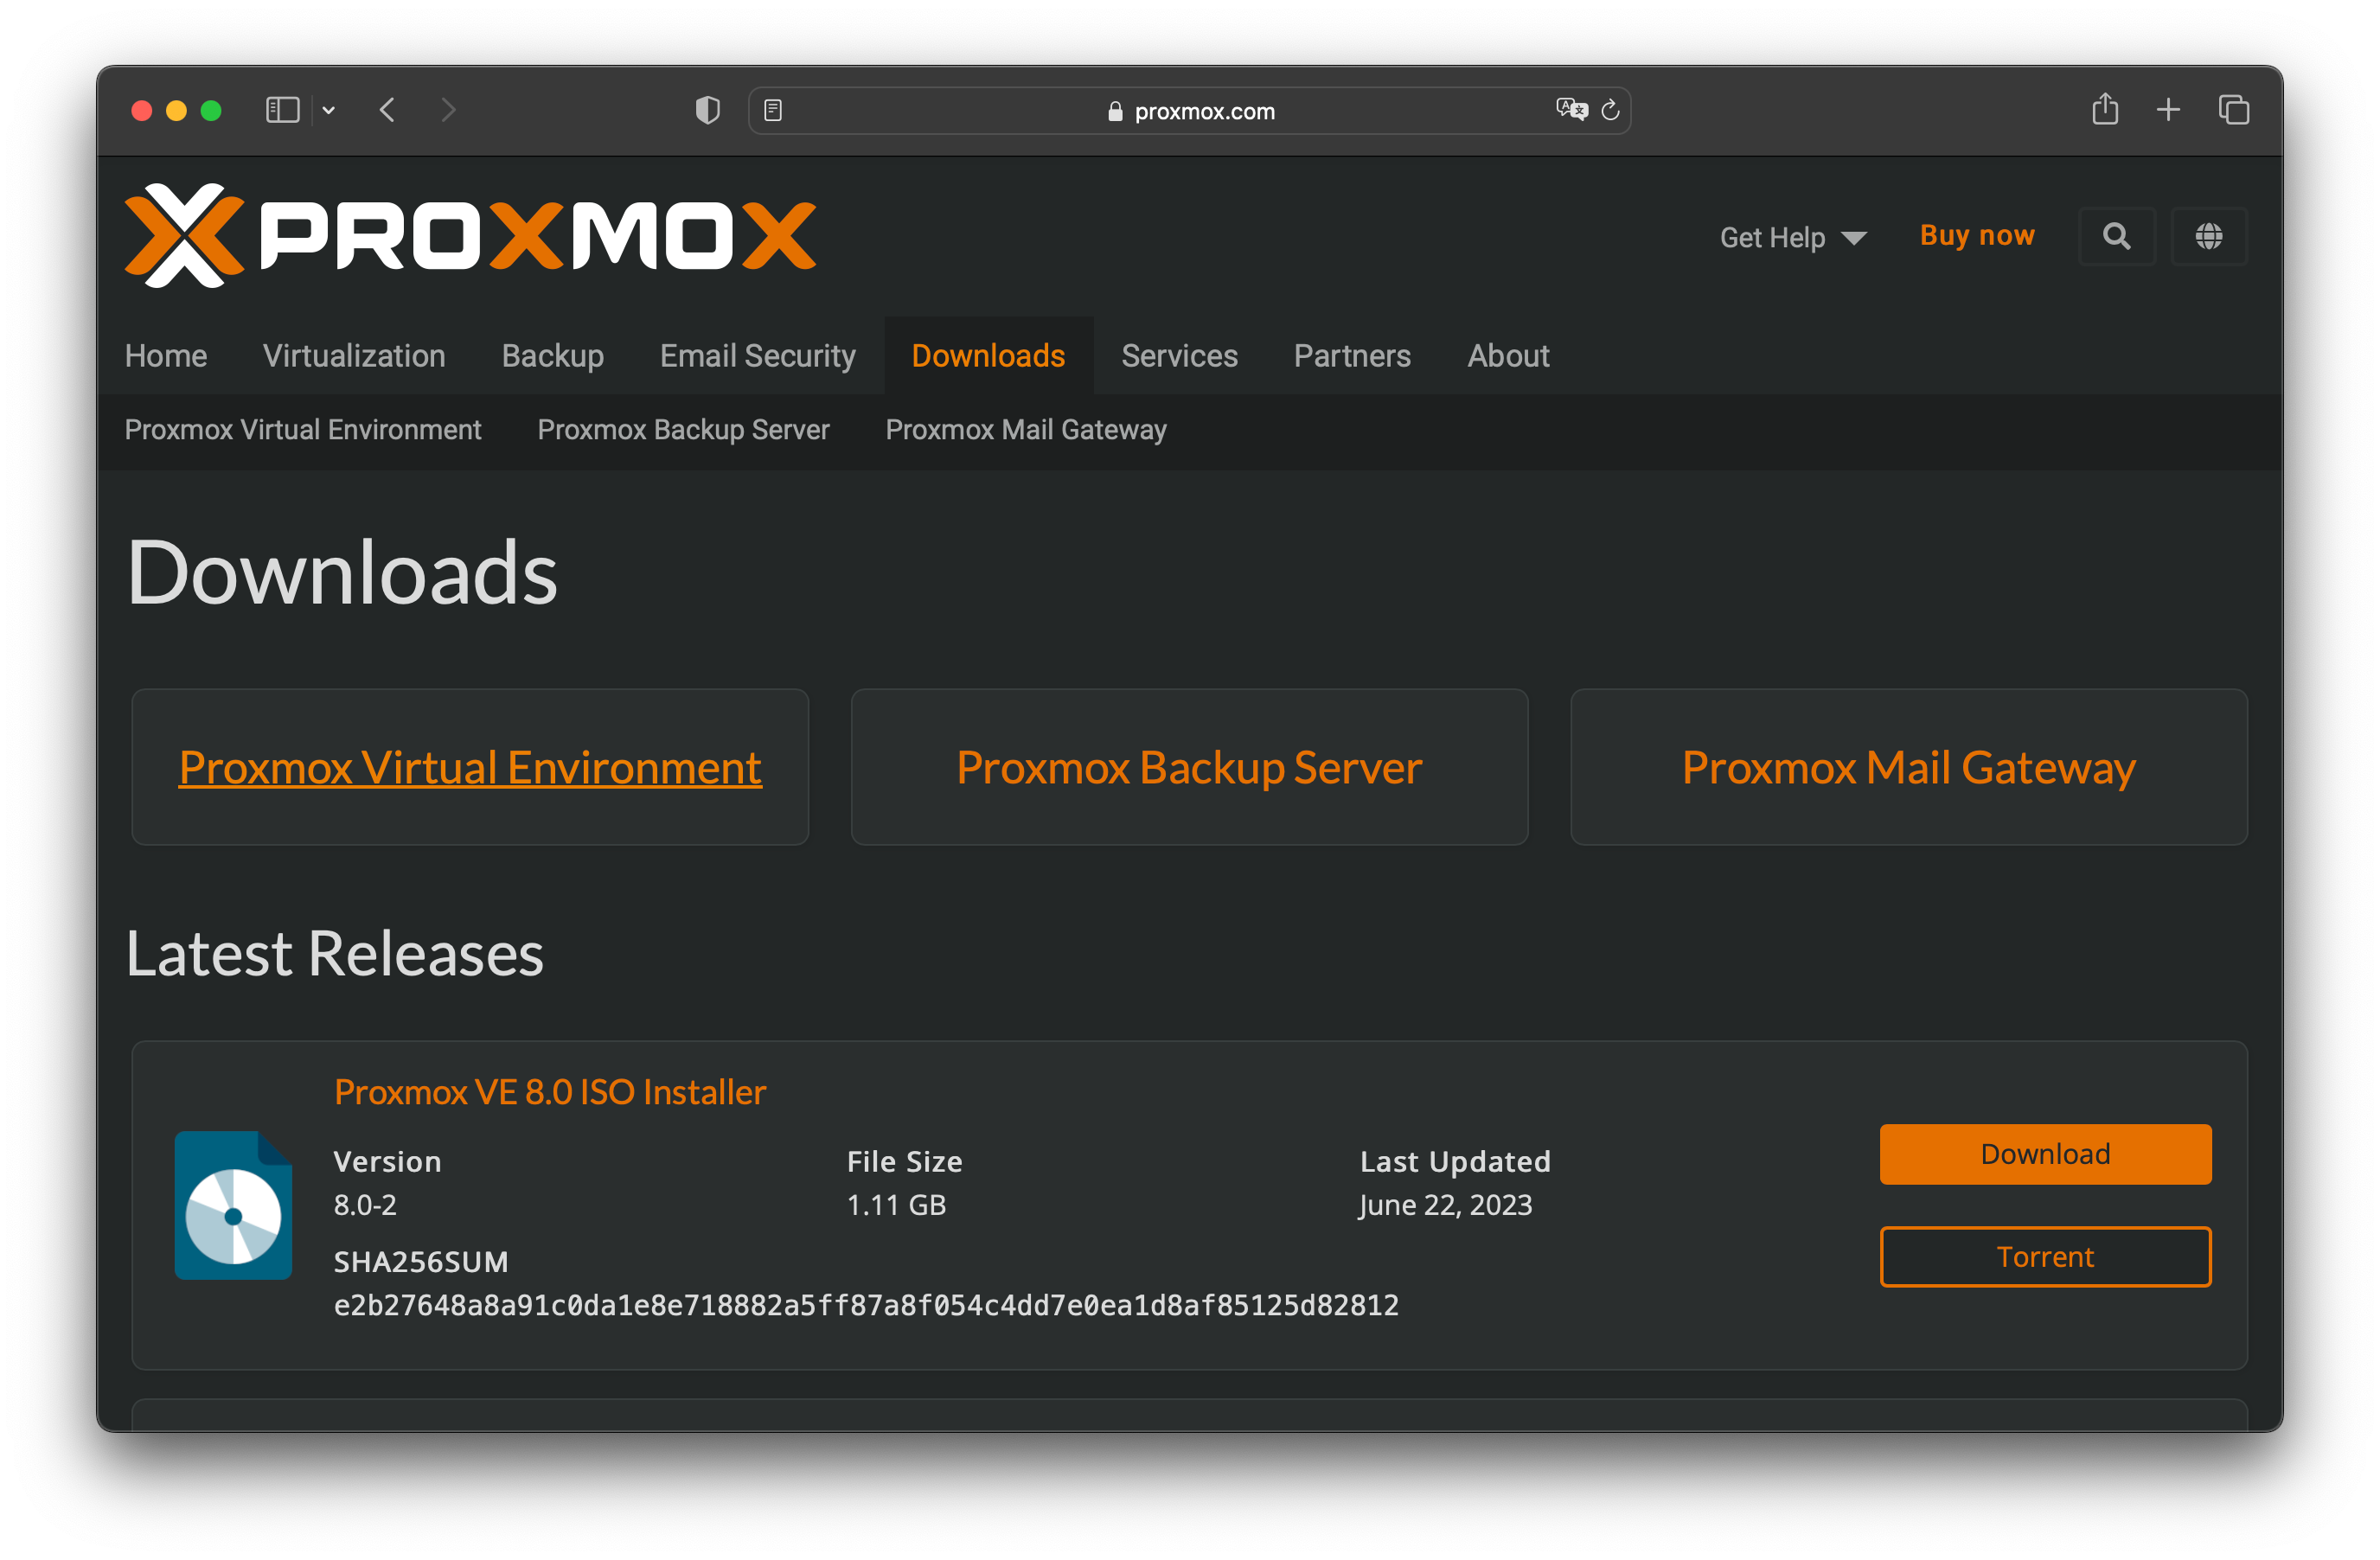
Step 2: Navigate to the Downloads Section. Once you’re on the Proxmox website, explore the site’s menu or homepage to find the ‘Downloads’ section. Typically, this section is in the main menu or can be found on the homepage.

Step 3: Download the ISO Image. Choose the Proxmox VE ISO version that you want to download. Typically, the stable release is the most suitable choice for most users.
Note: Ensure that you only download an .ISO file!
Prepare Installation Media
The next step is to prepare an installation media, typically in a USB drive to boot your server with the newly downloaded ISO image.
MacOS
If you are using macOS, then download Balina Etcher to easily prepare the installation media.
Windows
If you are using Windows, then download Rufus to easily prepare the installation media.
See also: Windows server hosting
Linux
On a Unix-like operating system use the dd command to copy the ISO image to the USB flash drive. First, find the correct device name of the USB flash drive (see below). Then run the dd command.
Note: make sure you have at least 1 GB of available memory on your drive!
dd bs=1M conv=fdatasync if=[ISO_IMAGE_LOCATION] of=/dev/[DEVCE_NAME]How to find the desired USB drive name?
You can determine the name of the USB flash drive using two methods. The initial approach involves comparing the final lines of the dmesg command output before and after connecting the flash drive. The alternative method is to compare the results obtained from executing the lsblk command. To do this, open a terminal and follow these steps.
lsblkThen, plug in your USB flash drive and run the command again:
lsblkA new device will appear. This is the one you want to use. To be on the extra safe side check if the reported size matches the size of your USB flash drive.
See also: Debian server hosting
Boot from USB/CD/DVD
To boot from an external device enter your USB/DC/DVD and press the appropriate key (usually F2, F12, Delete, or ESC) to access the BIOS or UEFI settings.
In the BIOS or UEFI settings, navigate to the boot menu and select the bootable USB drive or DVD as the first boot option. This will cause the computer to boot from the external device.
Install Proxmox VE
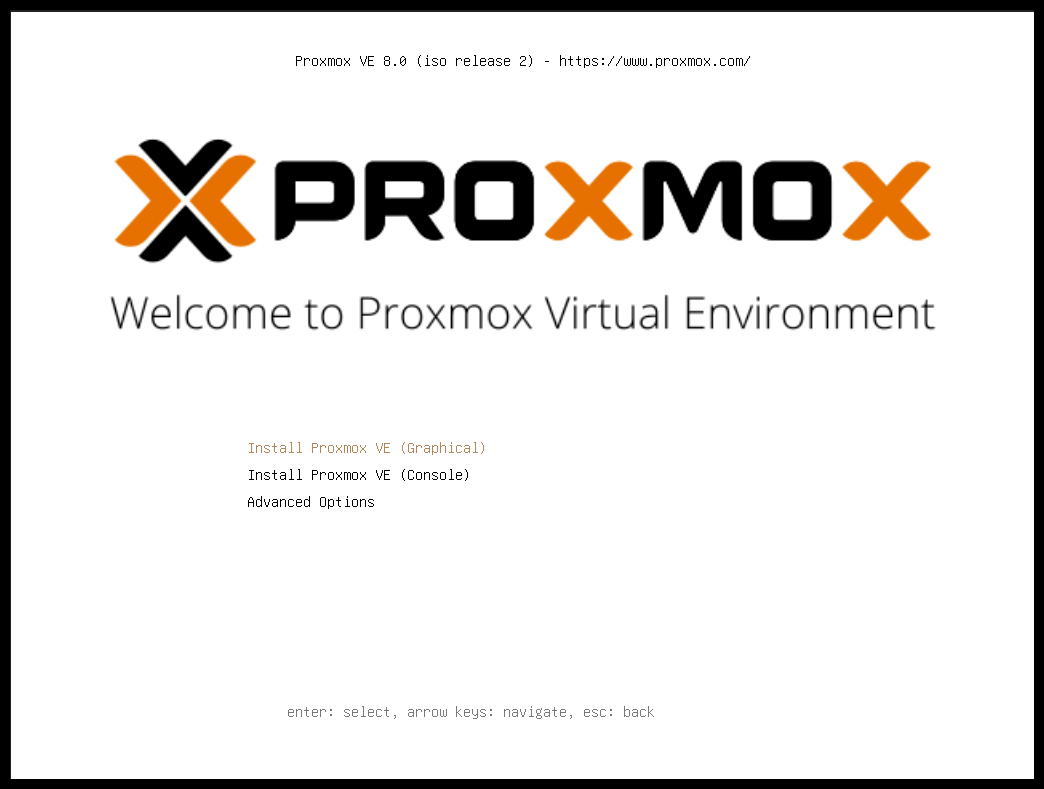
Step 1: After booting up from the USB device, you should see the installation wizard with three options. Choose Install Proxmox VE (Graphical) to start the installation process.
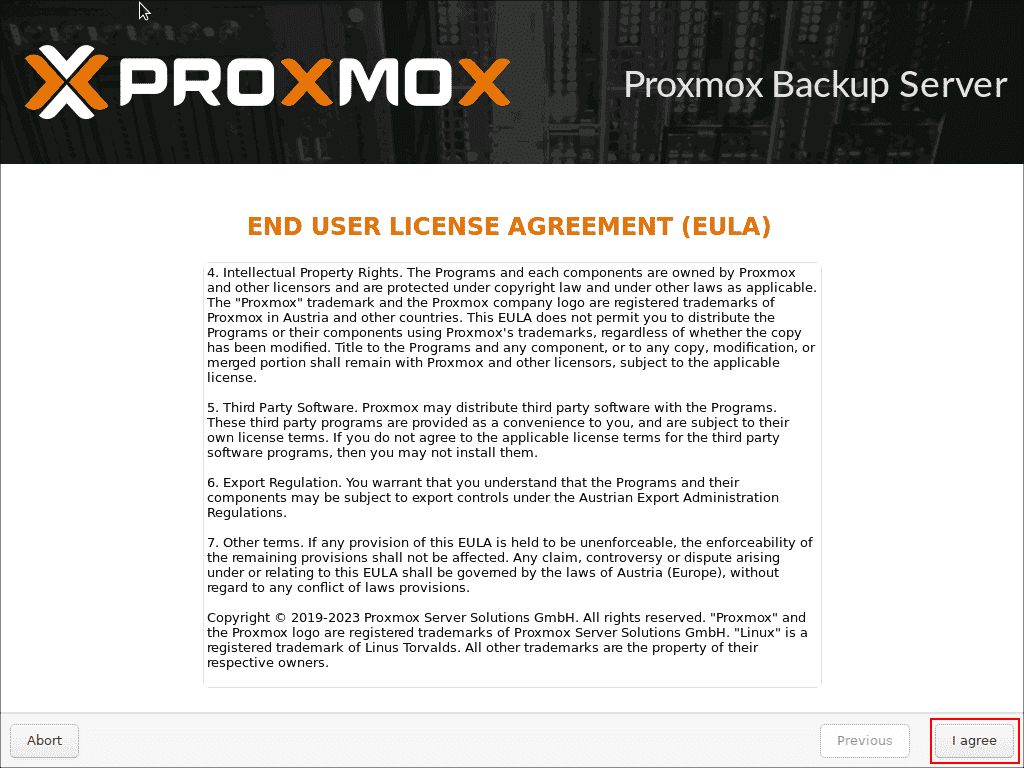
Step 2: Click the agree button to agree to the End User License Agreement (EULA).
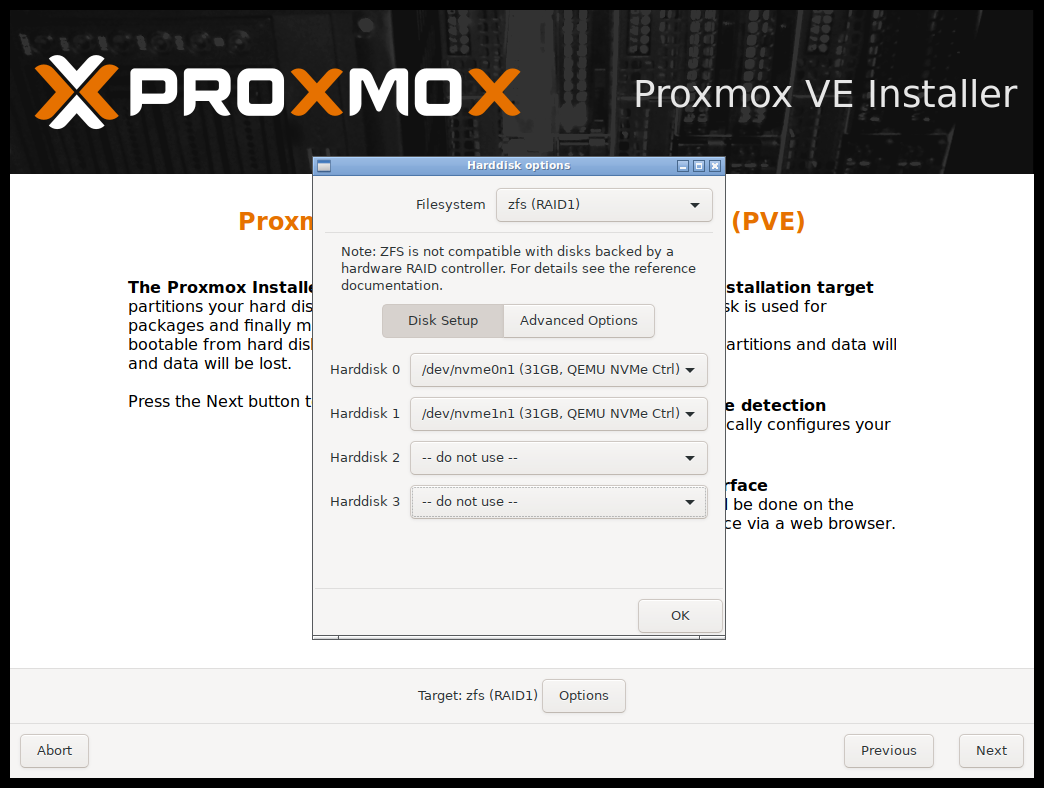
Step 3: At this stage, you need to specify in which disk it should be installed. But if you have a single hard disk then it would be chosen automatically.
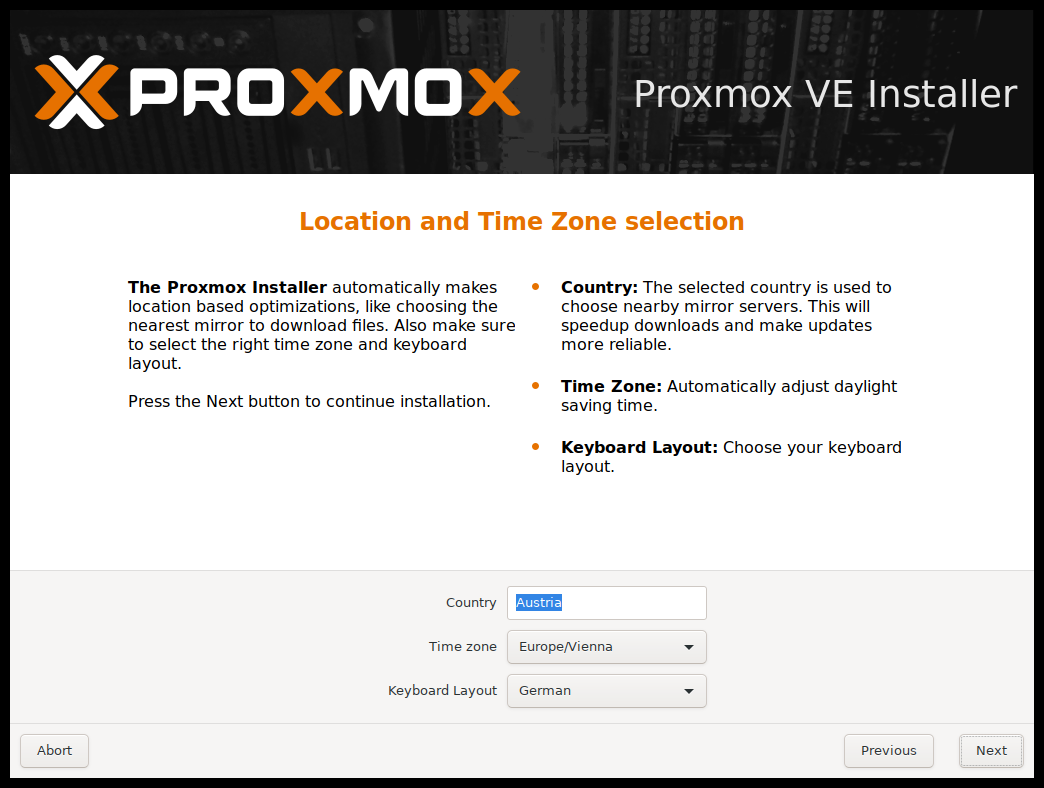
Step 4: Here you need to specifyCountry, Time zone, and Keyboard layout.
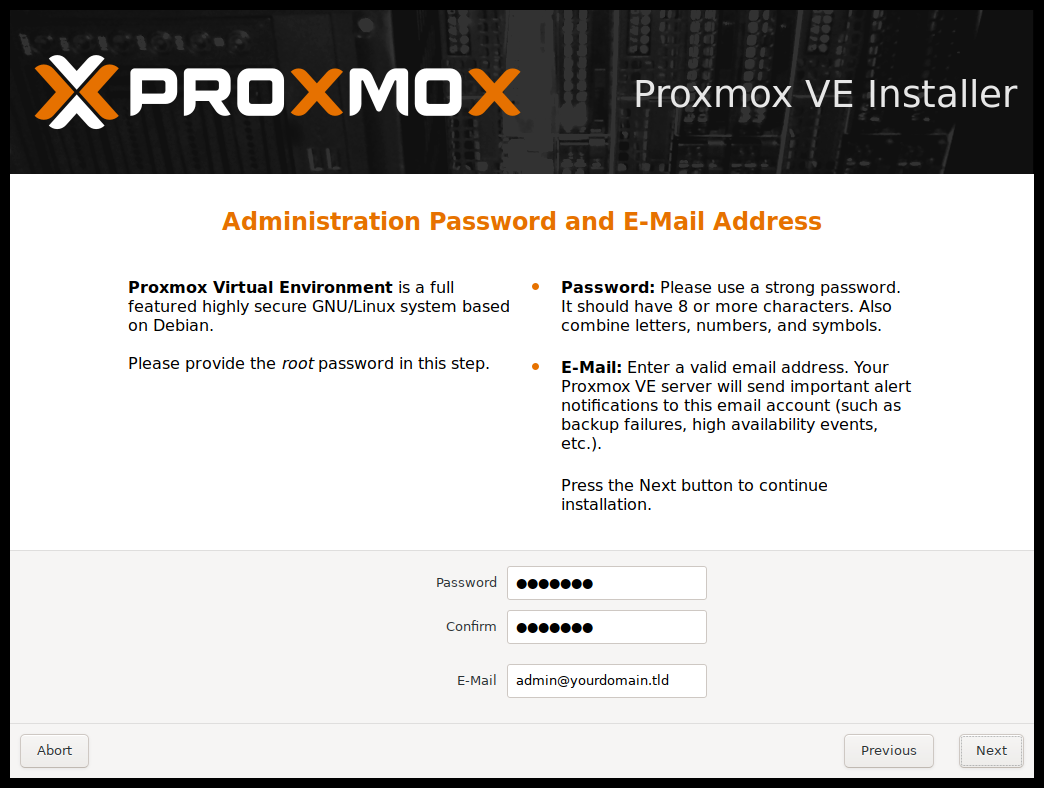
Step 5: At this step, you need to enter an admin password with a minimum of 8 characters, which should be a combination of letters, symbols, and numbers for better security. Also, you need to enter your emails as well.
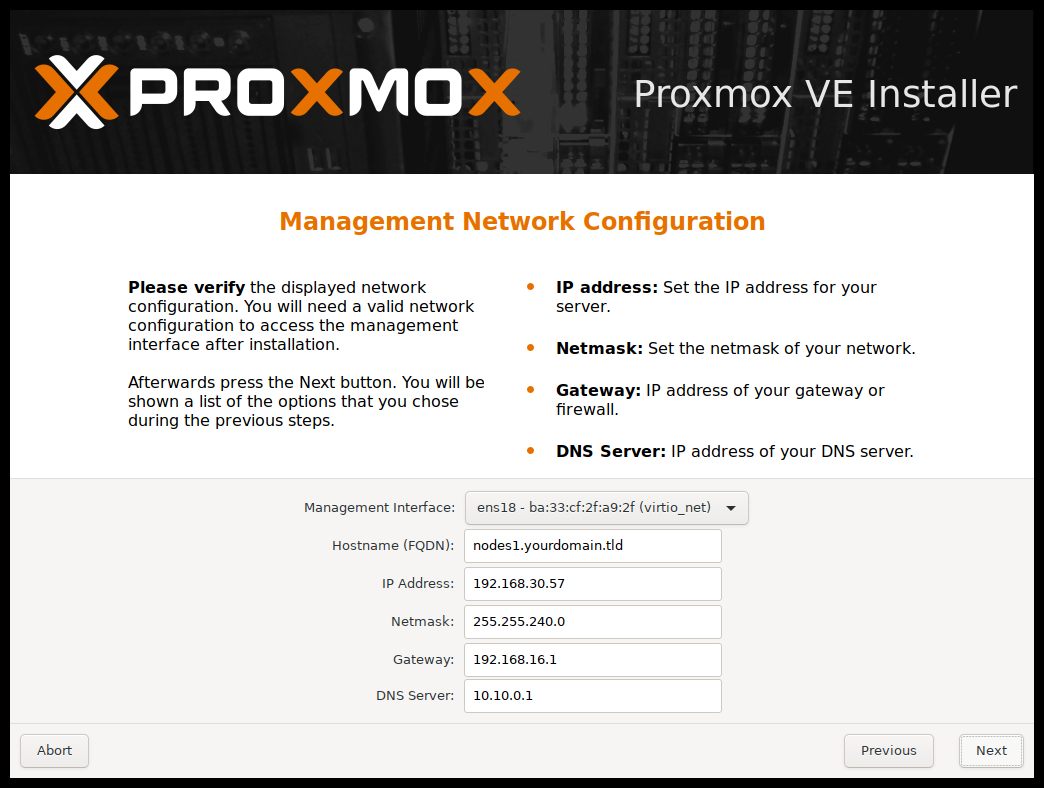
Step 6: In the management network configuration part you will see these:
- Management interface
- Host name
- IP address (if DHCP is enabled)
If you agree with it, then click continue.
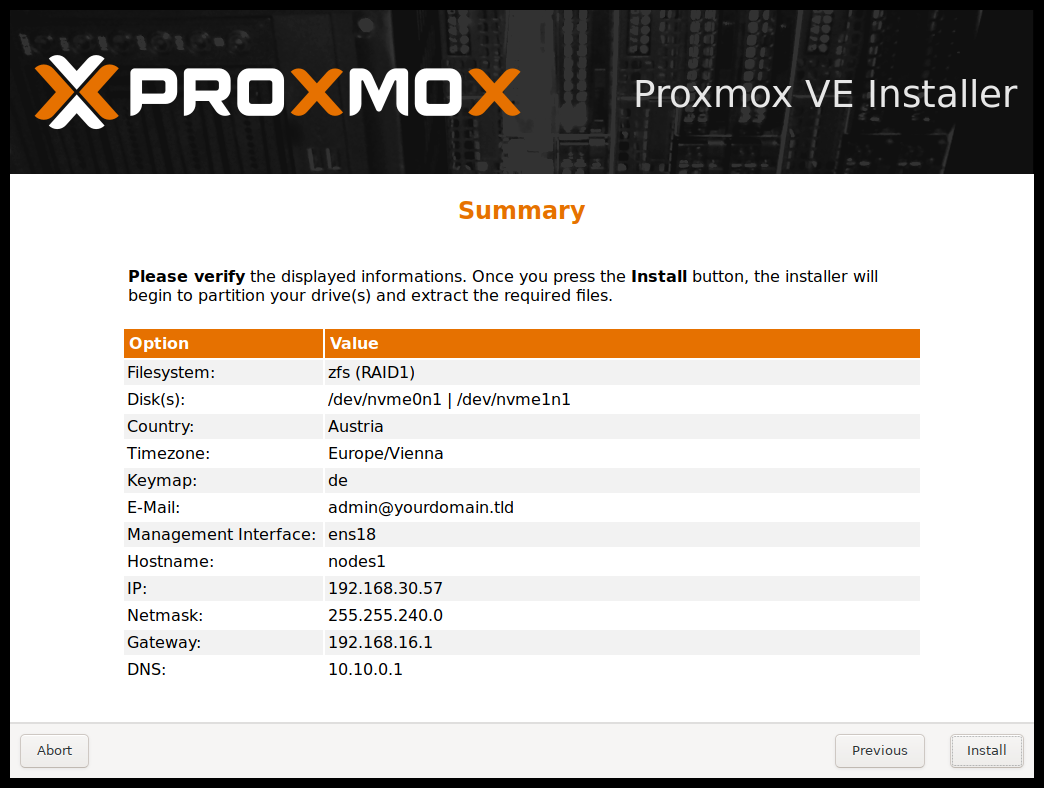
Step 7: The final step is to see the summary and check whether everything is right. If not, then click previous and correct them. It is also recommended to tick the Automatically reboot after successful installation. At last click install.
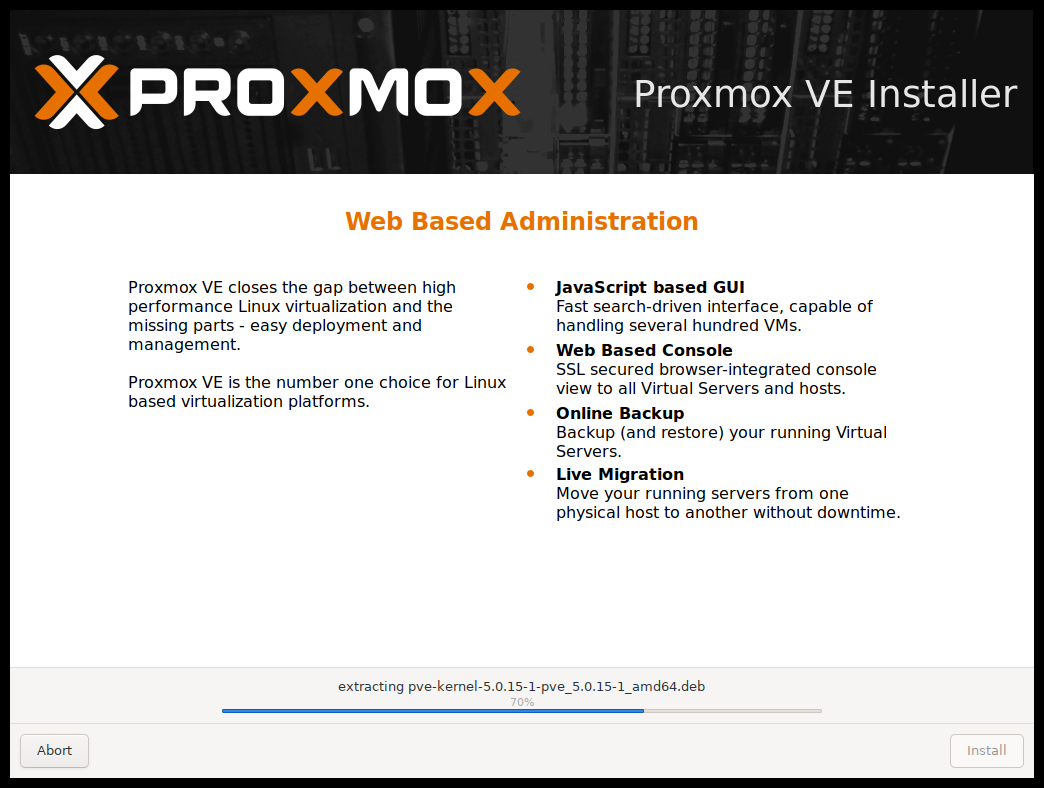
Wait a few minutes for it to complete the installation.
When it is successfully completed it will automatically reboot. Additionally, you can also click reboot to reboot the Proxmox server. Also, remember the URL that is displayed.

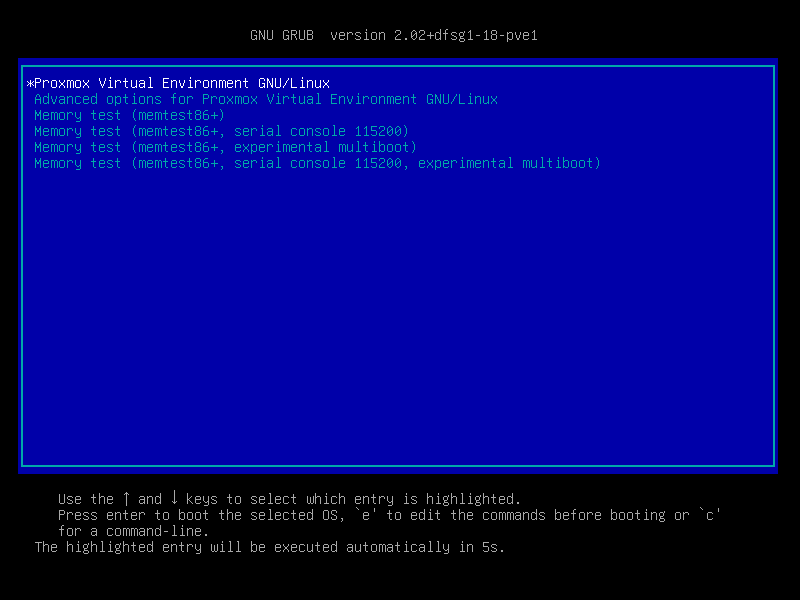
After a successful reboot, you will see the GRUB bootloader which will, by default, boot to Proxmox. Click ‘enter’ to start Proxmox VE.
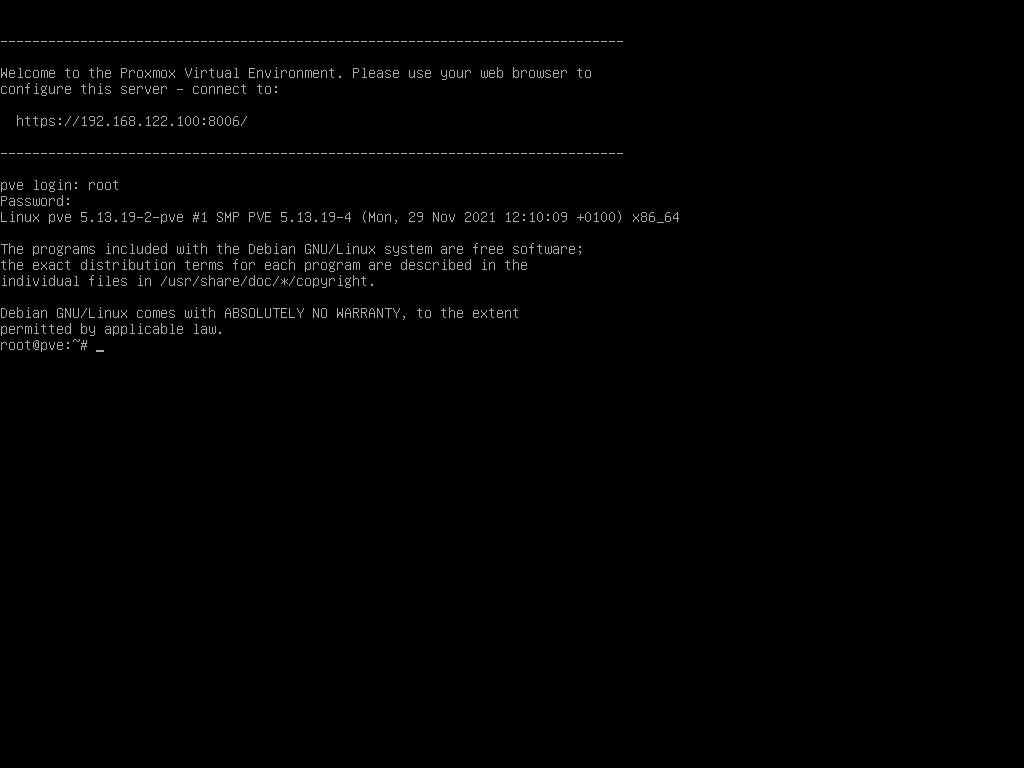
After a successful boot, Proxmox will start and display a URL that you have to open in your web browser.
Step 8: When you access the Proxmox web management interface, it says your connection is not private. You can ignore this and click advance, and then process.
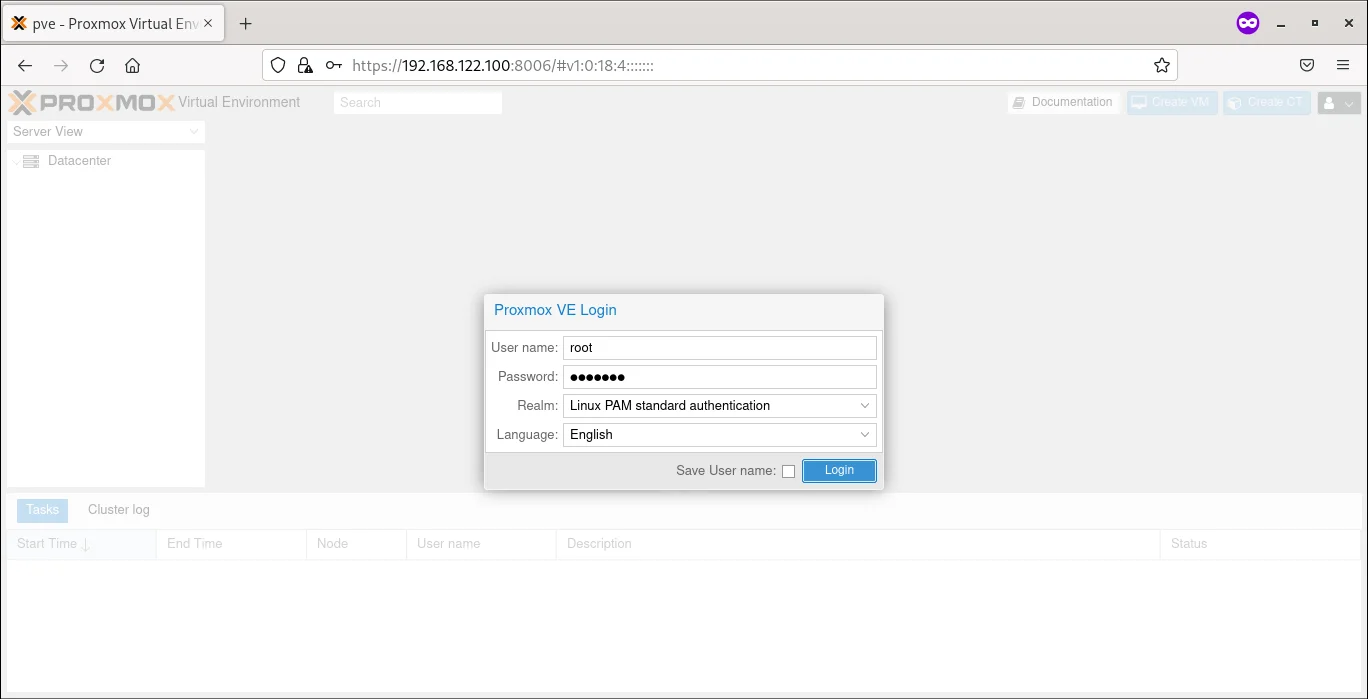
Step 9: When you first enter the page it will request username and password. The username is root and the password is what we have given previously in the installation process.
Done
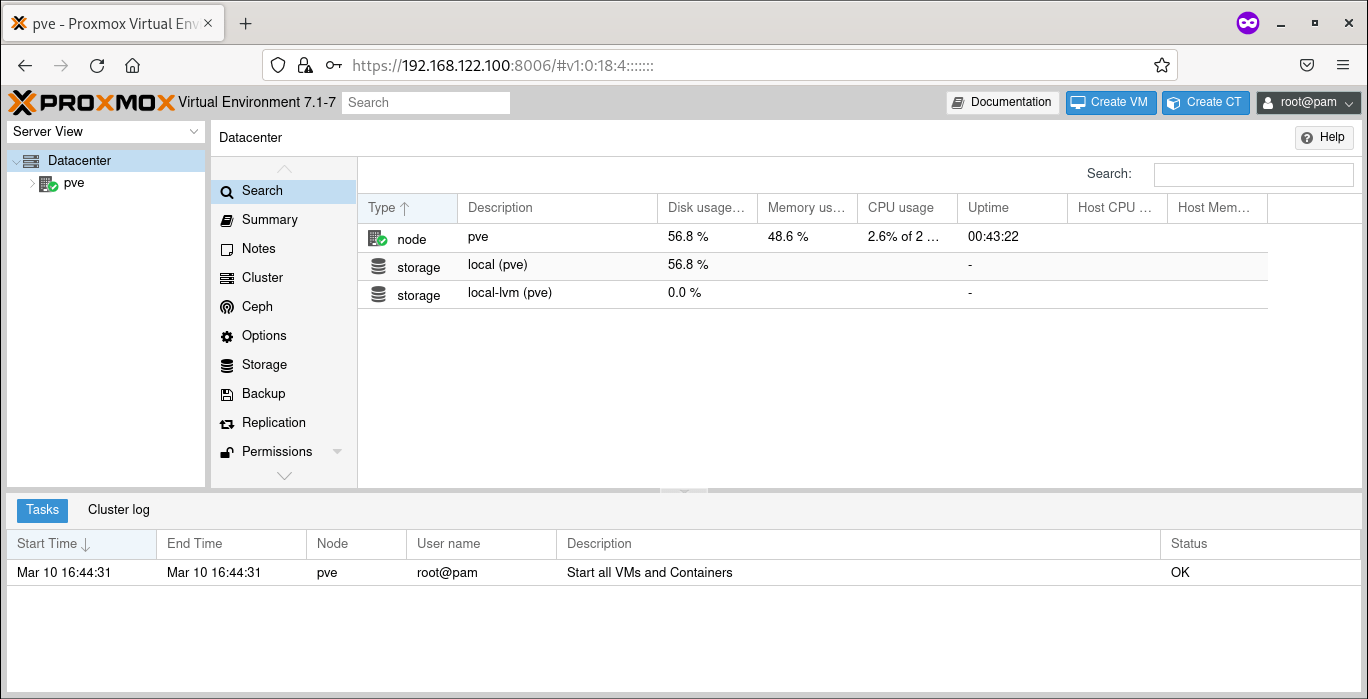
After you have entered the correct credentials you will see the Proxmox dashboard. Now you can create and manage virtual machines and containers with this dashboard.
Conclusion
Proxmox has evolved quite a lot in recent years. It has become one of the industry stander hypervisors. It is easy to use and easy to set up. It is at the top of the list with other popular hypervisors like VMware and Hyper-V.
If you are thinking of virtualizing your IT infrastructure and being able to edit your virtual machine and create virtual servers and containers within minutes. Proxmox is a good choice for you and your business.
Next Step
In this guide, we’ve explained how to install Proxmox VE and have given you a better understanding of what it is used for. We also recommend taking a look at our Knowledge Base to see our latest articles and tutorial videos to help you know more about our cloud server hosting.
Need even more advice or would you like a custom quote? Book a server consultation with one of our experts. We will assist you in identifying the most suitable solutions for you or your business.
Was this page helpful?
About the author