How to Setup a New Environment on Your Cloud Server

Setting up a new cloud environment is the first step of deploying any kind of application on our cloud. If you are having a problem setting up a new environment or you need some help setting it up. Then, you are at the right place. In this tutorial, we are going to explain how to set up a new cloud environment.
What is Cloud Environment
A cloud environment is a collection of isolated containers for running particular application services. The platform provides an easy-to-use tool for managing, configuring, monitoring, and troubleshooting the environment.
You can perform several actions with the environment, such as stopping, starting, cloning, or migrating the environment from one region to another.
Setting up a New Cloud Environment
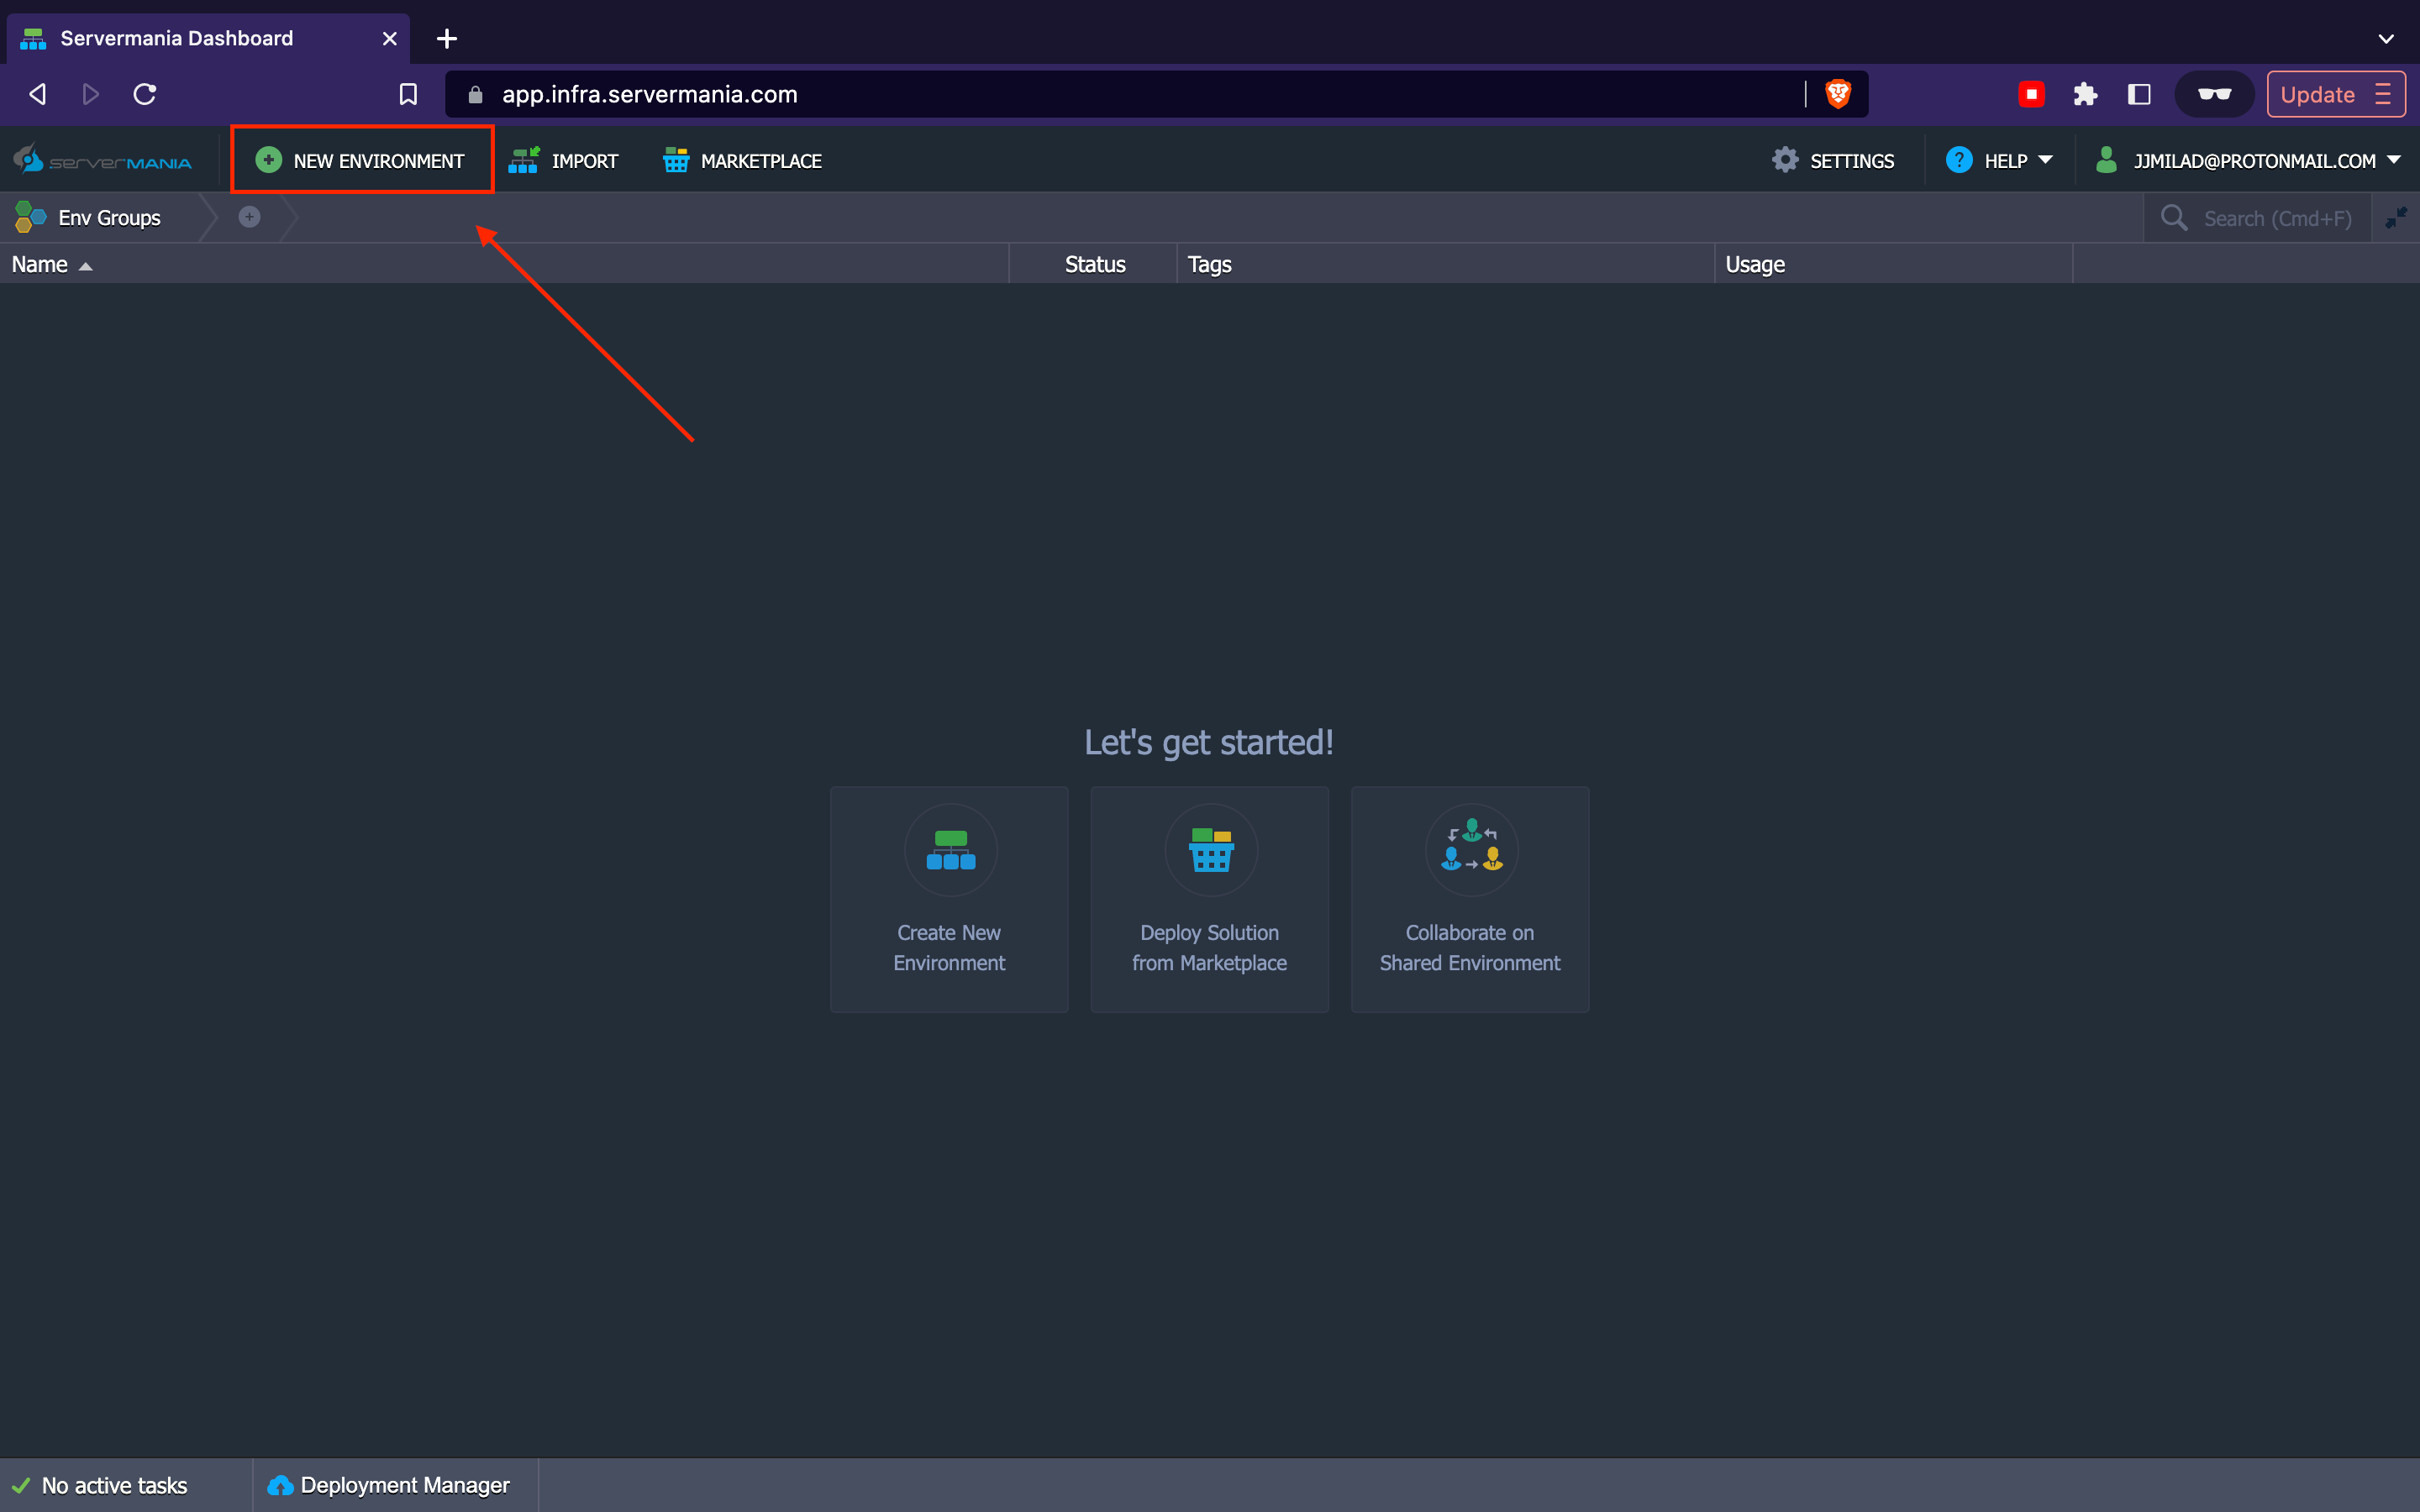
By using the platform UI you can easily configure and set up a new environment. To create a new cloud environment, click the NEW ENVIRONMENT button in the upper left corner.
After clicking the button, you see that a popup model appears. In it, you can see different configurations available for your environment. You can easily change and customize each parameter in just a few clicks.

- This area is the part where you change the programming language or specialized deployment solutions of your environment.
- In this area, you can set up and configure topology (layers).
- You can configure your resources and nodes in this area.
- The last area is where you see the summary of your deployment and confirm it by clicking the create button.
Choosing a Programming Language or Special Deployment Option
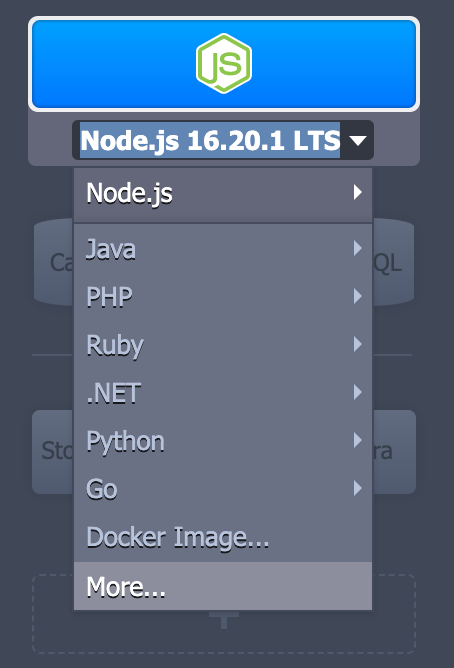
This is the first step to creating a cloud environment. In this part, you can choose a programming language or a specific deployment option. The platform supports multiple options and languages to choose from. For example: Python, Java, GO, Docker, etc.

The programming languages that are available here are fully supported by the platform and are the recommended deployment option for smooth hosting.
In the custom tab, is where you choose other specific deployment options such as a Kubernetes cluster or a custom container. It is most useful if you are unable to find your software solution.
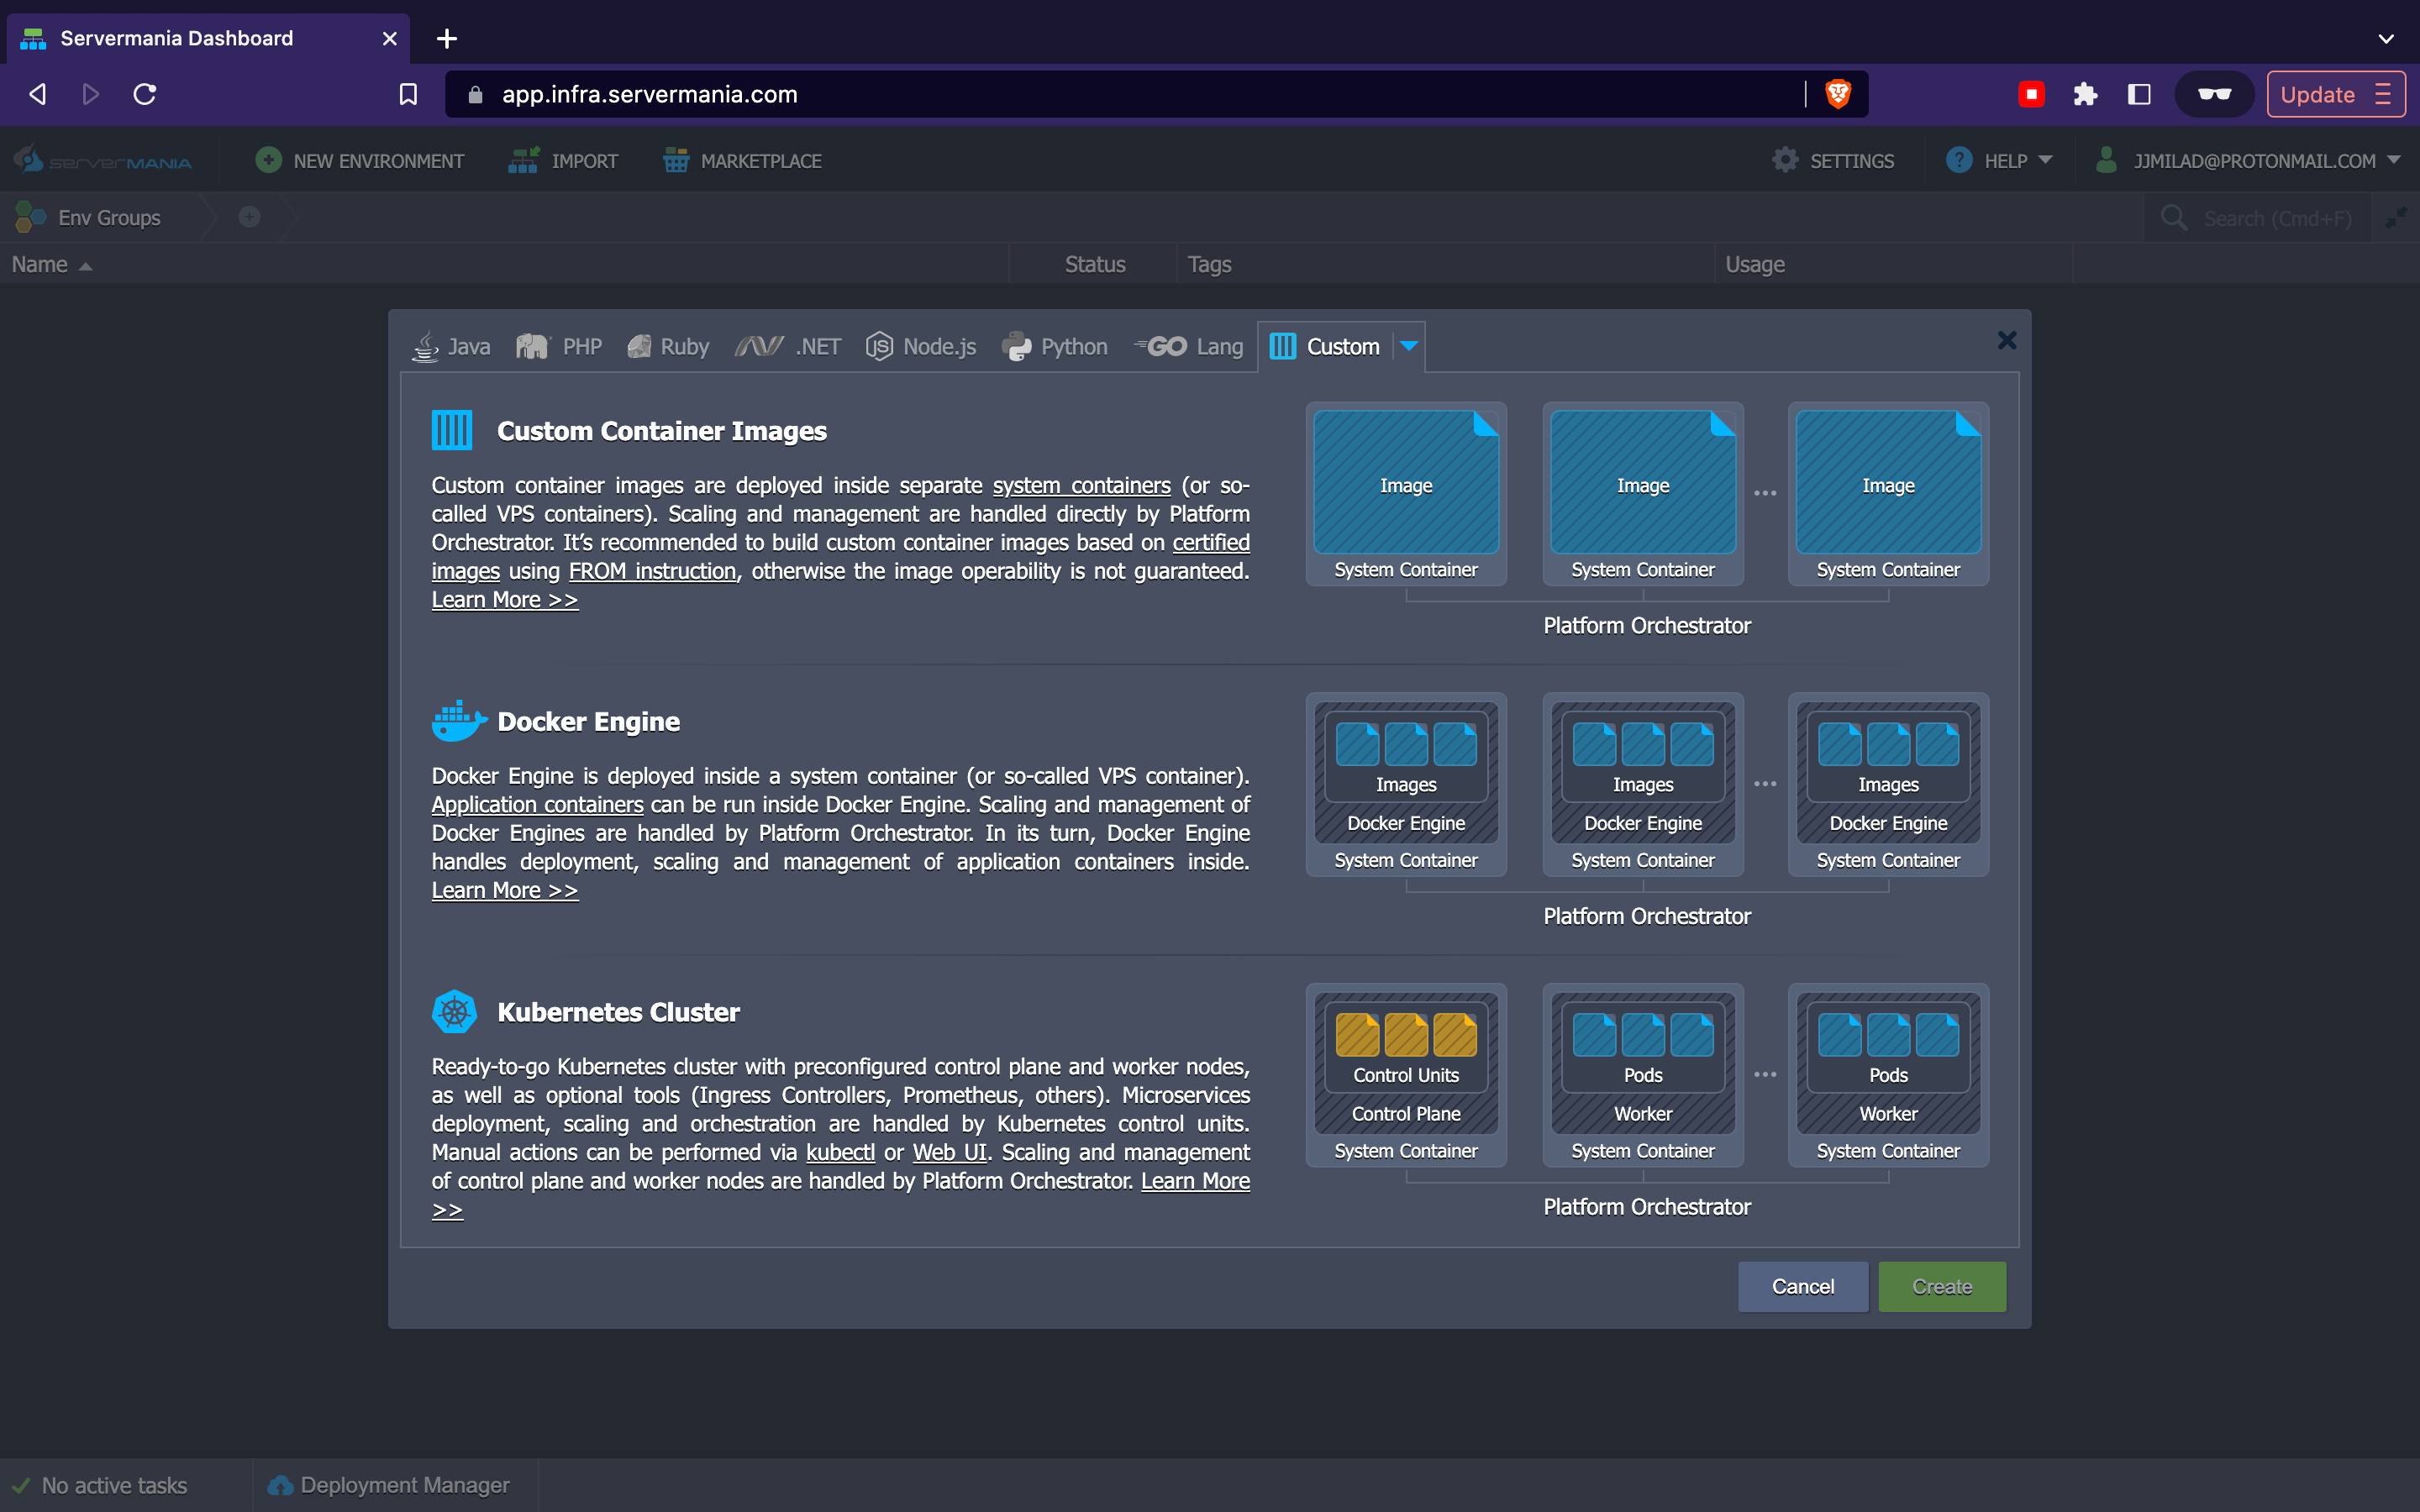
In this tab, you could perform the following:
- Custom Container Images: You could add custom docker images from your private repository or get it from Docker Hub. However, software compatibility and operability cannot be guaranteed.
- Docker Engine: With this solution, you could easily install a standalone docker engine and access its functionality such as scaling and managing multiple containers.
- Kubernetes Cluster: Using this solution you can use a ready-to-go Kubernetes cluster on our platform.
Configuring Topology
Topology simply refers to the software stack or the structure of your application. It helps you overview your application’s layers and structure. The platform provides various popular options. But if you can’t find the stack you are looking for then you can click ‘more’ or search for it.
The platform offers some of the most popular stacks, such as:
- Load Balancers
- Application Servers
- Databases (SQL & NoSQL)
- Cache
- Share Storage
- Elastic VPS
- Build Node
- Extra (custom layers)
See also: Cloud Servers
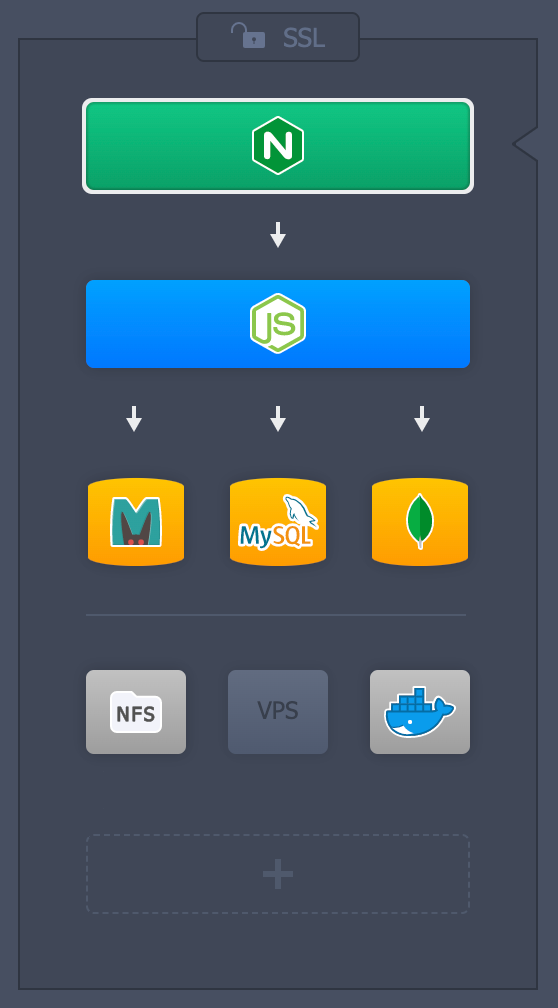
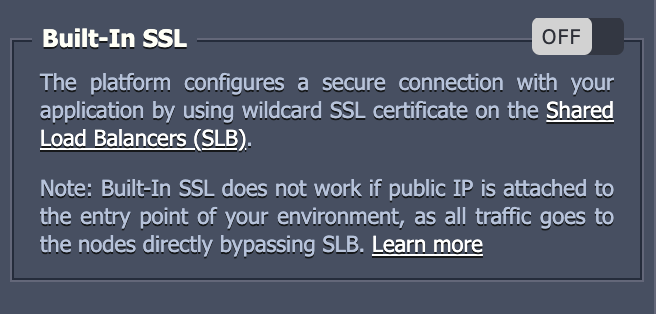
Additionally, the platform offers built-in SSL protection. But it does not work if you have a public IP address attached to your server. In this case, you need to enable and configure a custom SSL.
Configuring Nodes Resources
In this area, you can configure each layer or stack of your application. By simply clicking on your layer, its configurations will be displayed at the right of it (middle of the screen).
In this area, you can perform the following configurations:
- By toggling the on/off button, you can change the activation state of a specific layer.

- In the vertical scaling per node section, you can configure the automatic vertical scaling of a layer. You can provide the reserved and maximum (scaling limit) amount of cloudlets. The ‘Reserved’ cloudlets are what you pay for and are reserved for your environment. The other cloudlets that are in the ‘Scaling Limit’ section are the maximum amount of cloudlets allowed for scaling, in the event that your Reserved cloudlets cannot handle the load of your application. These configurations allow you to build fault tolerance into your use case and, at the same time, keeps it affordable so that you need only pay only for what you use.
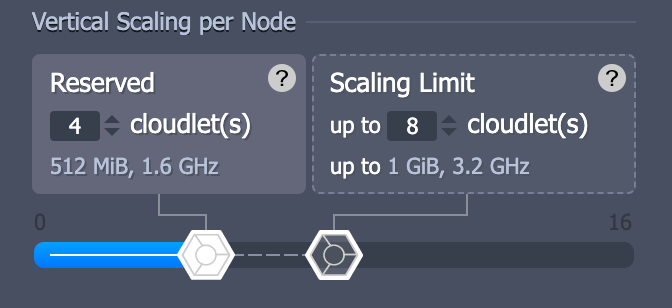 What is a cloudlet? Cloudlets are the measurement of resources used by a container. It is a measurement unit that includes 128 MiB of RAM and 400 MHz of CPU power simultaneously.
 - In the horizontal scaling part, you can define the number of nodes within each layer. You can also define whether you want it to be stateless or stateful. Additionally, you can customize the stack engine type or version.
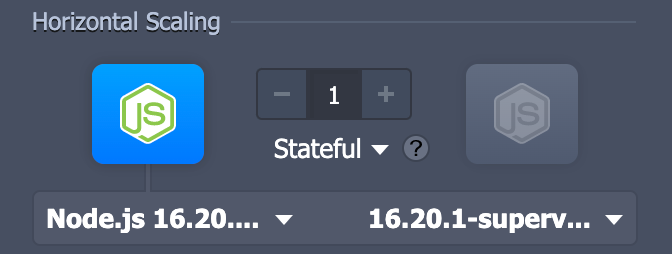
- Stateless scaling is a simultaneous creation of nodes from the base image template.
- Stateful scaling is a sequential creation of new nodes with the file system and all custom configurations copied from the initial master container.
- There are also the following configurations that play an important role in your deployment:
- Disk Limit: The amount of disk reserved per node.
- Sequential restart delay: In here you could define the delay between each node’s restart. This configuration ensures that at least one server stays up and running so that you don’t face downtime. Herewith, the -1 value will enable a simultaneous restart of all nodes.
- Access via SLB: This configuration block provides access to the nodes of the layer via the platform-shared load balancer.
- Variables: Manages the list of environment variables of each layer.
- Volumes: This tab contains the list of the current container data volumes, which are designed to persist independently of the container lifecycle.
- Links: This section is intended to establish a connection between the containers placed at different layers of a single environment.
- Ports: The ports tab provides you with general information on managing container ports at the platform.
- CMD/Entry Point: Here you can configure entry points and run commands. For more information refer to the official documentation.
Overview and Confirm the Environment
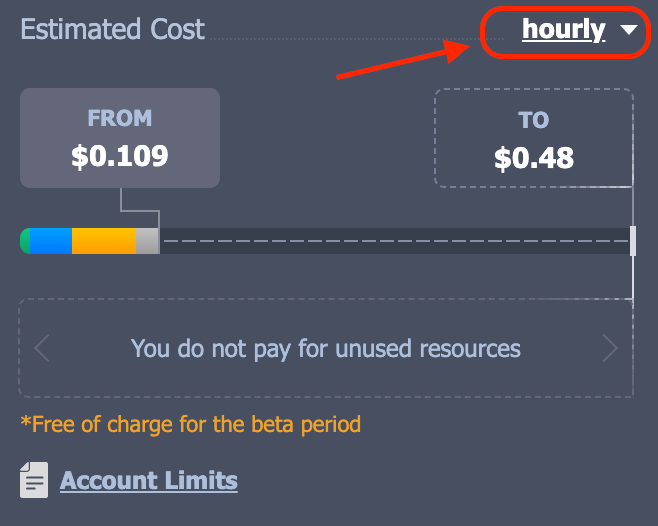
In this last part, you can overview the pricing and confirm your environment configurations.
If you are in the early stages of trying to assess whether a Cloud server is best suited to your business, be sure to check out our Cloud Business Guide.
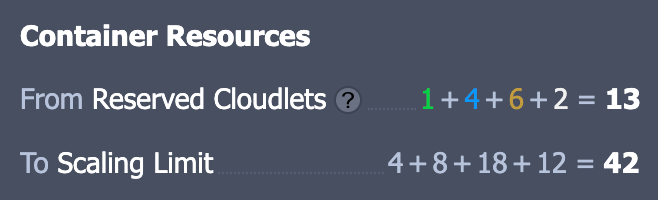
- The first part calculates the number of reserved and maximum cloudlets.
- The next part shows you the estimated cost of your environment. you can change the time period by clicking the drop down in the top right corner.
- The last step for creating an environment is to provide a unique name to it. After giving it a name or leaving it as default, click Create to create your environment.
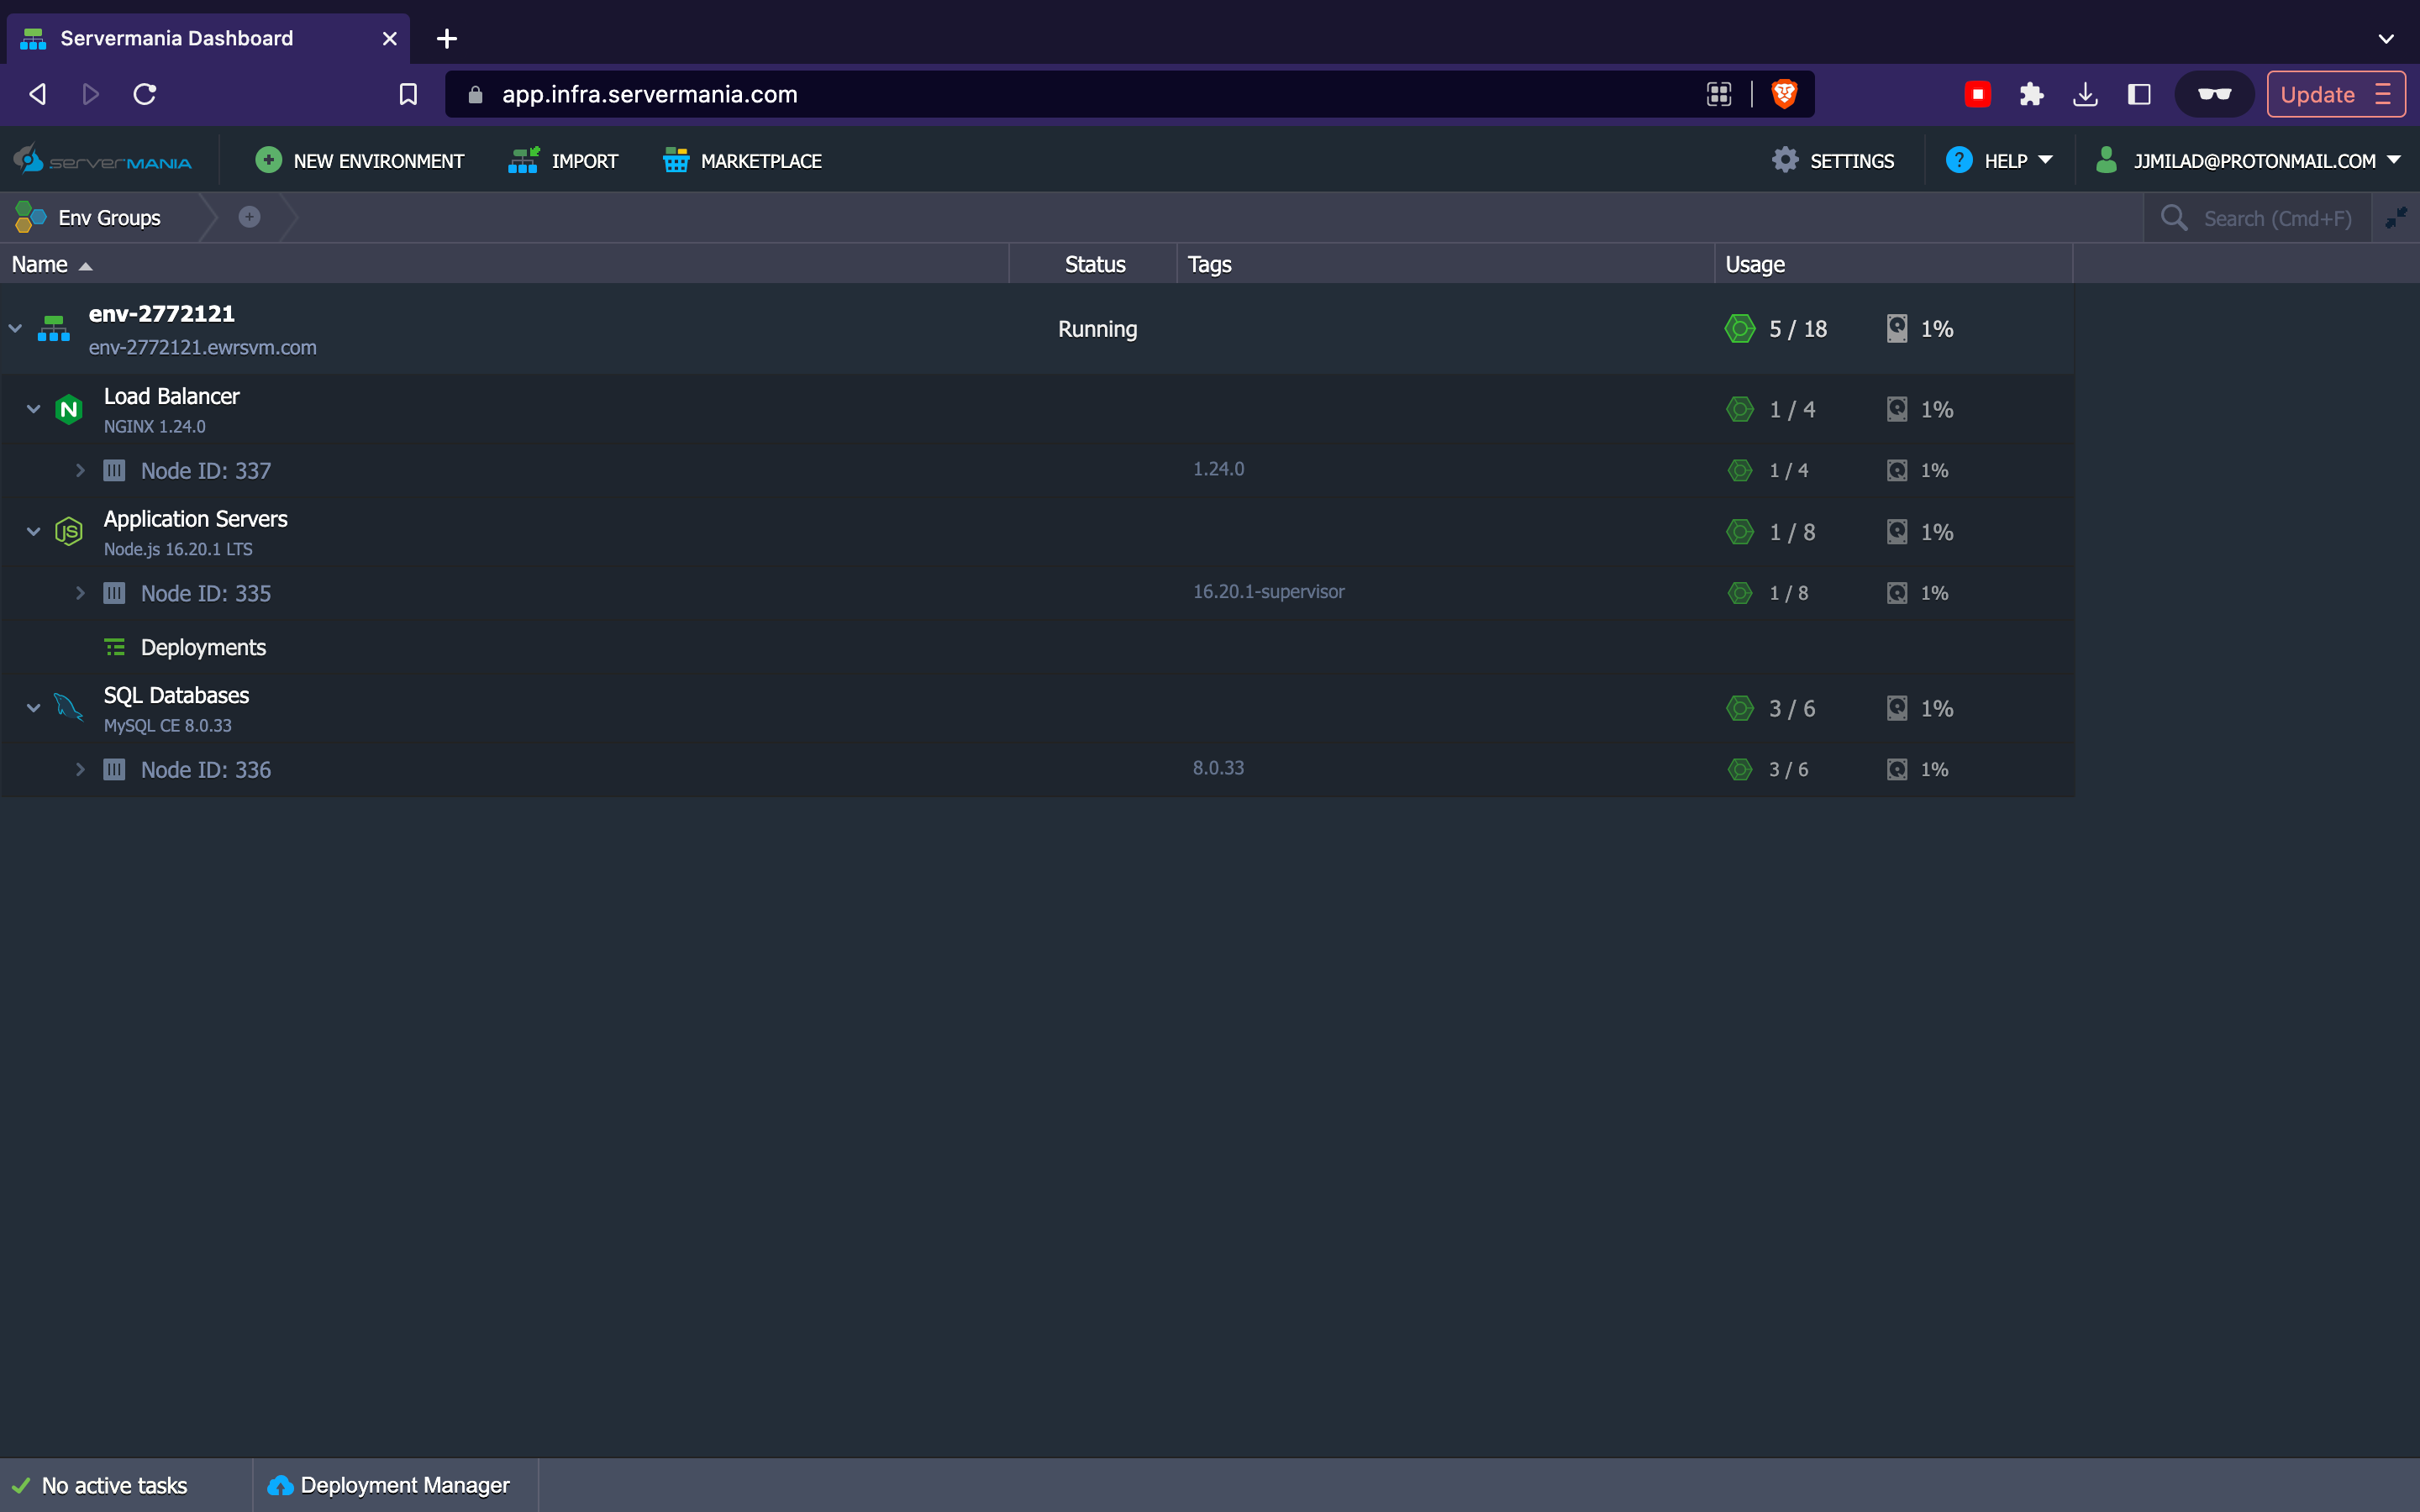
If you have successfully followed all the guides given in this tutorial, your new environment will be displayed on your dashboard after a few minutes.
Summary
Setting up a cloud environment on the ServerMania Cloud Platform is not quite simple. However, there are a few small configurations that need to be looked after.
In this tutorial, you have learned how to setup and configure a cloud environment, and the following are a few key notes that are important to keep in mind:
- Cloudlets: A measurement unit used for tracking cloud usage.
- Horizontal scaling VS vertical scaling: Horizontal scaling means more nodes but vertical scaling means making the existing nodes more powerful.
- Pricing calculation: The billing method of our platform is pay-as-you-go model and the usage is calculated with cloudlets.
- Environment Layer: You could think of these as different components of your application hosted under a single environment.
- Custom container images: If the preinstalled images do not satisfy your stack needs, then you can add your own.
Next Step
Now that you have acquired some skills and knowledge on how to set up a new cloud environment, keep learning and find out more about cloud computing. We also recommend taking a look at our Knowledge Base to see our latest articles and tutorial videos about the ServerMania Cloud Platform.
Was this page helpful?
About the author