How to Setup a PostgreSQL Database Cluster

PostgreSQL commonly known as Postgres database has become popular for most database server use cases in the industry, including high-traffic web applications and scalable systems.
A Postgres cluster makes your database more scalable, so in a high-traffic environment, it is extremely important that it remains up and running.
In this tutorial, we take a closer look at the features of the Postgres Cluster and explain how to set one up.
What is PostgreSQL (Postgres)?
PostgreSQL, commonly known as Postgres is an open-source and free relational database management system. For those that are not already familiar with this term, ‘SQL’ stands for Structured Query Language.
The Postgres database is similar to MySQL and other database systems that use SQL for querying. Postgres is a default database for most scalable and high-performance web applications. If you would like more information about the difference between MySQL and Postgres, check out our article PostgreSQL vs MySQL Performance and Features Comparison.
Postgres is a robust and user-friendly database that many beginners in the database industry enjoy working with, which is one reason why it is utilized as the primary database of most small and medium-sized projects.
Features of PostgreSQL
- JSON and JSONB support
- Geospatial Data Support:
- Robust Security
- Full-Text Search
- SQL Support
- ACIC Support (transactions with atomicity, consistency, isolation, and durability)
What is a Database Cluster?
Before exploring the concept of a PostgreSQL database cluster, it is important to know what database clusters are, in general.
A database cluster is a set of configurations in which multiple strands of database servers or nodes work alongside each other collaboratively to enhance or boost the performance, reliability, and scalability of a database management system.
Each node within the cluster basically stores a copy of the same data, ensuring redundancy and fault tolerance. While there are various database clustering techniques a common goal is to provide high availability, meaning that the database remains accessible even in the face of hardware failure, system crashes, or maintenance activities.
Database clusters often employ load balancing to distribute incoming requests among nodes evenly, preventing any single node from becoming a bottleneck. This ensures efficient resource utilization and optimal response times.
Data replications are another key feature of a database cluster where changes made to one node are propagated to others, maintaining data consistency across the cluster.
Clusters are vital for applications that require continuous uptime, data integrity, and the ability to scale seamlessly to accommodate growing workloads. They provide a robust foundation for mission-critical systems in various industries.
What is a PostgreSQL (Postgres) Cluster?
A PostgreSQL Cluster is a high-availability and fault-tolerant configuration of the PostgreSQL database management system. This configuration consists of multiple interconnected database nodes that work together to provide data redundancy and ensure continuous operation.
In the event of node failure, the cluster automatically fails over to a standby node to minimize downtime. This configuration enhances data reliability, scalability, and performance making it suitable for mission-critical applications.
Moreover, PostgreSQL clusters also support load balancing and data distribution making it ideal for handling large volumes of data and concurrent user requests in various enterprise-level applications, from e-commerce platforms to financial systems.
Why Use the Postgres Cluster?
If your server use case requires some or all of the following key features, you may want to consider a Postgres Cluster:
- High-availability, such as providing automatic failover and redundancy to minimize downtime in the face of hardware failure or maintenance
- Cluster supported load balancing, to efficiently distribute incoming traffic across nodes and prevent overloading a single server.
- Improved server response time and data distribution to enable data to be spread across nodes.
- Other similar functions to boost the performance and reliability of a database system.
How to Setup a PostgreSQL Cluster?
Before starting, you need to have at least 2 or more Linux servers in the same network or the same Virtual Private Cloud (VPC).
If you don’t have one, check out our best cloud server hosting and find a cloud server that fits your needs.
Note that this tutorial is only designed for computers based on the UNIX operating system (Linux and maybe Mac OS).
Access Your Remote Servers
The first step is to access your servers via SSH or other means. Then, choose one server as a primary one and take note of the private IP address of each server.
Update your Linux packages
Updating the Linux packages before installing or updating the current ones is compulsory. Type the commands below on all of your servers to update your Linux packages.
sudo apt-get update
sudo apt-get upgrade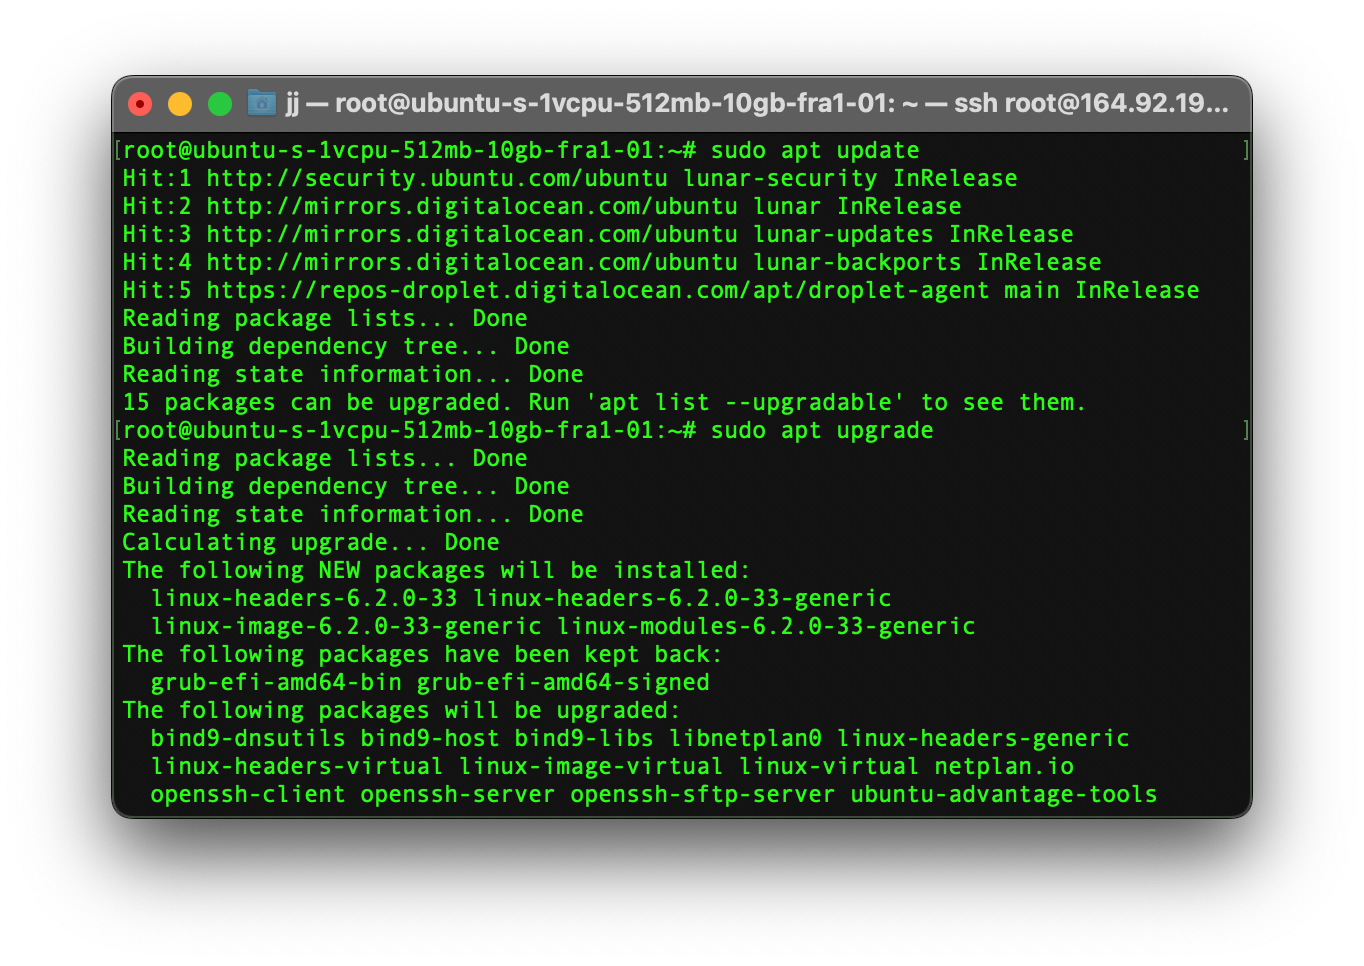
Install PostgreSQL
For setting up a Postgres cluster you must have Postgres installed on all of your servers. So, type the command below in all of your servers to install PostgreSQL.
Note that we are using PostgreSQL version 15 in this tutorial. If you are using PostgreSQL version 12 or lower then please recheck some steps because it might not work as expected in lower versions.
sudo apt-get install postgresql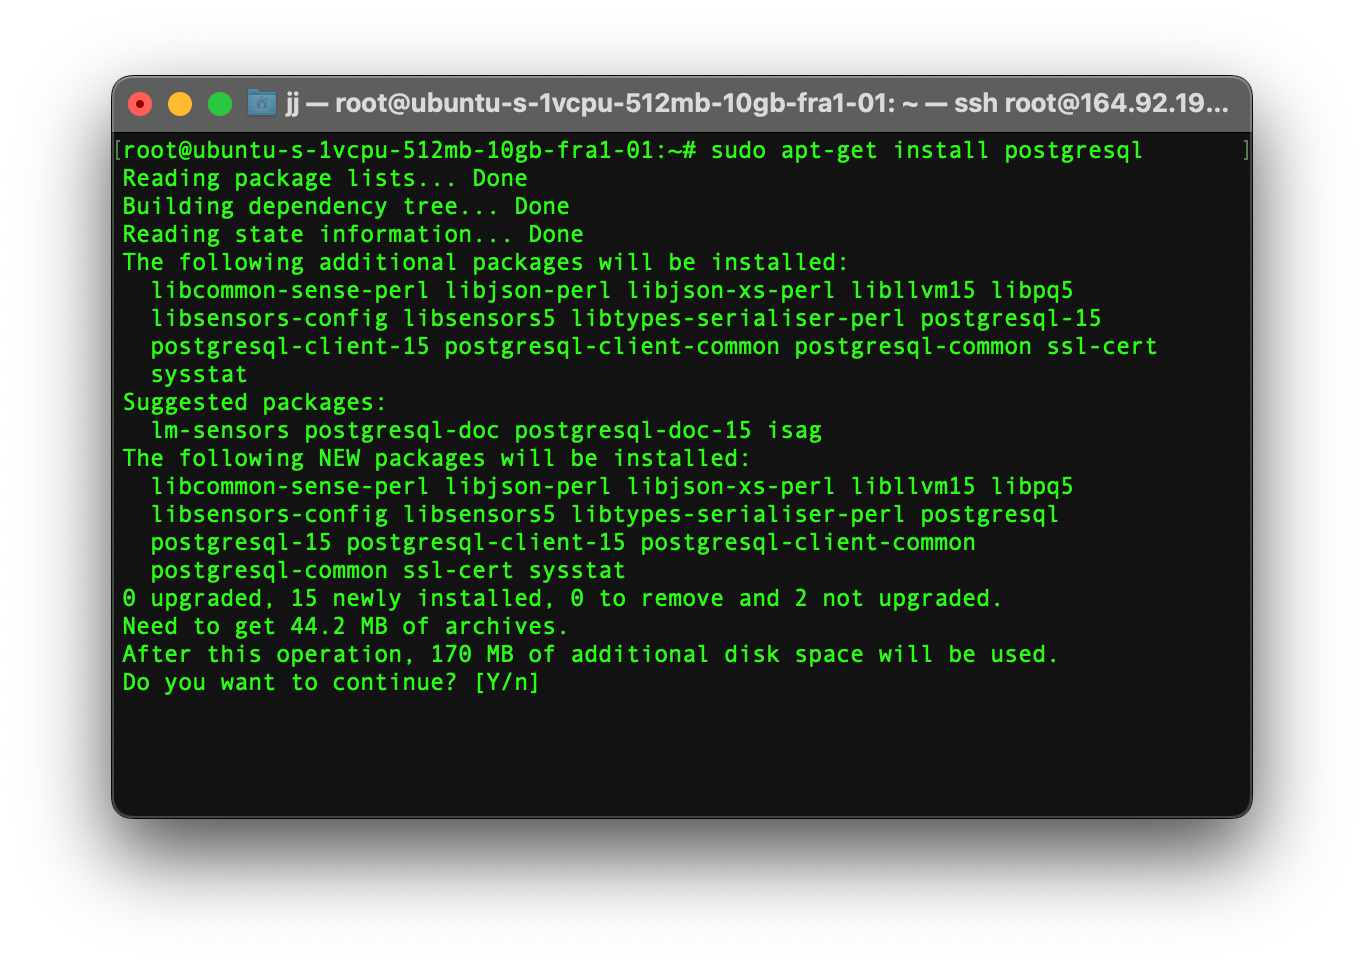
Configuring the Primary Node
Step 1
After installing PostgreSQL we need to edit the configuration file that is named postgresql.conf by first opening it on the primary node using a text editor, in this case, we will be using Nano but you could use any text editor you like.
sudo nano /etc/postgresql/[POSTGRESQL_VERSION]/main/postgresql.conf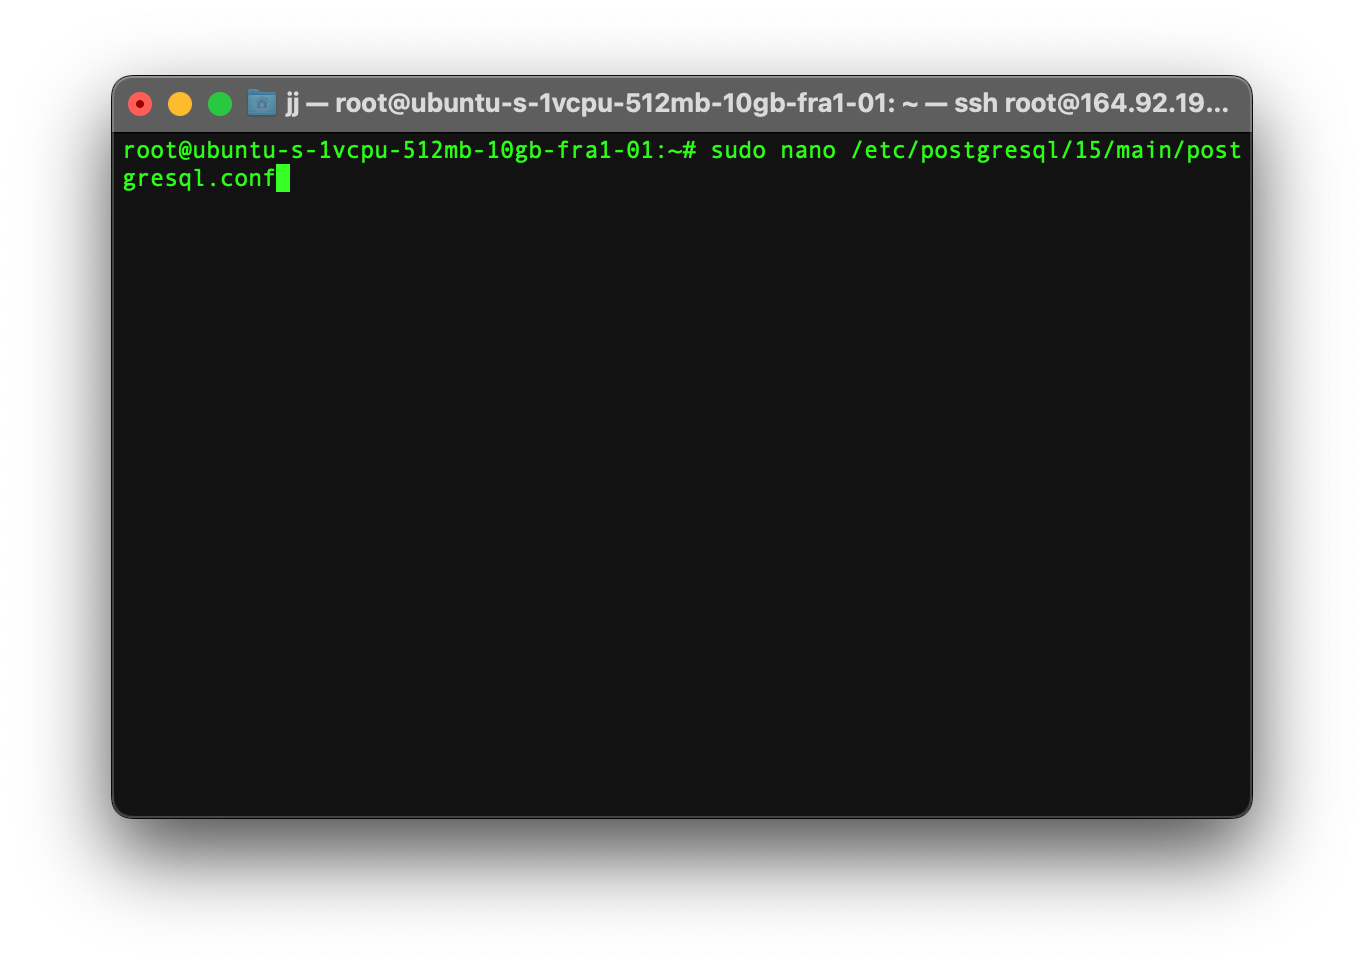
Note! [POSTGRESQL_VERSION] refers to your PostgreSQL version. If, you don’t know the version then type postgres -V on your terminal to find out which version number.
Step 2
After opening the configurations file you need to uncomment these lines or maybe even edit their values as below.
listen_addresses = '*'
wal_level = replica
max_wal_senders = 3
wal_keep_size = 1GB
Note! To save a file in the Nano text editor you should press Control+X and then press enter.
Step 3
After saving the file, you need to edit another file in the same directory by using the below command.
sudo nano /etc/postgresql/[POSTGRESQL_VERSION]/main/pg_hba.conf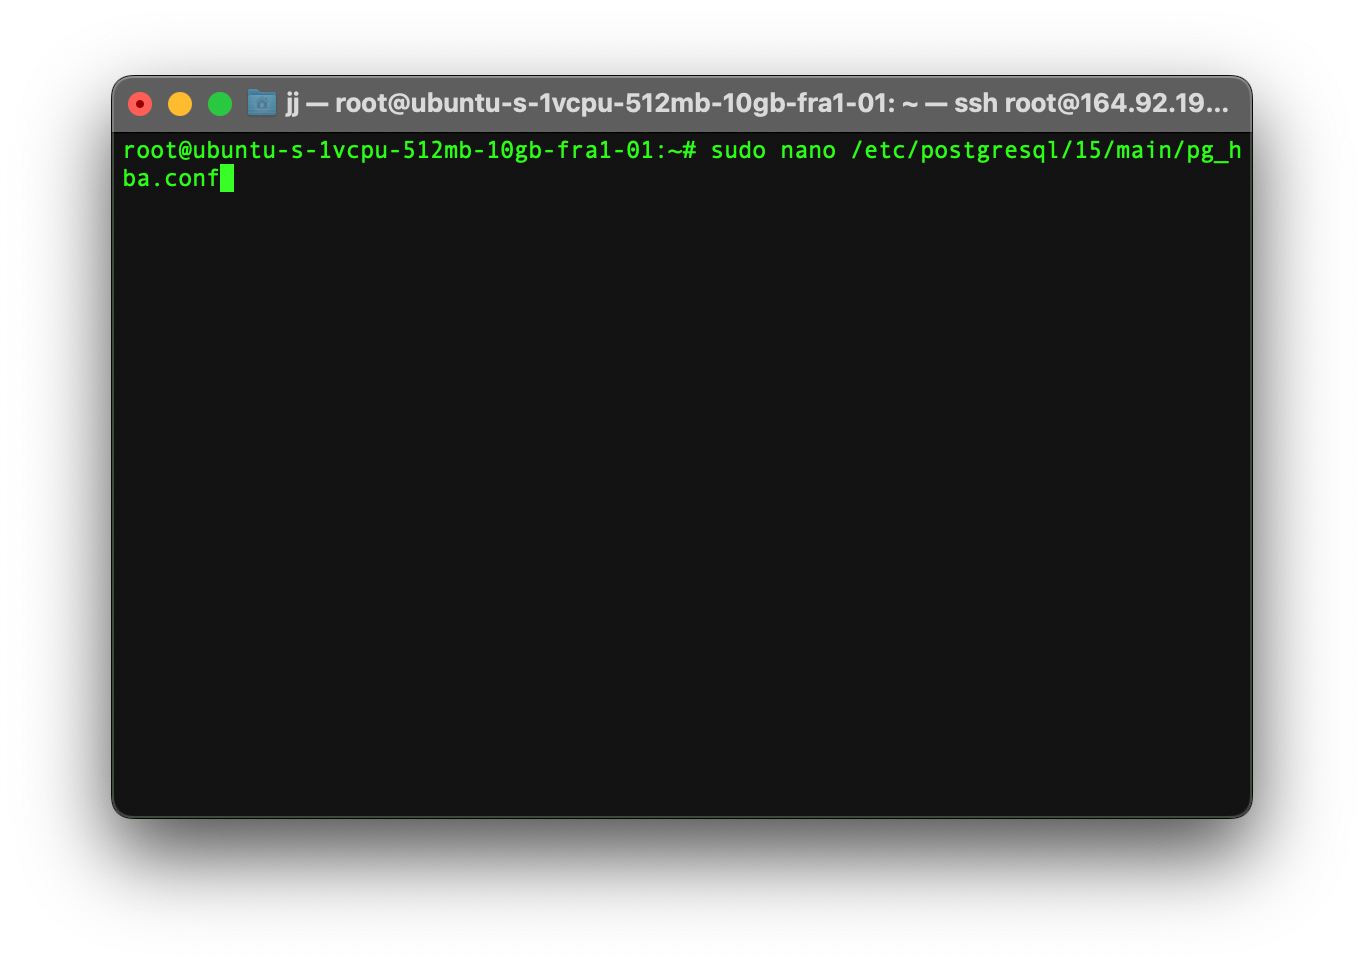
Note! [POSTGRESQL_VERSION] refers to your PostgreSQL version. If, you don’t know the version then type postgres -V on your terminal to find it out.
Step 4
After opening the file you need to type the below command at the end of the file.
host replication replicator [SECOND_SERVER_IP]/32 trust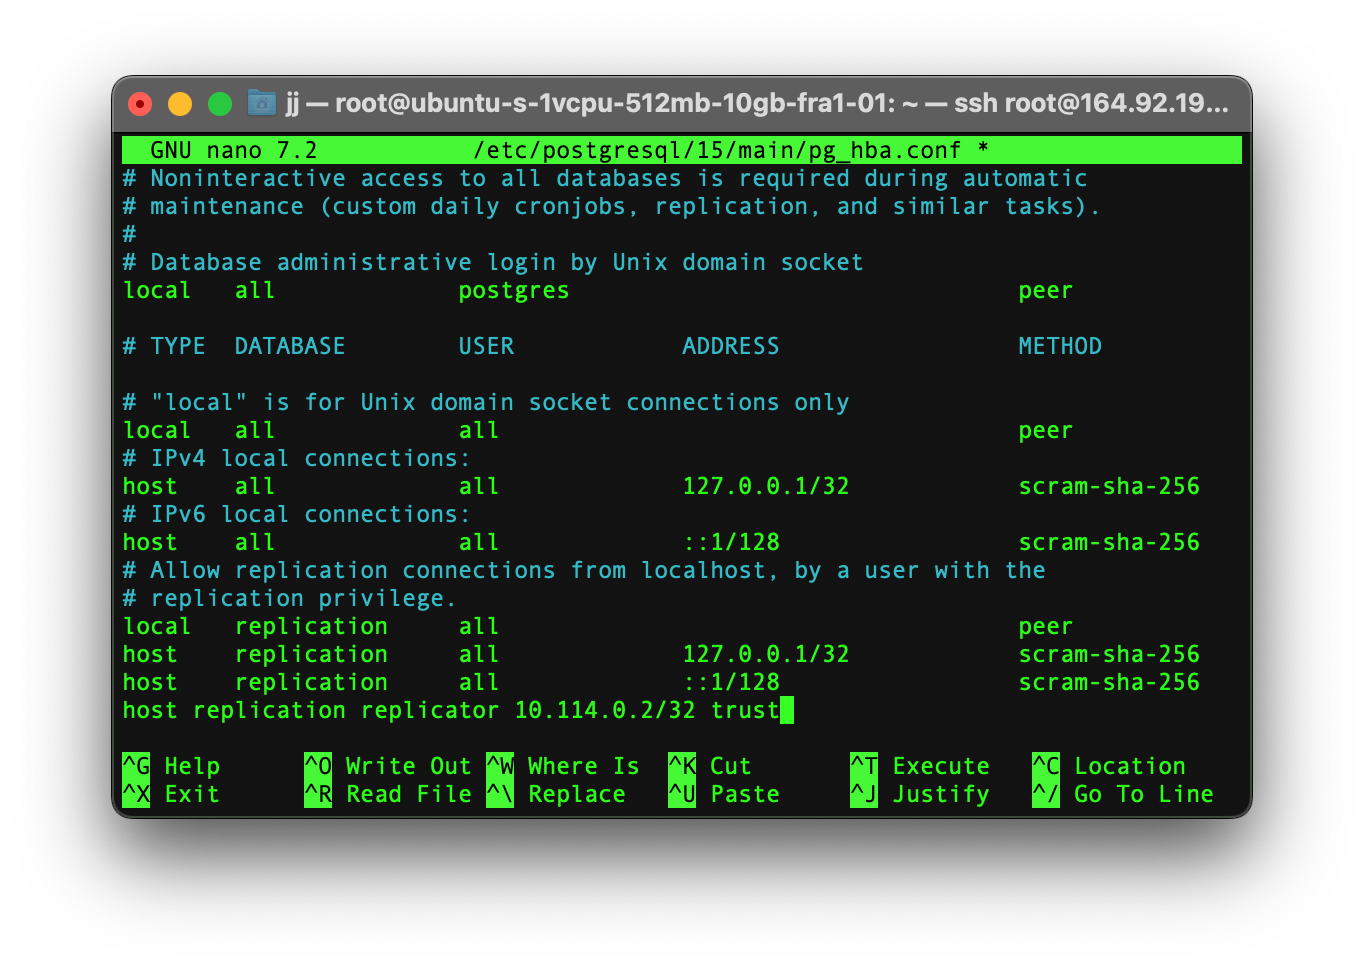
Note! If you are using more than 2 nodes then you need to add a new line for each node.
Restart PostgreSQL
After saving the other file, you now need to restart Postgres to save the changes.
sudo systemctl restart postgresql
Create a Replication User on the Primary Node
Step 1
Access the PostgreSQL Command-line interface (CLI) by typing the command below.
sudo -u postgres psql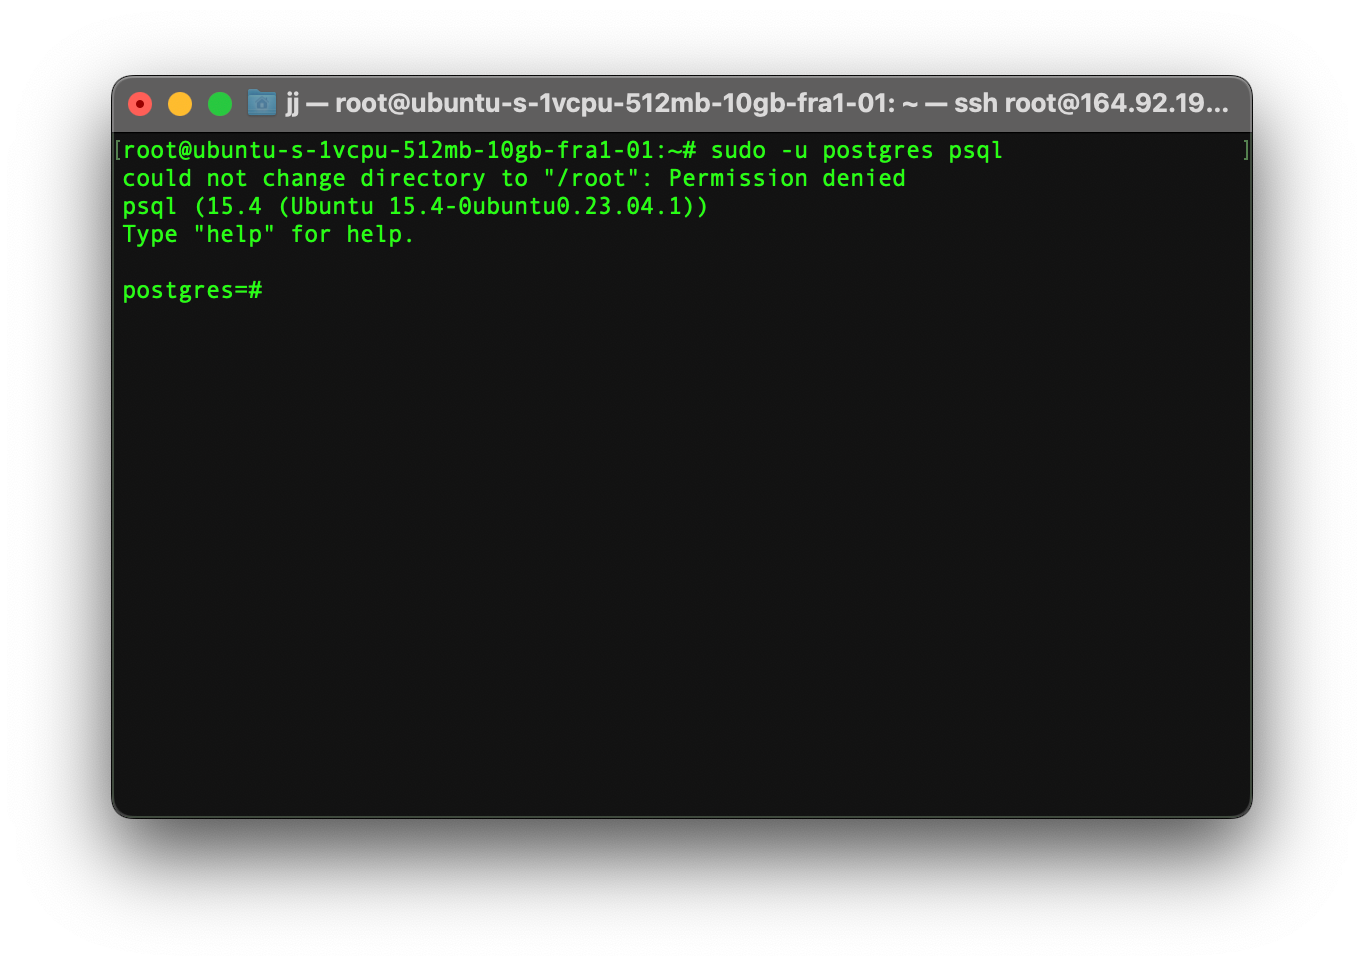
Step 2
Grant the necessary permission to a replication role.
CREATE USER replicator REPLICATION LOGIN CONNECTION LIMIT 3 ENCRYPTED PASSWORD 'your_password';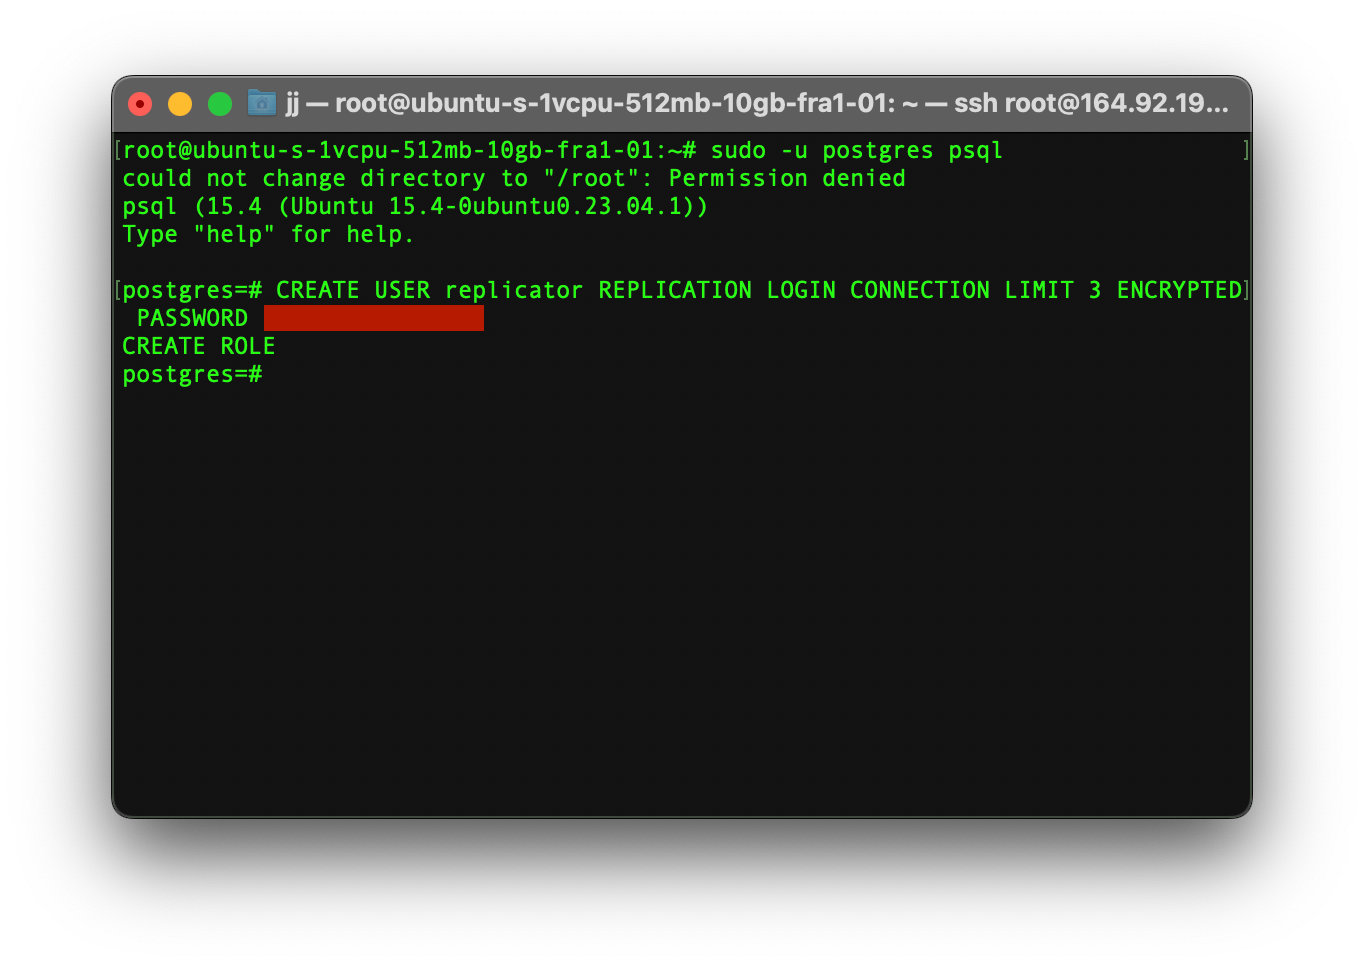
Note! You should replace ‘your_password’ with a strong password.
Step 3
Exit the PostgreSQL CLI:
\qConfiguring the Second Node
The next part is to configure the other node. You need to make sure that you have installed PostgreSQL on it already.
Step 1
To configure the second node, first, stop the PostgreSQL by typing the command below.
sudo systemctl stop postgresql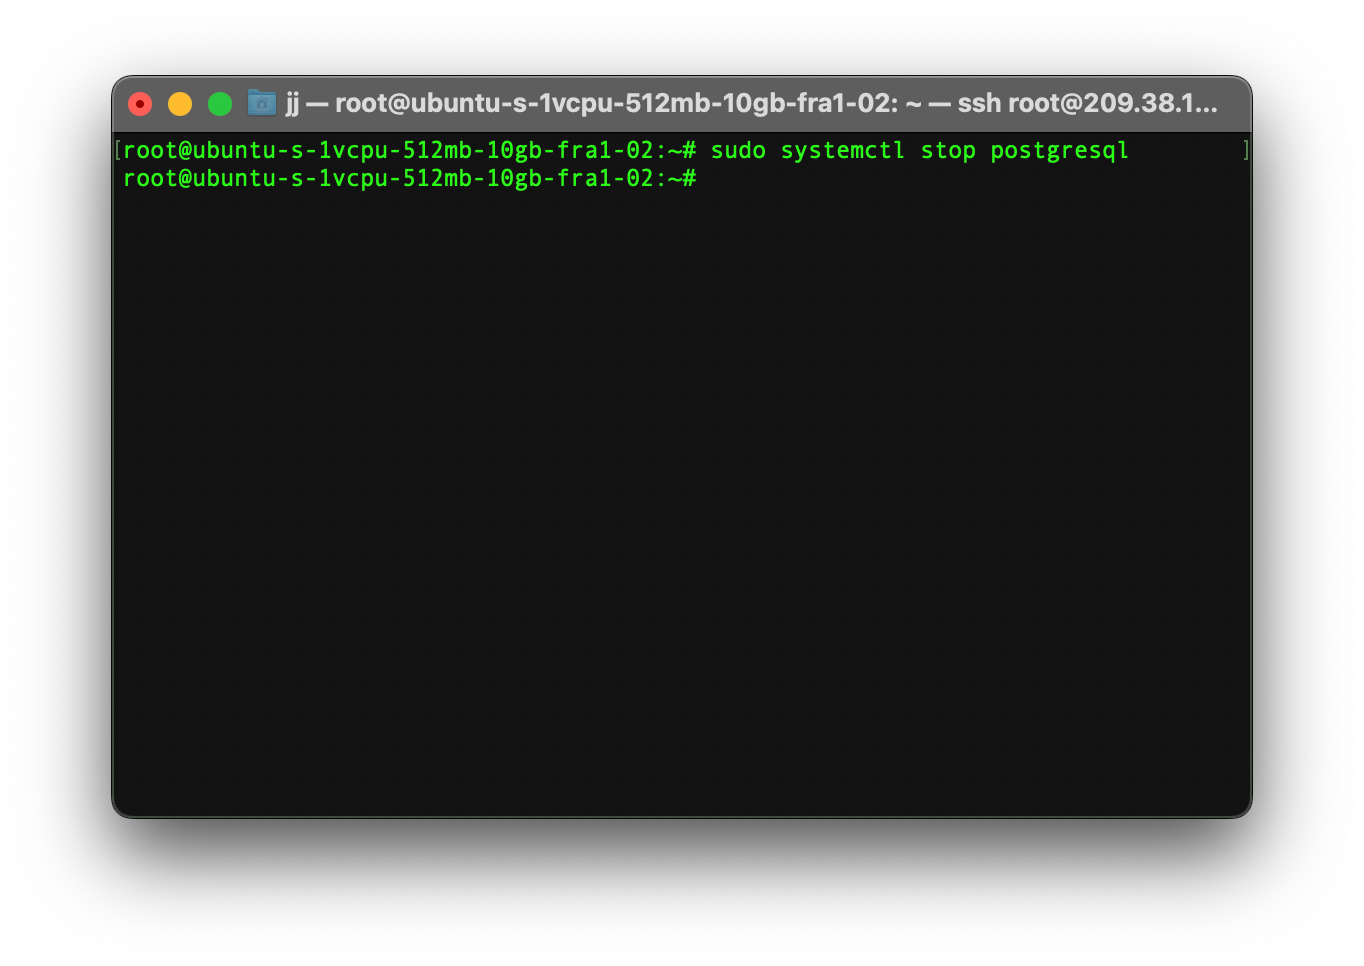
Step 2
Create a data directory for the standby node (Second Node):
sudo rsync -av /var/lib/postgresql/[POSTGRESQL_VERSION]/main/ /var/lib/postgresql/[POSTGRESQL_VERSION]/main/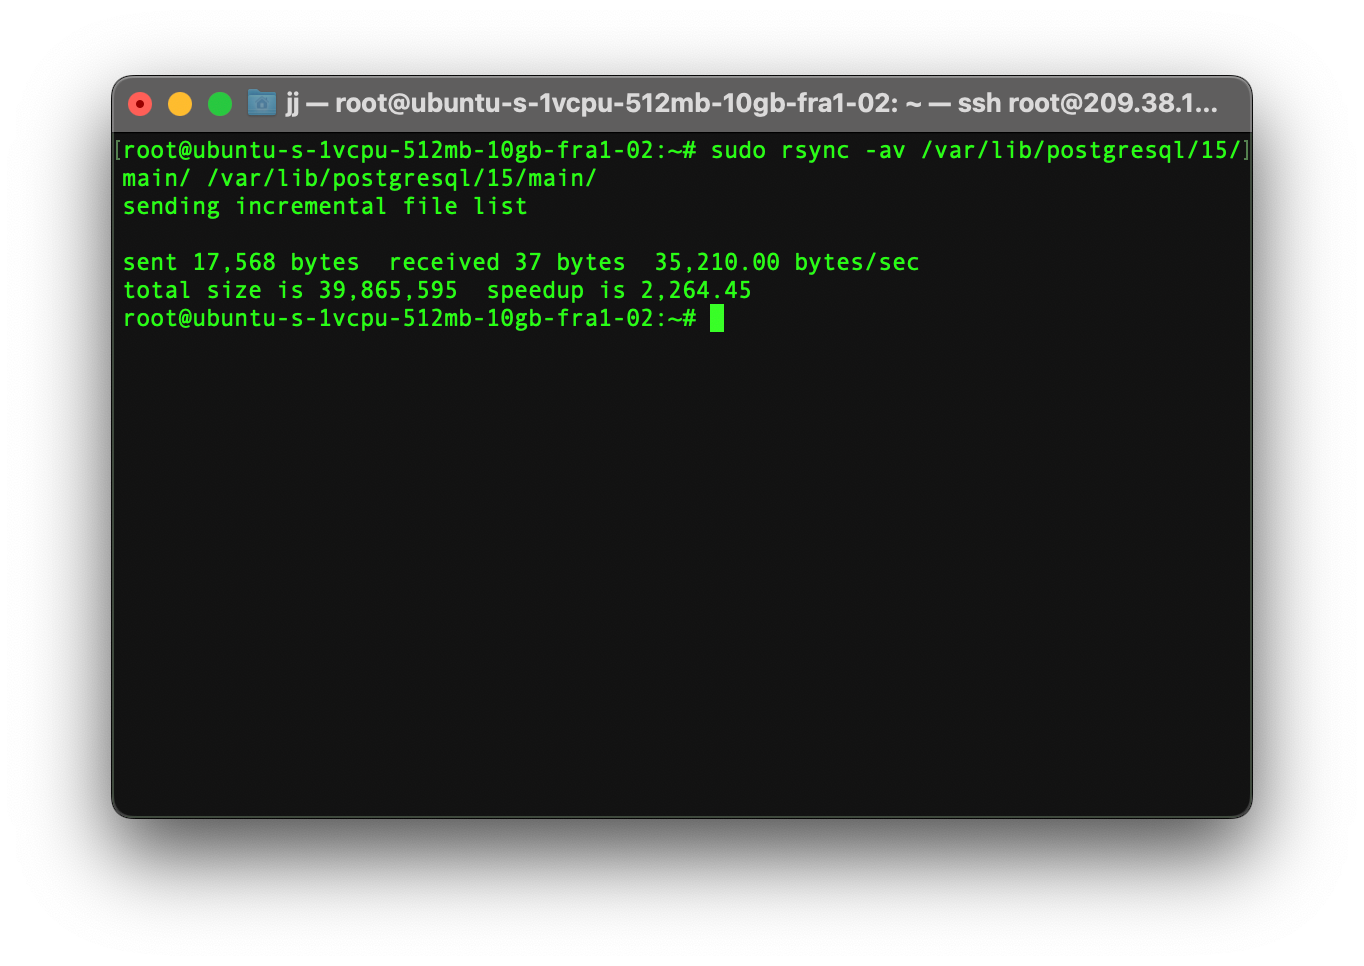
Note! You should replace [POSTGRESQL_VERSION] with your PostgreSQL version, which in our case is 15.
Step 3
Edit the postgresql.conf file:
sudo nano /etc/postgresql/[POSTGRESQL_VERSION]/main/postgresql.conf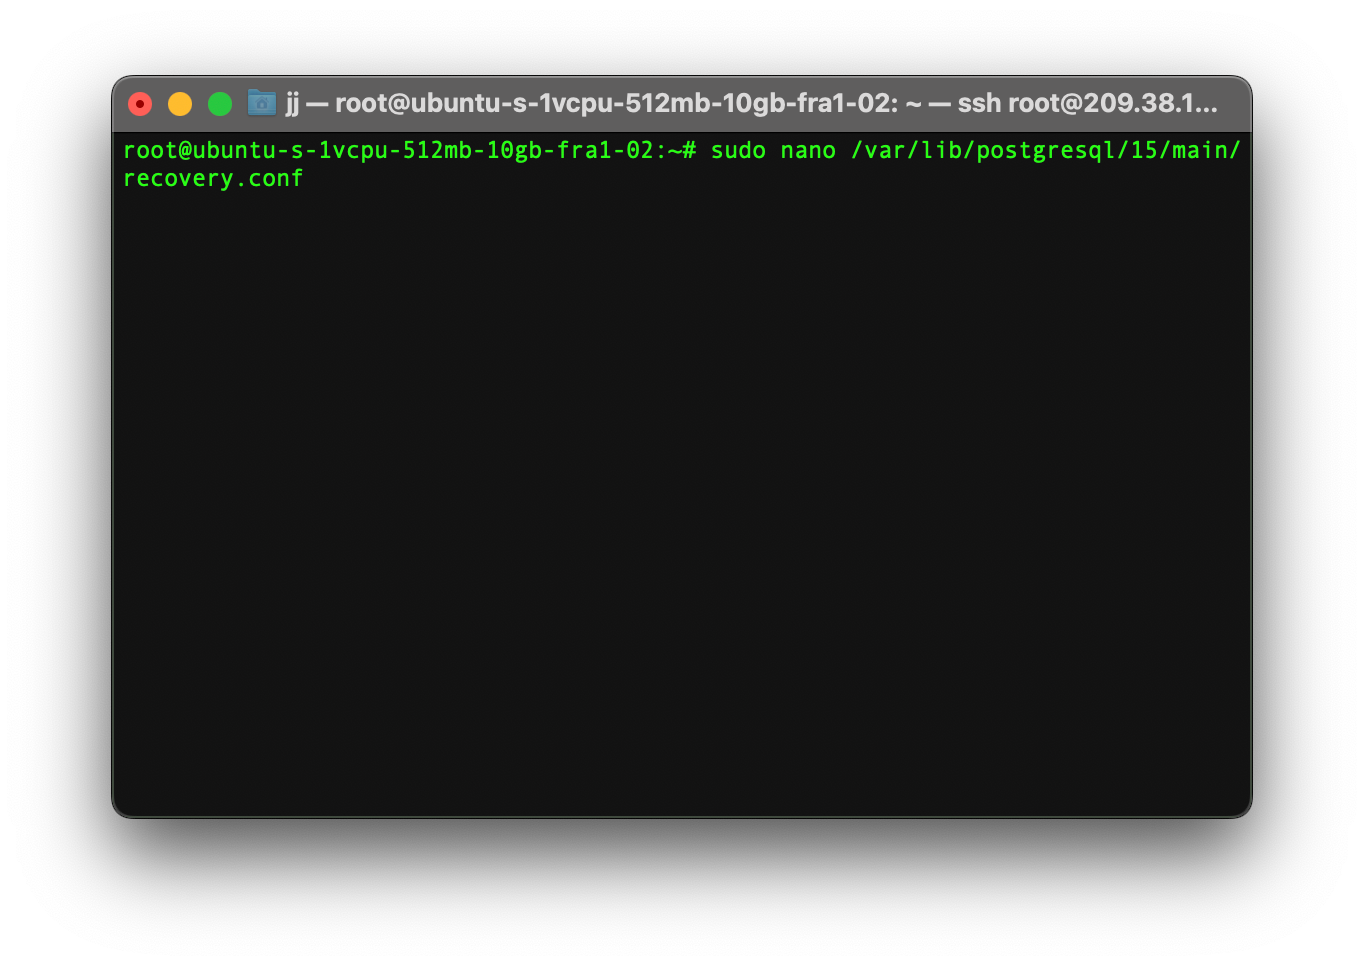
Step 4
After opening the file add the following lines.
hot_standby = on
primary_conninfo = 'host=[FIRST_SERVER_IP] port=5432 user=replication password=[YOUR_PASSWORD] sslmode=prefer'
primary_slot_name = 'standby_slot'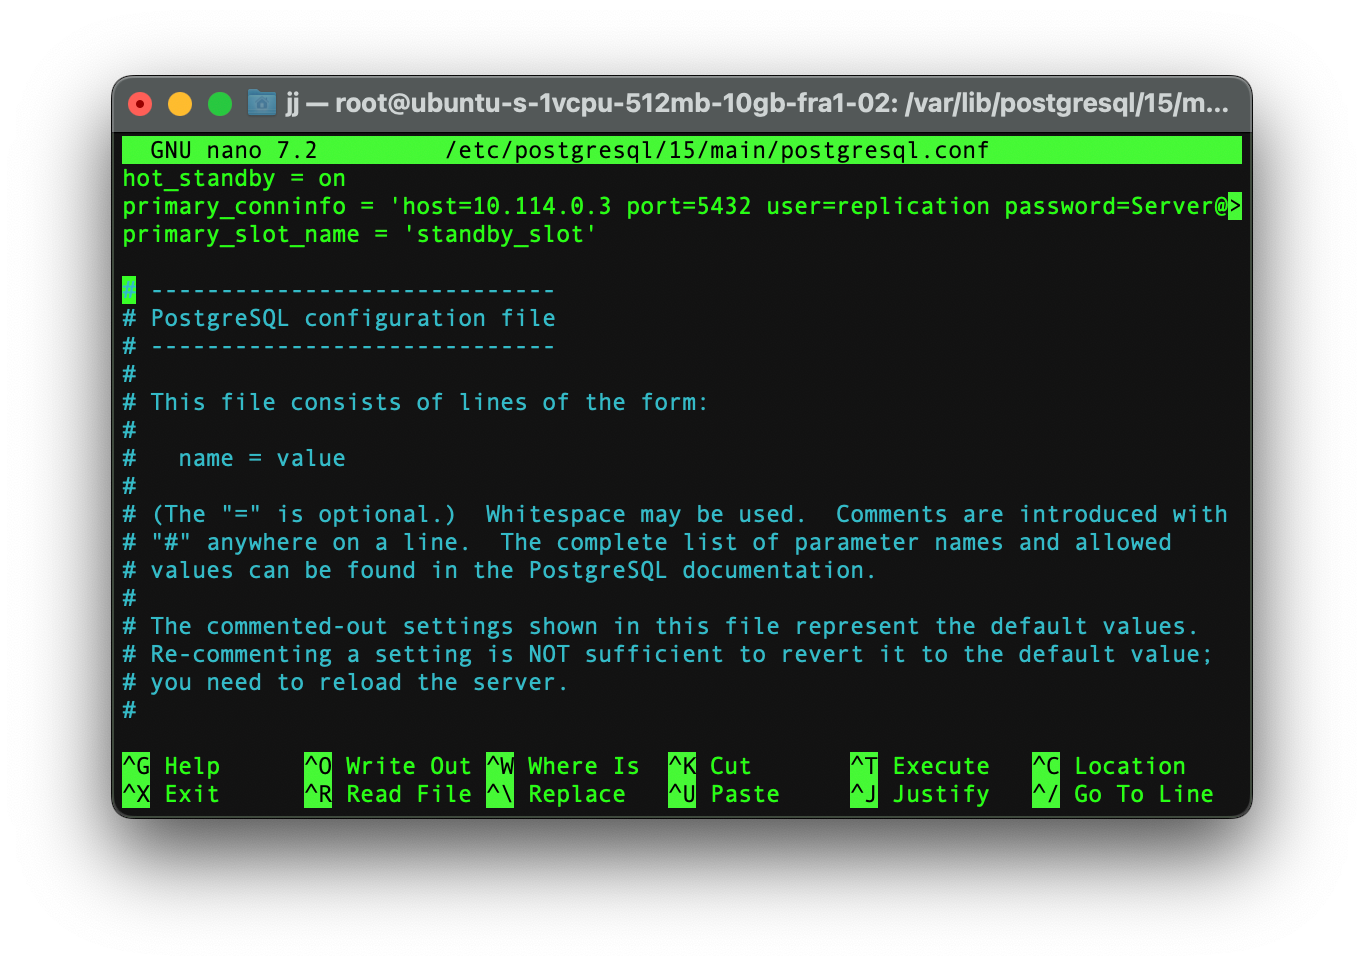
Replace [FIRST_SERVER_IP] with the IP address of the primary node and [YOUR_PASSWORD] with the replicator password you set in Step 3.
Step 5
Start PostgreSQL.
sudo systemctl start postgresql
Done
Congratulations! You’ve set up a basic PostgreSQL cluster with streaming replication. Remember that this is a simplified guide, and in a production environment, you should consider more advanced strategies.
Conclusion
All in all, PostgreSQL, or Postgres, is a versatile and popular database option. Using Postgres as a cluster increases the uptime of the database and improves its efficiency.
A Postgres Cluster may be a bit harder to maintain but at the end of the day it is worth all that hard work. Plus, if you use a Postgres Cluster it decreases the risks of your application being out of service or an issue causing server downtime.
Lastly, if you need more information about hosting databases on the cloud then see our blog post Hosting SQL Databases in the Cloud.
Next Step
Now that you have acquired the skills and knowledge to configure Postgres Clusters and now understand what they are used for, you are able to work with them and set them up. We also recommend taking a look at our Knowledge Base to see our latest articles and tutorial videos.
Was this page helpful?
About the author